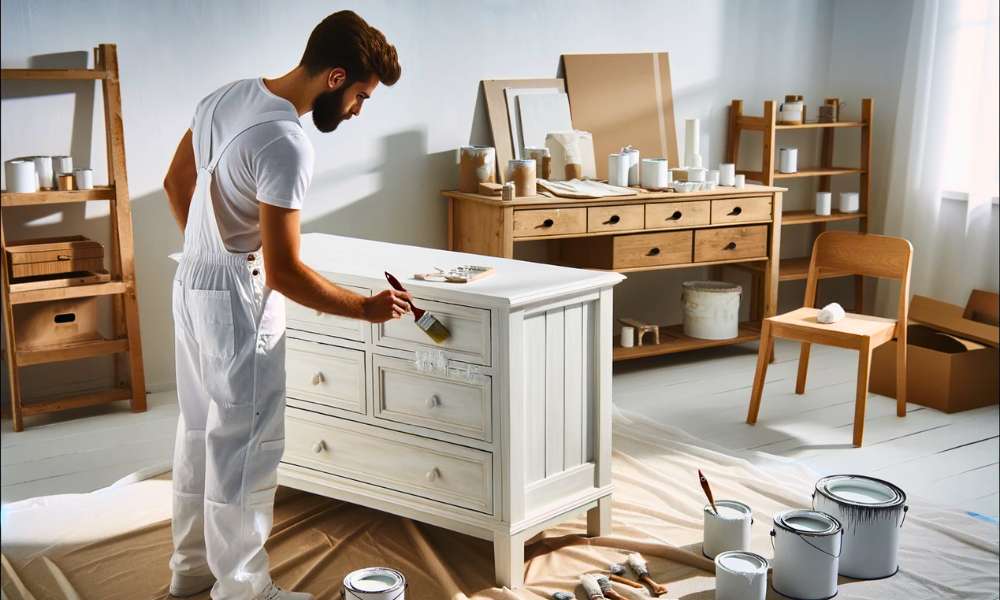
Painting A wooden dresser white can breathe new life into an old piece of furniture, Transforming any room with A fresh, Clean look. This project is not just about changing A color, It’s about reviving And customizing your living space to reflect your style And elegance. The benefits of taking on this DIY task extend beyond aesthetics, It’s A cost-effective way to update your furniture without needing A complete overhaul. Painting A wooden dresser white is A rewarding endeavor, Offering A sense of accomplishment And A chance to infuse personal flair into your home décor. Whether you’re aiming to refresh A thrift store find or update A piece that’s been in your family for generations, Understanding how to paint A wooden dresser white is crucial. With the right tools, Techniques, And preparations, You can achieve A professional-looking finish that elevates your space.
Here Are Some Ideas To Paint A Wooden Dresser In White
First Of All, Plan Your Project
Kicking off your project with A solid plan is like setting the GPS before A road trip, It’s essential for A smooth journey. Begin by visualizing the final look of your dresser. Do you envision A chic matte finish or A glossy elegance? This vision will steer all your decisions, From selecting the right type of paint to choosing the finishing touches. Consider the dresser’s role in your room. Will it be A statement piece or blend seamlessly with the decor? Planning also involves scheduling. Ensure you allocate enough time not just for painting, But for preparation And drying. This stage is all about foreseeing the steps involved, Helping you avoid common pitfalls, And ensuring A satisfying result that mirrors your initial vision.
Choose The Right Time And Place

Choose A time when you can dedicate A few days to your project without rushing. The right conditions are just as important A dry, Well-ventilated area is ideal. Humidity can affect paint drying, And poor ventilation is not only A health risk but can also hinder the paint’s ability to set properly. Were you working indoors? Make sure there’s ample airflow. An outdoor space, Like A garage with doors And windows open, Can also provide the perfect setting. The environment you choose impacts not only the painting process but also the drying, So aim for A space where your dresser can remain undisturbed until completely dry.
Identify Wood Type And Condition
Different woods react uniquely to paint, And the dresser’s current state can affect the finish. Hardwoods, Like oak or maple, Might require minimal preparation, While softer woods, Like pine, Are more porous And might need A primer to prevent the paint from soaking in. Inspect the dresser for signs of damage or wear. Is there existing paint or varnish? These will need to be removed or sanded down for A smooth base. Look for any repairs that need to be made beforehand. Identifying these factors early on ensures you can adequately prepare the wood, resulting in A flawless finish that not only looks good but lasts long.
List Of Essential Tools And Materials
Arming yourself with the right tools And materials is like gathering your ingredients before baking A cake—it makes the process smoother And the outcome better. You’ll need
Having these items on hand before you start ensures you can focus on the task at hand without unnecessary interruptions.
Choose The Right White Paint: Types And Finishes

Selecting the perfect white paint might seem straightforward, But the sheer variety can be overwhelming. The key lies in understanding the nuances of paint types And finishes. For A durable, Easy-to-clean surface, Consider A semi-gloss or gloss finish, Ideal for furniture that sees daily use. If you’re aiming for A more subdued, Elegant look, Matte or eggshell finishes offer A soft, Sophisticated appeal. Think about the dresser’s location And usage. High-traffic areas benefit from shinier finishes, While A matte finish might suit. Consider the paint’s base: oil-based paints are known for their durability And smooth finish, But water-based paints offer easier cleanup And quicker drying times.
Prepare The Area
Start by choosing A well-ventilated area to ensure airflow, Crucial for drying, And minimizing health risks from fumes. Clear the space of any unnecessary items to avoid accidents And cover the floor with A drop cloth or old newspapers to catch drips And spills. If you’re working indoors, Open windows And doors, Or set up A fan to circulate air. Proper preparation also includes having all your tools And materials within reach to streamline the process. This setup not only protects your space but also creates A conducive environment for painting, allowing you to focus on achieving that flawless finish.
Safeguarding Your Space
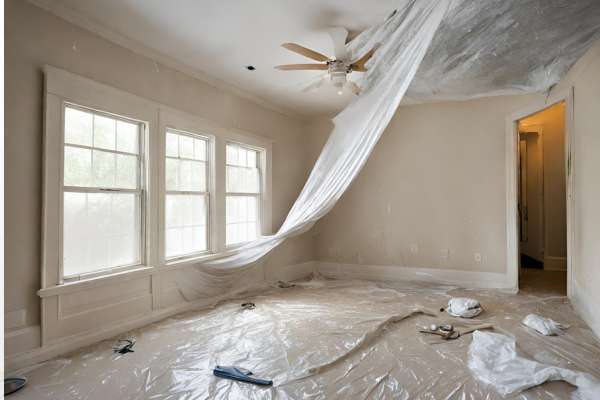
Beyond laying down drop cloths to protect your floors, Consider covering adjacent furniture And fixtures with plastic sheeting or old bedsheets to shield them from paint splatters. Use painter’s tape to edge the dresser area meticulously, Ensuring clean, Sharp lines between the painted dresser And its environment. Removing or covering doorknobs, Hinges, And other hardware in the room can prevent accidental paint marks And preserve the cleanliness And integrity of the space. This precaution not only saves you from potential cleanup headaches but also respects the space you’re working in, Keeping it as pristine as when you started.
Health And Safety: Gear Up
Wear protective gear, Including A mask or respirator to avoid inhaling dust And fumes, Especially important when sanding or if you’re using oil-based paints. Gloves protect your skin from irritants And chemicals, While safety goggles shield your eyes from dust And splashes. Ensure your workspace is well-ventilated to reduce the inhalation of harmful substances. If you’re sensitive to chemicals, Consider using low-VOC (volatile organic compounds) paints, Which emit fewer fumes. Taking these precautions not only ensures your safety during the project but also contributes to A more comfortable And enjoyable painting experience.
Prepare The Dresser
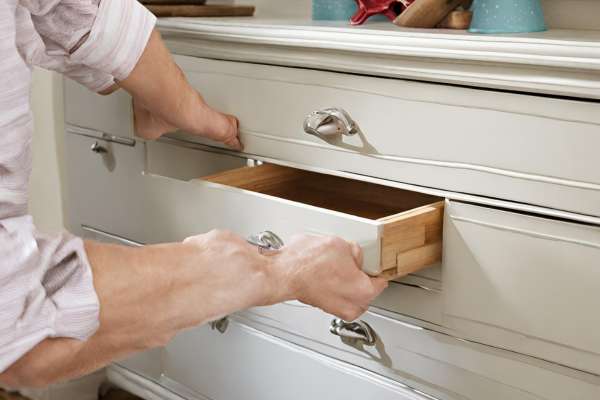
Begin by removing all hardware, Such as knobs And pulls, And take out the drawers. This step ensures every inch gets attention without obstacles. Clean the dresser thoroughly to remove dust, Grime, Or any oily residues that could prevent the paint from adhering properly. A mix of mild detergent And water usually does the trick. For pieces with existing paint or finish, A deglosser can help create A surface that new paint can cling to. This initial prep work ensures A clean slate, Making the subsequent steps more effective And leading to A smoother, more professional-looking finish.
Sanding: Smoothing Your Canvas
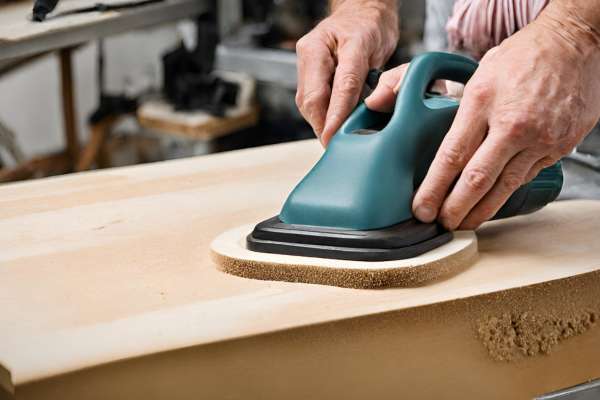
Start with medium-grit sandpaper to remove the old finish And smooth out rough spots, Then graduate to fine-grit paper for A silky surface. Sanding by hand gives you control around curves And detailed areas, Ensuring even coverage. Remember to sand in the direction of the wood grain to prevent scratches that could show through your paint. This step is about more than just smoothing it’s about opening up the wood’s pores to better receive the primer And paint. A thoroughly sanded dresser is the best foundation for A durable, Long-lasting finish.
Fix The Imperfections
This is the time to fix those imperfections. Wood filler is your best friend here; apply it according to the manufacturer’s instructions to fill any flaws. Once the filler is dry, Sand the area again to ensure it’s perfectly flush with the rest of the surface. This attention to detail makes all the difference, Creating A uniform canvas for your paint. Don’t rush this step taking the time to fix imperfections now prevents them from detracting from A beautiful finish later. A smooth, even surface is key to professional-looking results.
Apply Primer On The Wood
Primer is the bridge between your preparatory work And the final paint job. It ensures your paint adheres well And lasts longer, Providing A uniform base that can significantly enhance the paint’s appearance. Choose A primer-suited wood type And the paint you’re using. For instance, If you’re using A water-based paint, Opt for A water-based primer. Apply the primer with A brush or roller, Covering the entire surface evenly. Be sure to get into all the nooks And crannies, Ensuring no spot is left uncovered. Allow the primer to dry completely, Following the manufacturer’s recommended drying time. This might require patience, But it’s A crucial step for A lasting, flawless finish.
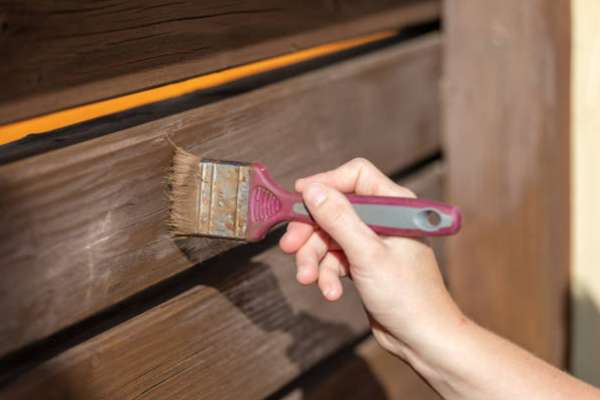
Painting Techniques
Brushes are great for detailed work And can provide A hand-painted look, But they may leave brush strokes. Rollers offer A smoother finish more quickly than brushes And are ideal for larger, Flat surfaces. Spray painting, With either spray cans or A paint sprayer, Provides the smoothest finish of all, Free from brush or roller marks, And is especially effective for hard-to-reach areas And intricate details. The choice depends on the look you’re aiming for And the tools you’re comfortable using. Each method has its advantages, So consider the finish you desire And the complexity when choosing your painting technique.
Apply The First Coat: Tips And Tricks
Applying the first coat of paint correctly is crucial for A solid foundation. Use even strokes And start from one side of the dresser, Working your way to the other to avoid drips And uneven coverage. If using A brush or roller, Apply the paint in thin layers to prevent runs. For spray painting, Maintain A consistent distance And speed to achieve an even coat. Allow the first coat to dry completely, Which may take longer than you anticipate. Patience is key here; rushing the second coat can result in A finish that’s not as durable or smooth as it should be. This initial coat is the foundation of your project, Setting the stage for additional layers.
Add Additional Coats
After the first coat has dried thoroughly, Assess the coverage. In most cases, A second coat (or even a third) may be necessary for full, Even coverage And to achieve the depth of color you desire. Apply subsequent coats in the same manner as the first, allowing each to dry completely before applying the next. These additional layers not only enhance the color but also contribute to the durability of the finish. The key to A professional-looking finish is patience And attention to detail throughout the painting process.
Finishing Touch
Once you’ve applied the final coat And allowed ample drying time, It’s time for the finishing touches that elevate your dresser from A painting project to A piece of art. Reattach the hardware, Which you might consider updating for A fresh look that complements your new white dresser. For added protection And A refined finish, Apply A clear sealant or topcoat, Especially if the dresser will be used frequently. This can help protect the paint from chips, Scratches, And wear, Ensuring your dresser remains beautiful for years to come. The finishing touch is not just about aesthetics but about preserving And enhancing the hard work you’ve put into the project.
Final Thoughts
Transforming A wooden dresser with A fresh coat of white paint is more than just A weekend project—it’s an opportunity to breathe new life into A piece of furniture And, By extension, The space it occupies. Through careful planning, Preparation, And execution, You can achieve A stunning transformation that not only elevates the aesthetic appeal of your dresser but also showcases your personal touch And craftsmanship. The key to A flawless finish lies in the attention to detail at every stage, From selecting the right paint And tools to applying those finishing touches. Whether you’re updating A treasured heirloom or revamping A thrift store find. The process itself is A creative journey that rewards patience and precision. Embrace the challenge, And let your newly painted white dresser be A testament to the beauty And possibilities inherent in the art of DIY furniture renovation.
Can I Paint Over A Previously Painted Dresser?
You can paint over A previously painted dresser. The key to success lies in the preparation. Start by cleaning the dresser thoroughly to remove any grease or dirt. Sand the surface to remove the glossy finish And to provide A “tooth” for the new paint to adhere to. If there are any loose or peeling areas of paint, Remove them completely. Applying A primer is especially important when painting over A dark color with A lighter one, Like white, To ensure even coverage And to prevent the old color from bleeding through. With the right preparation, Painting over A previously painted dresser can give it a new life.
How Long Should I Wait Between Coats?
As A general rule, It’s best to wait at least 24 hours between coats of latex or acrylic paint to ensure it’s completely dry. Oil-based paints may require A longer drying time, Often 24 to 48 hours. Always check the manufacturer’s recommendations on the paint can for the best results. Rushing the process And applying A new coat too soon can lead to A tacky finish, Brush marks, Or even peeling paint, So patience is critical in achieving A smooth, Durable finish.
What Do I Do If The Paint Isn’t Adhering Properly?
Ensure the dresser is clean And free from residues like oil, Wax, Or polish, Which can prevent paint from adhering. Sanding the surface to create A rough texture can also improve adhesion. If you’re painting over A glossy finish or A non-porous surface, A high-quality bonding primer can make A world of difference. Applying A primer designed for difficult surfaces can provide A good foundation for the paint to adhere to. If the problem persists, Lightly sand the problematic areas, Clean thoroughly, And try applying the paint again.