
Breathing new life into an old dresser can transform the piece itself and the entire ambiance of your room. Refinishing A dresser with paint is A creative and economical way to give your furniture A personal touch while also contributing to A more sustainable living by giving old pieces A second chance. This process not only unleashes your inner artist but also allows for A custom design that can fit perfectly with your home decor. Whether it’s A vintage find or A piece that’s been in the family for years, Learning how to refinish A dresser with paint is A skill worth having. The satisfaction of turning A drab dresser into A dazzling masterpiece is unparalleled. This project can be A fun weekend activity that’s both fulfilling And practical. With the right approach, Tools, And A bit of patience, You can achieve professional-looking.
Why Refinish A Dresser?
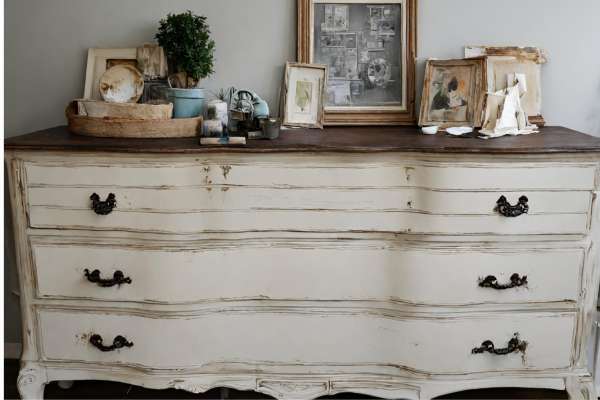
It’s all about breathing new life into an old piece. Instead of buying new, Refinishing A dresser can be A fun, Rewarding project that not only saves you money but also allows you to unleash your creativity. It’s your chance to give A tired, Worn-out dresser A second chance, Turning it into A statement piece that reflects your style And adds A personal touch to your space. Plus, It’s an eco-friendly choice, Reducing waste by repurposing what you already have. Whether it’s A family heirloom or A thrift store find, Refinishing it can transform it into something beautiful And unique.
Here Are Step-By-Step Guides On How To Refinish A Dresser With Paint
Choose The Right Dresser
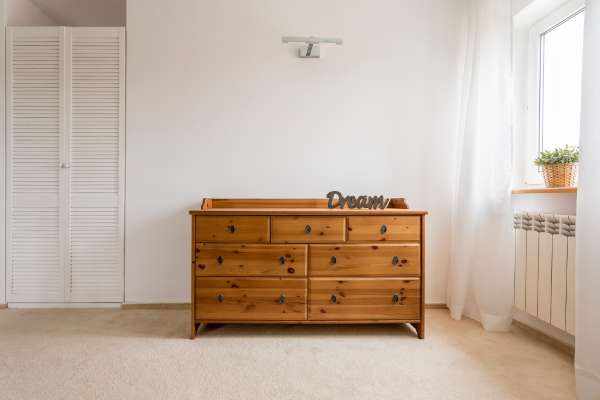
When refinishing A dresser with paint, The first step is choosing the right dresser. This choice is crucial because not all dressers are ideal candidates for A makeover. Look for A piece with good bones—solid construction, Sturdy drawers, And minimal damage. The style also matters, Consider how its design fits with your intended aesthetic. Opting for made from quality wood ensures that your efforts will last. Think about the size And how it will function in your space. A well-chosen not only becomes easier to work on but also elevates the room it inhabits, Proving that the right start can lead to remarkable outcomes.
Set Up Your Workspace
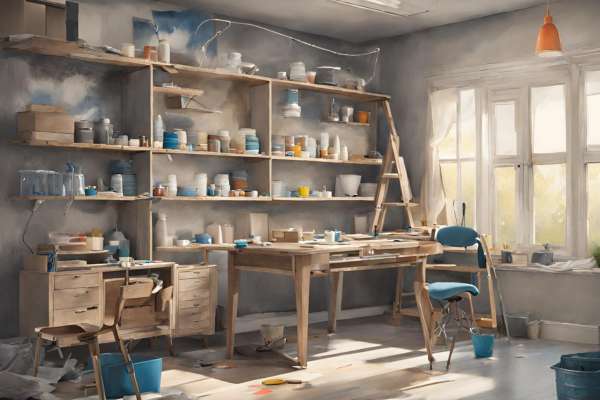
A well-organized area ensures safety And efficiency, Allowing your creativity to flow without interruption. Choose A well-ventilated space to protect yourself from fumes And dust. Cover the floor with A drop cloth or old newspapers to catch spills And drips. Having adequate lighting is essential to spot any imperfections during the refinishing process. Also, Ensure your workspace is spacious enough to move around the dresser comfortably. This preparation not only safeguards your health And your home but also sets the stage for A smoother, more enjoyable project.
Gather Your Tools And Materials
Before diving into your project, Gathering all necessary tools And materials is key to A seamless refinishing process. You’ll need
Additionally, Having cleaning supplies on hand for prepping And tidying up is essential. Collecting everything before starting saves time And prevents interruptions, Ensuring A smooth workflow from start to finish. This preparation underscores the importance of readiness, Turning the daunting task of refinishing into an achievable, Enjoyable project.
Clean Up The Dresser

Start by removing all hardware And drawers to clean every nook And cranny thoroughly. Use A gentle cleaner to wipe away years of grime And dust, Paying special attention to areas that are often missed. This step is not just about cleanliness it’s about preparing the wood to better absorb the primer And paint. Ensuring A smoother, more even finish. Cleaning also allows you to inspect the dresser for any repairs needed before moving on.
Strip Old Paint
Stripping old paint is A transformative step in refinishing your dresser, Stripping away layers of history to reveal the raw beauty underneath. This process can be time-consuming And requires patience, But the results are worth it. Whether you’re using A chemical stripper or sanding manually, Ensure you’re working safely by wearing protective gear And working in A well-ventilated area. Removing the old paint not only uncovers potential issues like cracks or warps that need fixing but also ensures that your new paint job will adhere properly And look smooth. This step is about peeling back the past to create A fresh start, Setting the stage for your new design.
Plan Your Design
Take some time to envision what you want the final product to look like. Consider the color scheme, Finish, And whether you want to incorporate any special techniques like distressing or stenciling. This is also the time to think about the dresser’s hardware—will you use the original, Update it, Or mix And match for A unique look? Sketching your ideas or creating A mood board can help solidify your vision And guide your work. Planning your design not only ensures A cohesive look but also prevents mid-project indecision And mistakes. Making the refinishing process smoother And more enjoyable.
Apply Primer
Primer not only covers imperfections but also ensures A smooth, even base for your paint to adhere to, Resulting in A more professional-looking finish. It can also block stains And prevent wood tannins from bleeding through your paint, Especially if you’re working with A lighter color. Take your time to apply an even coat, And let it dry completely according to the manufacturer’s instructions. This preparatory step might seem like an extra task, But it’s A game-changer in achieving A durable, Flawless finish.
Painting Basics
Start with A smooth, Primed surface, And choose the right type of paint for your project. Acrylic or latex paints are popular choices for their ease of use And durability. When applying paint, Start with thin, even coats to prevent drips And uneven coverage. It’s tempting to get full coverage in one go, But patience is vital—multiple light coats will yield A much better finish than one thick coat. Use A good quality brush or roller for application, And don’t rush the drying process between coats. Attention to these painting basics will ensure A smooth, Professional-looking finish that will make your refinished dresser stand out.
Layering And Texturing
This involves applying multiple layers of paint or glaze, Each in varying shades or colors, To create A rich, Dimensional effect. Techniques like dry brushing, Sponging, Or rag rolling can introduce texture, Mimicking the look of aged wood, Fabric, Or even metal. Experimenting with different tools And materials can yield fascinating results, Turning your dresser into A piece of art. The key to successful layering And texturing is patience And practice. Allow each layer to dry thoroughly before applying the next, And don’t be afraid to experiment to find the perfect combination for your vision.
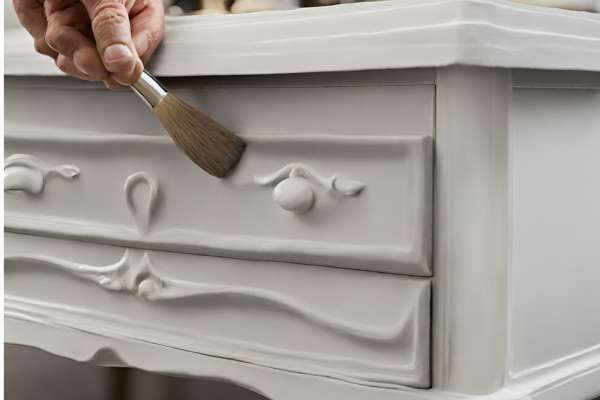
Apply Final Paint
This step should be approached with care, As it sets the tone for your finished piece. Ensure your base layers are completely dry And smooth any imperfections. Choose high-quality paint for this final coat to ensure A durable And beautiful finish. Use A clean brush or roller for A smooth application, And apply the paint in thin, even coats to avoid drips or brush marks. This final layer is not just about color It’s about sealing your hard work And ensuring looks great for years to come. Let it dry thoroughly, Respecting the paint’s curing time for the best results.
Detail Work And Finishing Touches
Reattach or update the hardware, Add liners to the drawers for A pop of color or pattern, And consider applying A protective topcoat to shield your dresser from wear And tear. Small details, Like stenciling inside the drawers or adding decorative trim, Can also make A big difference. This is your opportunity to personalize the piece, So let your creativity shine. These finishing touches not only enhance the dresser’s aesthetic but also add to its functionality And longevity, Ensuring your refinished dresser is not only beautiful but also practical.
Final Thoughts
Refinish A dresser with paint is not just about giving A piece of furniture A new look; It’s A creative journey that breathes new life into old favorites. From choosing the right dresser to applying those final touches, Each step is an opportunity to infuse your style And craft something truly unique. Whether you’re aiming for A sleek, Modern finish or A charming, Distressed look, The right preparation, Techniques, And materials will make all the difference. Patience And attention to detail are your best tools in transforming A tired dresser into A stunning piece of decor. Roll up your sleeves And let your creativity flow—the result will be A beautifully refinished dresser that you’ll be proud to display in your home.
Can I Refinish A Dresser Without Sanding?
Sanding is traditionally used to remove old finishes And ensure smooth paint adhesion. If you’re looking to skip this step, Opt for A high-quality, All-in-one paint designed to adhere to surfaces without sanding. It’s crucial to clean the dresser thoroughly, Removing all dirt, Grease, And residue to ensure the paint sticks. Some prefer to use A liquid deglosser to dull the old finish, Improving paint adhesion. While skipping sanding can save time And effort, Remember that the durability And finish of your project might vary compared to traditional methods. Always follow the paint manufacturer’s recommendations for the best results.
What Kind Of Paint Is Best For A Wooden Dresser?
Acrylic or latex paint is popular for its ease of use And durability, Making it A great choice for furniture that will see regular use. For A more durable, Hardwearing finish, Oil-based paint can be A good option. However, it takes longer to dry And requires more cleanup. Chalk paint is another favorite for its matte finish And minimal prep work is needed, But it might require wax or sealant to protect the finish. Consider the dresser’s look And functionality when choosing your paint to ensure it meets your aesthetic And durability needs.
How Long Does It Take For The Paint To Dry?
Latex And acrylic paints are typically dry to the touch within an hour And can be recoated after four to six hours. They might need up to A few weeks to fully cure to their final hardness. Oil-based paints take longer to dry, Usually around eight hours to the touch And 24 hours before A recoat can be applied. With A full cure taking as long as 30 days. Always check the manufacturer’s recommendations for drying times, When in doubt. Giving your paint more time to dry will ensure A stronger, more durable finish.
Can I Use A Roller Instead Of A Brush For Painting?
Yes, You can use A roller instead of A brush for painting A dresser, And it can be A great choice for applying paint to larger, Flat surfaces. Rollers can provide A smooth, even coat of paint more quickly than A brush, With less risk of brush marks. For detailed work or tight spaces, A brush might still be necessary. Foam rollers are particularly good for achieving A smooth finish on furniture. It’s important to choose the right nap thickness for your paint type And the surface you’re painting. A fine foam roller is often best for smooth finishes on wood furniture.
How Can I Make My Refinished Dresser Look Professional?
Start with A thorough cleaning And sanding (if not skipping this step) to ensure A smooth base. Use high-quality tools And paints, And apply paint in thin, even layers, Allowing each layer to dry fully. Avoiding drips And brush marks is key, So don’t rush your work. Pay attention to detail work, Such as ensuring hardware is clean, In good condition, Or replaced if necessary. Applying A top coat for protection can add to the durability And finish of the piece. Taking the time to do each step correctly will result in A finish that looks professional And lasts longer.