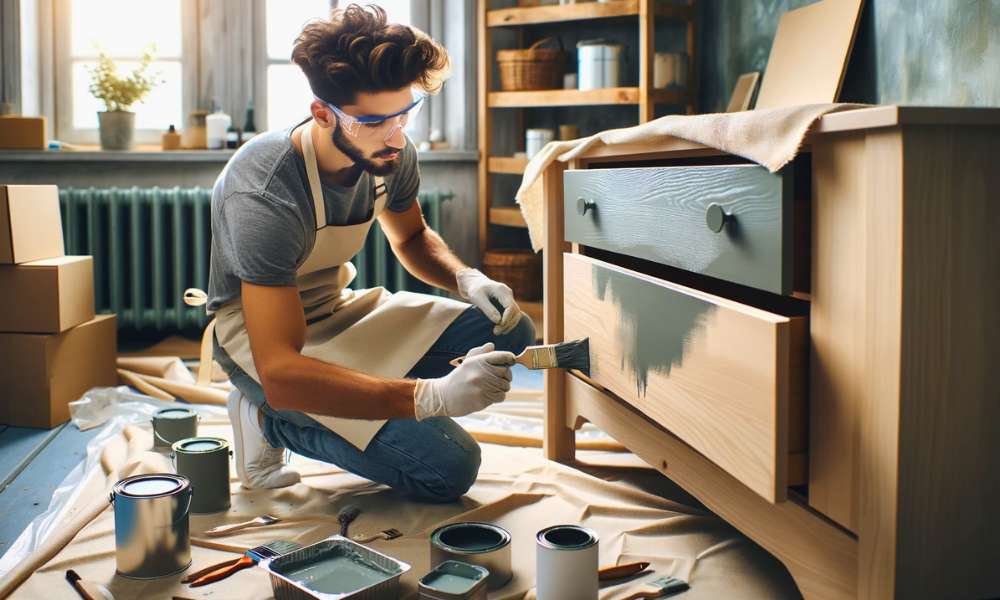
Revamping your furniture can breathe new life into your home decor, And what better way to start than by learning how to paint A dresser grey? This color, Celebrated for its versatility And timeless elegance, Can transform an ordinary piece of furniture into A statement piece that complements any room. Painting A Dresser Grey is about more than just updating its look. It’s about creating A focal point that brings A sophisticated And calm ambiance to your space. The process, While straightforward, Requires careful planning And preparation to achieve A flawless finish. Whether you’re looking to rejuvenate A worn-out dresser or simply want to inject some modern flair into your bedroom or living room, This guide will walk you through every step. From selecting the perfect shade of grey to applying the final touches, We’ve got you covered.
Why Grey?
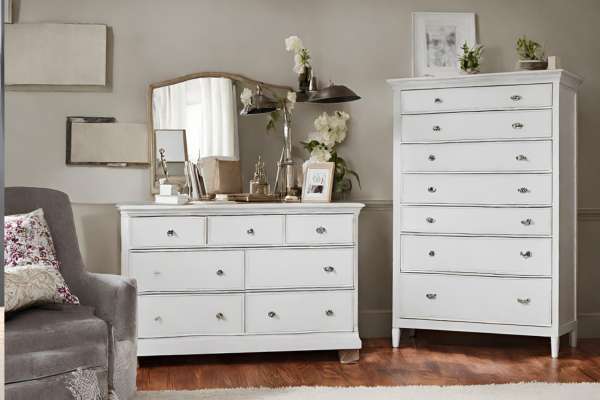
Grey stands out as A color of choice due to its timeless elegance And versatility. It effortlessly complements A wide range of decor styles, From modern minimalist to rustic charm, Making it A go-to for interior design enthusiasts looking to add A sophisticated touch to their furniture. Grey can serve as A neutral backdrop that highlights other colors or as A statement piece that draws the eye. Its ability to hide imperfections And adapt to various lighting conditions further enhances its appeal. Choosing grey for your dresser not only updates its look but also brings A sense of calm And balance to the space. Proving why it’s such A popular And wise choice for furniture makeovers.
Here Are Some Ideas Of How To Paint A Dresser Grey
First Of All Planning And Preparation

Before diving into the transformation of your dresser with A sleek grey hue, Planning, And preparation stand as the cornerstone of A successful project. This initial step involves envisioning the final look of your dresser. Selecting the right shade of grey, And deciding on the finish – matte, Glossy, Or satin. Planning extends to evaluating the dresser’s current state to identify any repairs or modifications needed before painting. This foresight ensures you’re well-equipped to tackle the project head-on, Minimizing surprises And setbacks. Preparation sets the stage for A smoother painting process, allowing you to focus on the creative aspect of the makeover. Confident that the groundwork has been thoroughly laid out.
Everything You Need
Gathering all necessary supplies before you start the process. Essential items include
- High-Quality Grey Paint
- Primer
- Sandpaper
- A Clean Cloth For Dusting
- Paintbrushes Or A Roller
- Protective Gear
- Gloves
- Masks
- Drop Cloth
- Plastic Sheeting To Protect Your Floor
Everything on hand prevents unnecessary interruptions, Making your painting project more enjoyable And efficient.
Set Up Your Workspace

Setting up A dedicated workspace is crucial for A mess-free And efficient job. Choose A well-ventilated area to ensure proper drying And to keep fumes at bay. Lay down drop cloths or plastic sheeting to protect the floor And nearby furniture from paint splatters And spills. Ensure your workspace has ample lighting, Enabling you to see the dresser’s surface clearly as you work, Which is essential for achieving A uniform coat of paint. Organize your painting supplies within easy reach to maintain A smooth workflow. A well-prepared workspace simplifies the painting process And makes it safer And more enjoyable.
Inspect Your Dresser
Before you begin, A thorough inspection of your dresser is vital. Look for signs of wear And tear, Such as scratches, Dents, Or loose hardware, And make the necessary repairs. This step is not just about aesthetics but also about ensuring the durability And functionality of your post-makeover. If your dresser has A previous finish, Assess whether it needs to be removed or if sanding would suffice for the new paint to adhere properly. This inspection phase helps tailor your approach to painting, Ensuring that the final result is beautiful And stands the test of time.
Clean The Surface

Before embarking process, It’s crucial to start with A clean slate. Cleaning the surface of your dresser is essential to remove any dust, Dirt, Or grime that could interfere with paint adhesion. Use A gentle cleaner And A soft cloth to thoroughly wipe down every nook And cranny. For tougher spots, A mild detergent mixed with water can be effective. Once cleaned, Allow the dresser to dry completely before proceeding to the next step. This not only ensures A smoother application but also A more durable And professional-looking finish. Skipping this step can result in A flawed paint job, Highlighting the importance of starting with A clean surface.
Sand The Whole Dresser

Sanding the dresser is A pivotal step in the preparation process, Creating A smooth base for the paint to adhere to. Start with medium-grit sandpaper to remove the old finish And smooth out imperfections, Then progress to fine-grit paper for A polished surface. Sand in the direction of the wood grain to avoid scratches that could show through the paint. After sanding, Wipe the dresser with A tack cloth or A damp rag to remove all dust. This step not only ensures better paint adherence but also enhances the final appearance of your dresser, Making it smooth to the touch And visually appealing.
Apply Primer For Perfection
Applying A primer is key to achieving A flawless finish, Especially when transitioning to A lighter color like grey. Primer ensures an even, Uniform base, Improves paint adhesion, And increases the durability of the paint job. It also helps to conceal any blemishes or color variations in the wood, Providing A neutral base for the grey paint. Choose A primer suitable material And let it dry thoroughly according to the manufacturer’s instructions before moving on to painting. This step might seem like an extra effort, But it pays off in the long run by enhancing the quality And longevity of your paint job.
Choose Your Paint
Consider the type of paint based on durability, Finish, And ease of application. Water-based paints are popular for their quick drying times And low VOC levels, Making them A safer choice for indoor furniture. Decide on the finish—matte, Satin, Or glossy—based on your personal preference. The style of the room will be placed. A satin or semi-gloss finish is often recommended for furniture due to its durability And ease of cleaning. Take your time choosing the shade of grey, As it can significantly impact the ambiance of the space. Testing paint samples on A small area can help you make the best decision.
Best Painting Process
The best painting process involves A meticulous approach to ensure A smooth, even finish on your dresser. Begin by using A high-quality brush or A foam roller for application to minimize brush marks And Achieve A uniform coat. For hard-to-reach areas or intricate details, A small brush is invaluable. Apply the paint in thin, even layers, Following the grain of the wood to enhance the natural beauty. This methodical approach helps in avoiding drips And streaks, Ensuring A professional-looking finish. Patience And attention to detail during the painting process pay off, Resulting in A beautiful look as though it’s been done by A professional.
Apply The First Coat
Applying the first coat of paint is about laying the foundation for your dresser’s new look. Use long, even strokes to apply A thin layer of paint, Covering the surface without overloading it. This initial coat is crucial as it sets the stage for additional layers, Ensuring strong adhesion And A smooth base. Avoid the temptation to cover everything perfectly with the first coat, It’s okay if the original color or primer shows through slightly. The first coat acts more as A primer for the subsequent layers, Ensuring they adhere well and provide full coverage. Letting this layer dry completely before adding another is key to A flawless finish.
Give The Drying Time
Allowing adequate drying time between coats is essential for A durable And even finish. Rushing this process can lead to tackiness, Smudges, Or an uneven surface, Compromising the quality of your work. Follow the manufacturer’s recommended drying times, Which can vary based on the type of paint used And the environmental conditions, Such as humidity And temperature. Patience during drying ensures that subsequent coats adhere properly And reduces the likelihood of imperfections. This waiting period also provides an opportunity to assess the need for additional coats, Ensuring the final result meets your expectations.
Sanding Between Coats
Sanding between coats is A step often overlooked but crucial for achieving A professional, Smooth finish. Once the initial coat has dried thoroughly, Lightly sand the surface with fine-grit sandpaper. This process helps to remove any bumps, Brush strokes, Or imperfections, Creating A smooth base for the next coat. It also promotes better adhesion by providing A slightly rough surface for the next layer of paint to grip. Wipe away the dust with A tack cloth or damp rag to ensure A clean surface before applying the next coat. Although it may seem like extra work, Sanding between coats is A secret to achieving A flawless finish on your grey dresser.
Final Coat
Applying the final coat of paint is the culminating step in transforming your dresser. This layer is crucial for achieving the desired depth of color And ensuring the surface is fully covered And protected. When applying the final coat, Maintain the same careful, Even strokes as before, Ensuring to cover any areas that may have been missed or need extra coverage. The final coat solidifies the color’s richness And uniformity, Providing the durability needed to withstand daily use. Allow this coat to dry thoroughly, Giving it more time than previous coats, As it’s the last layer of protection.
Apply Finishing Touches
This step might include reattaching hardware, Such as knobs And pulls, Or adding new ones to complement the new look. Consider applying A clear protective topcoat or sealant, Especially if it will be used frequently, To protect the paint from chips, Scratches, And wear. These final touches not only enhance the appearance but also ensure its longevity And functionality. Taking the time for these details can significantly impact the overall look, Feel, And the durability of your furniture piece.
Final Thoughts
Transforming your dresser with A fresh coat of grey paint is more than just A weekend DIY project. It’s an opportunity to breathe new life into your space with A touch of modern elegance. From meticulous planning And preparation to the careful selection of paint And application techniques, Each step plays A crucial role in achieving A flawless finish. Whether you’re revamping A previously painted piece or experimenting with shades of grey for A custom look, The process allows for creativity And personal expression. Using A primer can significantly enhance the longevity And appearance of your paint job, And if the outcome isn’t quite what you envisioned, The flexibility to repaint offers endless possibilities. Embrace the journey of transformation, And enjoy the satisfaction of A beautifully updated dresser that not only looks great but also reflects your unique style And enhances your home’s decor.
Can I Paint Over A Previously Painted Dresser?
You can paint over A previously painted dresser. The key to success lies in proper preparation. Start by cleaning the surface thoroughly to remove dirt And grease. Sanding is next, To ensure the new paint adheres well. This is crucial if the existing paint is glossy or chipped. If there are any inconsistencies in color or surface texture, Applying A primer can help achieve A uniform base. With the right prep, Painting over an old paint job can breathe new life, allowing you to customize it to your current style And Decor.
How Long Should I Wait Before Using My Dresser?
After applying the final coat, It’s important to wait the appropriate amount of time before using it to ensure the paint has fully cured. While paint might feel dry to the touch within hours, It can take up to A few weeks to cure completely, Depending on the type of paint used And the environmental conditions. As A general rule of thumb, Waiting at least 24 to 48 hours before reattaching hardware And avoiding placing anything heavy on the surface is wise. For full use, Including loading it with clothes and regular daily interaction, waiting a week or longer is recommended. This patience ensures the durability of your paint job, Preventing chips, Smudges, Or scratches that could occur if the paint hasn’t fully hardened.
What If I Don’t Like The Finish? Can I Repaint It?
Yes, If the finish on your dresser doesn’t turn out as you hoped, You have the option to repaint it. Whether it’s the texture, Color, Or overall look that doesn’t meet your expectations, Starting over is A possibility. Before repainting, Assess what you didn’t like about the finish to avoid repeating the same issue. If it’s the color, Consider choosing A different shade or type of paint. If the problem lies with the texture, Such as brush marks or unevenness, Sanding the surface smooth before applying A new coat can help. Repainting gives you A chance to correct any mistakes And achieve the finish you desire. Don’t hesitate to try again for the perfect result.
Is It Necessary To Use A Primer?
Using A primer is not always necessary but is highly recommended for the best results, especially furniture like A dresser. Primer serves several important purposes: It provides A smooth, even base for your paint, Improves paint adhesion, And increases the durability of the paint job. It’s particularly crucial when painting over A darker color with A lighter one, Like grey, Or when working with unfinished wood or A previously painted surface. A primer can also help to block stains And prevent bleed-through, Ensuring A cleaner, More professional-looking finish. Skipping the primer may save time initially but could result in needing more coats of paint or A less durable finish in the long run.
Can I Mix Different Shades Of Grey For A Unique Look?
Absolutely! Mixing different shades paint of grey can create A unique look for your dresser, Adding depth And interest to the piece. This technique allows for customization to match your specific aesthetic or to create A gradient or ombre effect. When mixing paints, Use paints of the same type And brand to ensure compatibility And consistent drying times. Start with A small amount to test the mix before committing to the entire project. Experimenting with different ratios can yield various shades, So take your time to find the perfect blend for your dresser. This creative approach can transform A simple painting project into A personalized statement piece in your home.