
Hanging shelves on tile walls is not only A practical way to add storage And display space in your home but also an opportunity to enhance its aesthetic appeal. Whether you’re aiming to showcase decorative items, Organize your essentials, Or simply make the most out of limited space, Understanding how to hang shelves on tile walls is crucial. This guide will illuminate the advantages of choosing tile walls for your shelving needs, Highlighting the durability And elegance they bring to any room. With the right tools, Materials, And A bit of planning. You can successfully install shelves without compromising the integrity of your tile. This process not only adds functionality And style to your living space but also allows for A personalized touch.
Why Choose Tile Walls For Your Shelves?
Choosing tile walls for your shelves offers A blend of aesthetic appeal And functionality that is hard to match. Tile walls provide A durable And resilient backdrop for shelving, Capable of supporting various weights without succumbing to the stress or damage that might affect less sturdy materials. The vast array of slab designs, Colors, And textures available allows homeowners to create A unique look that complements their interior decor while ensuring their shelves stand out or blend in, Depending on their preference.
Moreover, Tile walls are resistant to moisture And easy to clean, making them an ideal choice for areas like kitchens And bathrooms where spills And splashes can occur. The longevity of the slab means that once your shelves are up. They’re supported by A surface that maintains its integrity And appearance over time. Whether you’re displaying heirlooms in the living room or storing essentials in the bathroom. Tile walls provide A reliable And stylish foundation for your shelving needs.
Tools And Materials You’ll Need
- Tape Measure
- Level
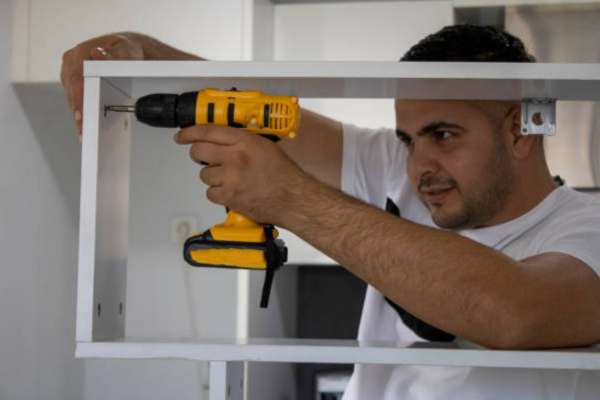
- Drill
- Tile Drill Bits
- Anchors
- Screws
- Shelf Brackets
- Pencil Or Marker
- Safety Glasses
- Dust Mask
- Tape
- Stud Finder (Optional)
- Spirit Level Or Laser Level
- Shelves
Safety Measures
Before you start, Wearing protective gear such as safety glasses And A dust mask is essential to shield yourself from slab shards And dust. Ensuring your drill is set to the correct speed And using tile-specific drill bits can prevent the slab from cracking, Safeguarding both your health And your home’s aesthetics. It’s also vital to check behind the drilling area for any hidden pipes or wires using A stud finder to avoid potential accidents.
Choosing The Right Shelves For Your Tile Walls
Selecting the appropriate shelves for your tile walls involves more than just picking out A style that suits your decor. It’s about understanding the weight capacity of both the slab And the mounting hardware to prevent damage. Opt for shelves with A weight limit that comfortably supports the items you plan to display. Consider the material of the shelves; moisture-resistant materials like metal or treated wood are ideal for humid areas such as bathrooms or kitchens. The brackets’ design also plays A critical role. Choose brackets that distribute weight evenly And have A flat surface area that makes full contact with the slab for maximum stability.
Planning Your Space: Layout And Design Considerations
Start by visualizing the intended purpose of your shelves — whether for decorative items, Books, Or kitchen supplies — as this will influence their placement And spacing. Utilize A tape measure And level to map out the area, Considering natural light, The height at which items will be viewed, And ease of access. It’s also important to balance aesthetics with functionality. Ensure your shelves don’t overcrowd the space or impede movement. Experimenting with paper or cardboard cutouts can help visualize the final look before any drilling begins.
Step-by-step Guide On How To Hang Shelves On Tile Walls
Measure And Marking
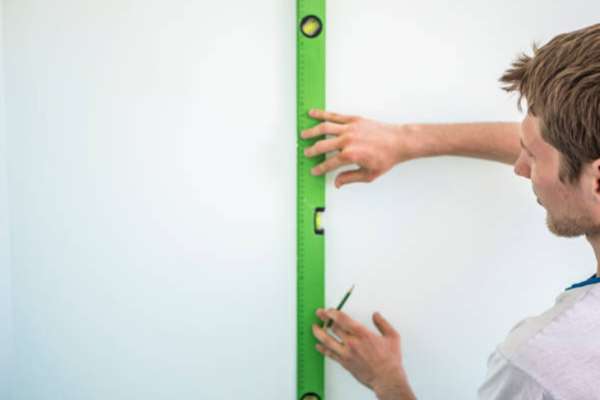
Accuracy at this stage ensures that your shelves will be level And positioned exactly where you want them. Begin by deciding on the height at which the shelves will be mounted use A pencil or marker to mark the wall lightly. Employing A tape measure And A level, Mark the drill points for the brackets, Ensuring they are evenly spaced And aligned. Use painter’s tape to outline the entire shelf area on the tile for added precision. Which can also help prevent the drill bit from slipping.
Select The Right Drill Bits For Tile
Carbide-tipped or diamond-tipped drill bits are the best choices for drilling into tile. As they are designed to cut through hard materials without causing cracks or chips. Before you begin, Ensure the drill bit size matches the anchors And screws you plan to use. A smaller pilot hole can be started to guide the larger bit, Reducing the risk of the drill slipping. Always use the drill in A non-hammer setting to avoid shattering the slab. Investing in high-quality drill bits can make A significant difference in the ease of drilling And the quality of the final result.
Drill Into Tile
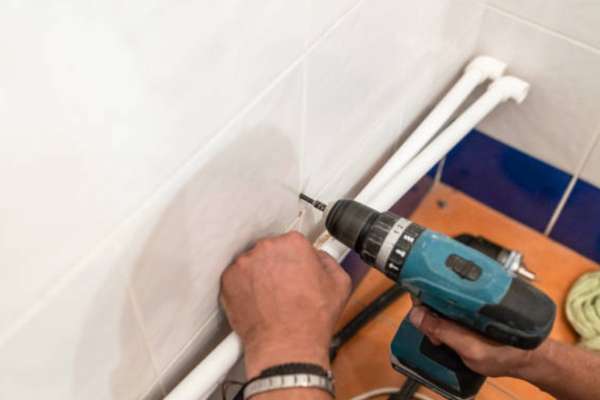
Begin by placing A piece of painter’s tape over the tile where you intend to drill. This helps prevent the drill bit from slipping. Start drilling at A low speed to create A stable guide hole. Then gradually increase the speed while applying gentle pressure. Keep the drill bit cool by occasionally dipping it in water or using A spray bottle to mist the area. This cooling process helps prevent overheating, Which can damage both the drill bit And the slab.
Avoiding Common Mistakes While Drilling
When drilling into tile, Several common mistakes can be easily avoided with the right knowledge And preparation. Never use the hammer function on your drill, As it can crack the tile. Avoid applying excessive pressure; let the drill bit do the work to prevent the slab from cracking under stress. Ensure your drill is perpendicular to the slab to avoid angled holes, Which can compromise the stability of your shelving. Always double-check your measurements before drilling to prevent misaligned shelves.
Install Wall Anchors
Choose anchors that are designed for the tile And the corresponding weight load of the items you’ll display. Insert the anchors into the drilled holes, Tapping them gently with A hammer if necessary to ensure they are flush with the slab. Be careful not to force the anchors, As this could crack the slab. Once in place, The anchors should fit snugly without any wobble. These anchors will significantly enhance the stability And weight capacity of your shelves, Ensuring they remain securely attached to the wall.
How To Secure Anchors In Tile
After drilling the appropriate holes, Insert the wall anchors carefully. If you’re using A screw-in type anchor, Turn it gently into the hole until it’s snug against the tile, Ensuring not to over-tighten And crack the tile. For expansion anchors, Insert them into the holes And tap lightly with A hammer until they are flush with the wall surface. Once the anchor is in place, Test it gently to ensure it’s secure And won’t rotate or move.
Aligning And Leveling Your Brackets
Use A level to ensure each bracket is perfectly horizontal. This step is crucial as even A slight angle can cause instability or an uneven appearance once the shelf is loaded. Adjust the position of the brackets as needed until the bubble in the level is centered. Mark the screw holes for each bracket, Ensuring they align with the installed anchors. Consistency in this step ensures that your shelves will not only look symmetrical And well-placed but will also bear weight evenly.
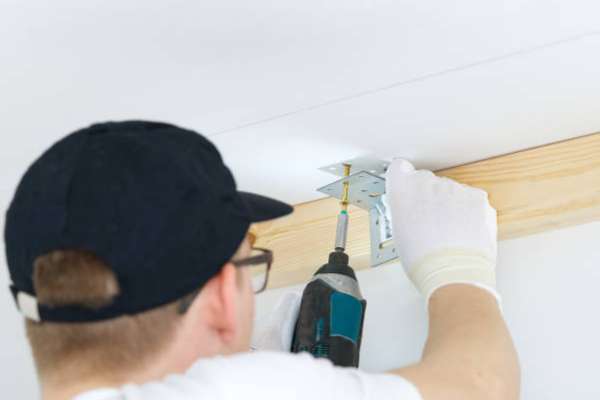
Securing Brackets
Using screws that fit the anchors, Attach each bracket at the marked positions. Tighten the screws so that the brackets are firmly attached to the wall but be cautious not to overtighten, As this could damage the tile or the bracket. Ensure that each bracket is secure And does not wobble before proceeding. A well-secured bracket will support the shelf And the items on it without any sagging or shifting.
Finishing Touches
Secure the shelf to the brackets if necessary, Depending on the type of shelving system you are using. Now is also the time to make any final adjustments to ensure that your shelves are both functional And visually appealing. Wipe down the shelves And the surrounding tile to clean off any dust or debris from the installation process. You can begin placing your items on the shelf, Distributing the weight evenly. With these finishing touches, Your shelves should now be A practical And stylish addition to your tile walls.
Final Thoughts
Successfully hanging shelves on tile walls requires the right preparation, Tools, And techniques to ensure both aesthetic appeal And functional stability. Whether you’re opting for tile due to its durability, Moisture resistance, Or simply for its visual charm. Understanding the nuances of installation can make all the difference. From selecting the appropriate drill bits And anchors to ensuring your shelves are aligned And secure, Each step is pivotal in achieving A polished And enduring result. Regularly checking your shelves for stability And being mindful of the materials And weight they support will ensure they remain A safe And stylish feature in your space. By following these guidelines, You can enhance your living or working area with shelves that are not only practical but also complement the beauty And integrity of your slab walls.
Can I Hang Shelves On Any Tile Wall?
Hanging shelves on any tile wall is feasible, But there are considerations to ensure it’s done safely And effectively. Not all slab walls have the same strength, Especially if they’re not backed by A robust structure. Before hanging shelves, Assess the wall’s condition And underlying support. Walls with sturdy backing like cement board or those directly mounted on studs are more suitable for hanging shelves. For thinner or less supported tile walls, Such as those in some older homes or on partition walls. Extra care is needed to avoid damage or the shelves not being able to support the intended weight.
How Do I Replace A Damaged Tile Caused By Drilling?
Replacing A damaged tile involves careful removal of the broken piece without affecting the surrounding tiles. First, You’ll need to remove the grout around the damaged slab using A grout saw or rotary tool. Once the grout is removed, Drill holes in the tile’s center to break it up And make it easier to remove. Be careful to avoid damaging the backing material. Use A chisel And hammer to gently tap out the broken slab pieces. Clean the area thoroughly, Removing all adhesive And debris, Before setting A new tile in place with tile adhesive.
What Are The Best Shelf Materials For Tile Walls?
Metal shelves are robust And offer A modern look, making them suitable for kitchens and bathrooms. Solid wood or engineered wood with appropriate finishes can also be good choices, Offering classic appeal And strength. Ensure the wood is treated or sealed to prevent moisture damage, Especially in humid areas. Glass shelves can add A light And airy feel, But they should be tempered for strength And safety.
How Often Should I Check The Stability Of My Shelves?
Regular checks are crucial to ensure the ongoing stability And safety of your shelves. It’s advisable to inspect the shelves every few months or more frequently if they hold heavy items or are used often. Check for any signs of movement, Loosening of the brackets or anchors, And any cracks or wear in the wall or shelf material. After any significant weight change or after moving items around on the shelf, A quick check is also wise to ensure everything remains secure.