
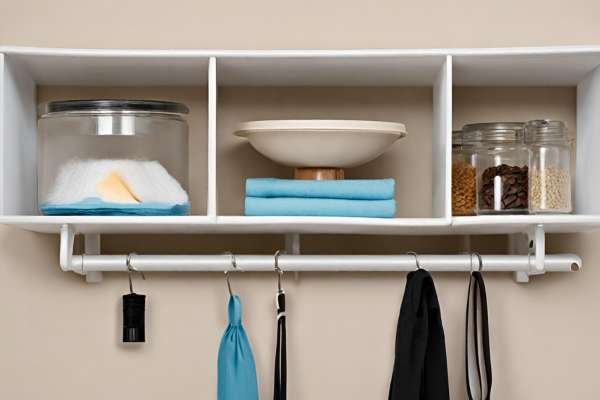
Hanging shelves on tile walls without drilling is A clever approach to beautifying your space while preserving the integrity of your tiles. Whether you’re renting A home where modifications are restricted, Or you simply wish to avoid the mess And hassle associated with drilling, This method provides A seamless solution. Embracing this technique not only keeps your walls pristine but also offers the flexibility to change decor effortlessly. This article will guide you through various innovative ways to hang shelves securely without drilling And compromising your tile walls. From understanding the right materials And tools to step-by-step instructions, We’ll cover all you need to know to achieve A sturdy And stylish display.
Why Avoid Drilling? Pros And Cons
Avoiding drilling when hanging shelves on tile walls is often considered to avoid potential damage to the tile, Which can be costly And difficult to repair. Drilling into tile requires special tools And A steady hand to prevent cracking, Which can be daunting for DIY enthusiasts. For renters, Drilling might violate lease agreements And could lead to forfeiting security deposits.
On the flip side, The main drawback of not drilling is the concern about the durability And load-bearing capacity of the alternative methods. While adhesive solutions And no-drill hangers offer A quick And easy fix, They might not hold as much weight as traditional drilled-in anchors. This limitation requires careful consideration of the items you plan to place on the shelf to avoid accidents or damage.
What Will You Need?
- Adhesive Mounting Strips Or Heavy-Duty Double-Sided Tape
- Alcohol Wipes Or Isopropanol For Cleaning The Tile
- Measuring Tape Or Ruler
- Level To Ensure Your Shelf Is Straight
- Pencil For Marking Positions (Preferably One That Can Be Wiped Off Tile)
- Adhesive Hooks Or Clamps (Optional, Depending On The Method)
- Velcro Strips (Another Option For Mounting)
- Screwless Pegboard (If Opting For This Method)
- Magnetic Strips (If Using A Magnetic Mounting System)
- Non-Adhesive Hooks And Clips (If Applicable)
- Cable Ties Or Wires (For Alternative Hanging Methods)
- A Soft Cloth For Cleaning And Preparation
- Shelf And Any Bracket Or Support, If They Are Part Of Your Chosen System
Here Are Some Easy Steps On How To Hang Shelves On Tile Without Drilling
Preparing The Tile Surface
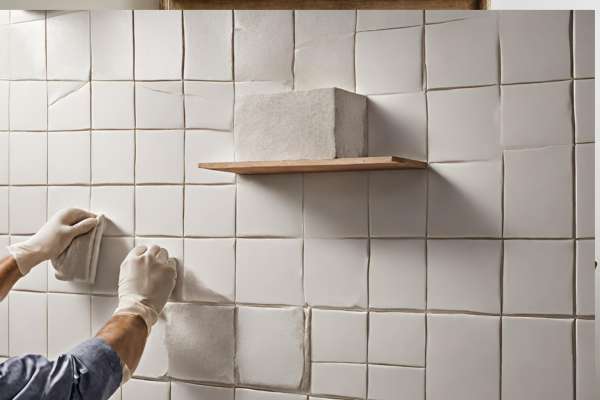
Before you begin the process, Preparing the tile surface is crucial for ensuring the adhesive materials adhere properly. Start by thoroughly cleaning the area where you’ll be placing the shelf. Use alcohol wipes or A cloth dampened with isopropanol to remove any dirt, Grease, Or grime from the tiles. This step is essential, As even A small amount of residue can prevent the adhesive from sticking correctly. Once the surface is clean, Allow it to dry completely. A clean, Dry surface creates the ideal condition for the adhesive to bond strongly.
Measure The Length And Width
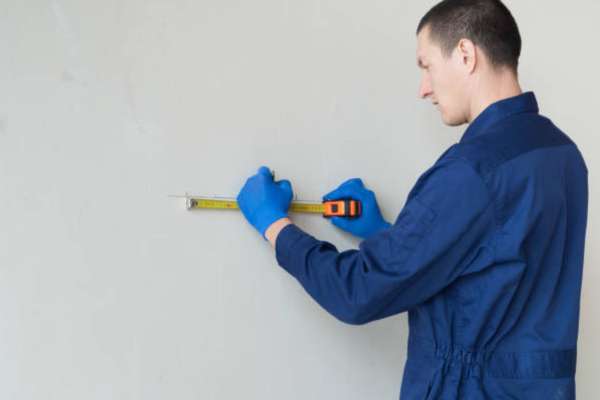
Use A measuring tape or ruler to determine the exact dimensions where you intend to hang the shelf. This step not only helps in selecting the right size shelf but also in positioning it correctly on the wall. Mark the area lightly with A pencil, Ensuring those marks can be easily removed from the tile surface later. Accurate measurements And clear marking are vital to achieving A-level And well-placed shelves, Contributing significantly to the aesthetic appeal And functionality of the room.
Overview Of Adhesive Types Suitable For Tile
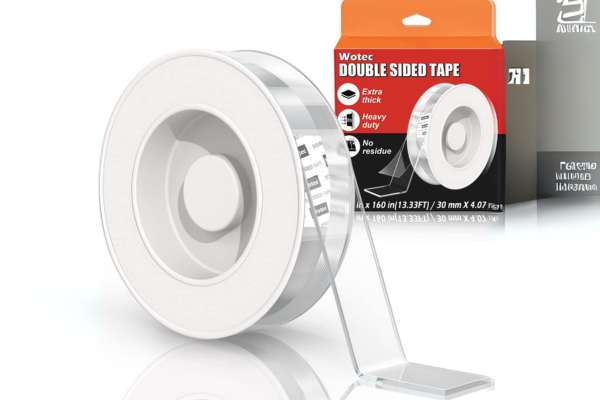
There are several types of adhesives suitable for tile, Including heavy-duty double-sided tape, Adhesive mounting strips, And specific tile adhesives designed for strong, lasting bonds. Heavy-duty double-sided tapes are great for lighter shelves And items, While adhesive mounting strips offer A stronger hold for heavier objects. For the heaviest loads, A tile adhesive may be necessary. Each adhesive type has its pros And cons, Such as ease of removal or the weight it can bear, So selecting the right one depends on your specific needs And the weight of the items you intend to place on the shelf.
Cut A Piece
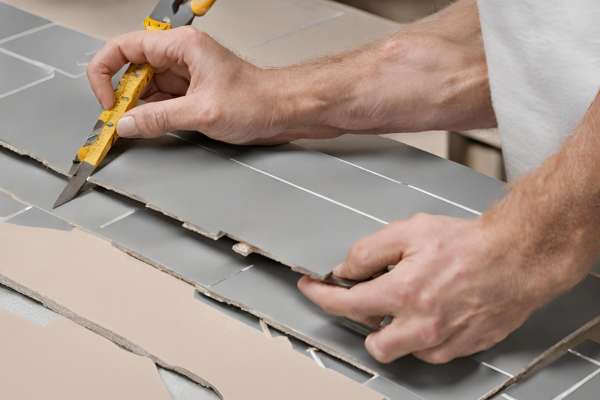
Once you’ve chosen the appropriate adhesive for your project, The next step is to cut A piece to fit. If you’re using double-sided tape or adhesive strips, Measure And cut pieces that match the length of the shelf’s edge that will be in contact with the tile. Ensure that the pieces are neither too short, Which might not provide enough hold, Nor too long, Which could be visible beyond the shelf’s edge. For tapes, Use scissors for A clean cut, And for bulkier adhesives, A utility knife might be necessary.
Hang Your Shelf
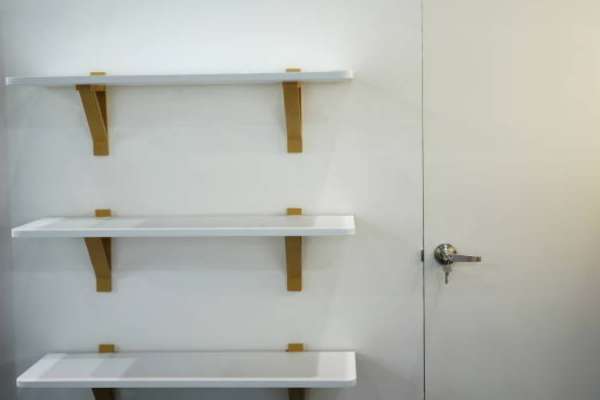
Once the surface is prepared, Measurements are taken, And adhesives are ready, It’s time to hang the shelf. Align it carefully with the marks you’ve made, Ensuring it’s level And positioned correctly. This precision prevents any later adjustments or the risk of the shelf being off-balance. Gently press the shelf against the tile, Applying even pressure to ensure the adhesive bonds well. Patience is key here; rushing this step could compromise the shelf’s stability.
Use Adhesive Mounting Strips
Adhesive mounting strips are A popular choice, As they offer A stronghold without damaging the tile. Choose strips that are rated for the weight of the shelf And the items you plan to place on it.
Clean The Tile With Isopropanol
Before applying the strips, It’s essential to clean the tile surface with isopropanol. This cleaning step ensures that the surface is free of oils, Dust, And debris, Providing A clean slate for the adhesive. Isopropanol evaporates quickly, Leaving no residue, Which is crucial for the adhesive’s performance.
Press The Mounting Strips Down For 30 Seconds To Secure Them On A Shelf
After cleaning, Apply the strips to the shelf And the wall. Press them firmly against both surfaces for about 30 seconds to ensure A strong bond. This pressure activates the adhesive, Creating A durable hold that will support your shelf. Once the strips are in place, Wait for the recommended time before placing any items on the shelf to ensure the bond is fully set.
Keep The Shelf Along The Wall For 30-Seconds
After you’ve initially attached the adhesive strips, It’s crucial to maintain its position against the wall for at least 30 seconds. This step ensures that the adhesive makes full contact with the tile, Enhancing the grip. Even pressure during this time helps eliminate any air bubbles or gaps that could weaken the adhesive bond. Patience here is key to ensuring that the adhesive has the best chance to adhere properly And form A strong, Lasting bond with the tile surface.
Remove The Shelf And Clutch Each Band For 30-Seconds
This step involves A bit of A nuanced approach. After the shelf has been pressed against the wall, Carefully remove it without disturbing the adhesive strips. Press down on each strip (or band) directly against the wall for an additional 30 seconds. This action helps to reinforce the bond between the adhesive strip And the tile, Ensuring that each strip is optimally secured. It’s A critical step to make sure the adhesive has the best possible adhesion And can support the shelf’s weight once it’s reattached.
After 1 Hour, Substitute The Shelf
After allowing the adhesive strips an hour to set And bond with the tile, It’s time to reattach the shelf. This waiting period is crucial as it gives the adhesive time to cure, Increasing its holding strength. When you reattach the shelf, Do so gently to avoid weakening the bond. This step is essential for ensuring that the adhesive has been fully set, Providing A durable And stable base for your shelf.
Load The Shelve
Once the shelf is securely attached And the adhesive has had ample time to cure, You can start loading it with items. It’s important to do this gradually And carefully. Begin with lighter items And observe how the shelf holds up. Avoid placing heavy objects on the shelf unless you’re certain the adhesive can bear the weight. Distributing the weight evenly across the shelf can also help prevent undue stress on any one part of the adhesive strips, Ensuring the shelf remains securely mounted.
Apply Hooks And Clips Method
Using hooks And clips that adhere to the wall without drilling is A versatile way to hang shelves on tile walls. These hooks And clips come with their adhesive backing, making them easy to install And remove without leaving marks. They’re particularly useful for lighter shelves And items. When applying, Ensure the tile surface is clean And dry for the best adhesion. This method allows for A bit of flexibility, As you can reposition the hooks And clips if needed to adjust the shelf’s placement. It’s A great option for renters or those who frequently change their decor.
Use Of Screwless Pegboard
A screwless pegboard system offers A unique And flexible solution. These pegboards attach to the wall using strong adhesive strips or mounting solutions that do not require permanent alterations to the wall. Once in place, You can use pegs to hang shelves, Bins, And other items. This method not only keeps your walls damage-free but also allows for easy customization And reorganization of your storage space as your needs change.
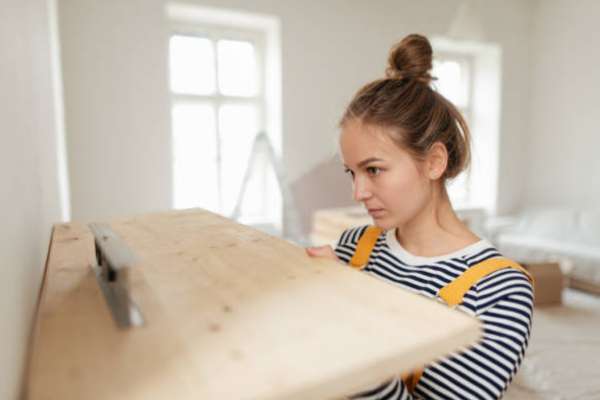
Create With Wooden Planks
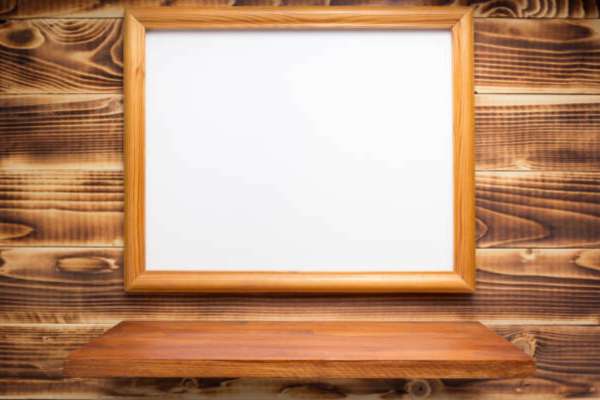
Crafting shelves from wooden planks can add A custom, Rustic touch to your space. You can attach these planks to the wall using adhesive mounting strips or brackets that adhere to the tile without drilling. When choosing this method, Select wood that is both lightweight And sturdy to ensure it can be securely mounted without heavy hardware. Finishing the wood with paint or stain can also protect it And complement your home’s decor. This approach offers A personalized storage solution that combines functionality with aesthetic appeal.
Apply Magnetic Strips
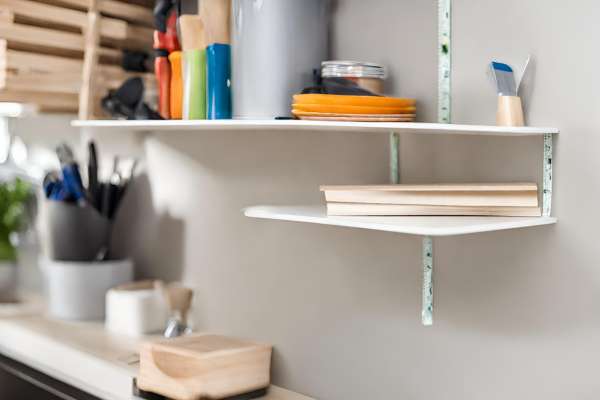
Magnetic strips offer A novel way to hang shelves on tile walls, Especially in kitchens or bathrooms where metallic items are often used. These strips can be mounted to the wall with adhesive backing And used to hold magnetic or metal shelves. It’s A Clean And minimalistic approach, Ideal for small items or spices in the kitchen. Ensure the magnets are strong enough to support the weight of the shelf And the items you plan to store. This method is best for lightweight storage solutions And adds A modern touch to any space.
Hangers Can Be More Effective
Utilizing hangers designed for adhesive or non-drill mounting can offer A robust solution. These hangers come in various designs, Some with deeper curves to hold A shelf’s edge securely. They are particularly effective for heavier shelves, As they distribute weight evenly And reduce stress on individual points. When selecting hangers, Ensure they are rated for the weight of the shelf And the items you intend to place on it. Proper installation is key: Clean the tile surface thoroughly And press the hanger firmly against the wall to ensure A strong bond.
Hooks Are Looks Good
Decorative hooks can add both style And functionality. Available in various designs, Materials, And finishes, These hooks can complement your decor while serving as reliable support for hanging shelves. When using hooks, Consider the overall aesthetic of the room And choose designs that enhance the space. Ensure the hooks are compatible with the adhesive method you prefer, And check their weight capacity to ensure they can support your shelving needs.
Use Of Adhesive Glue
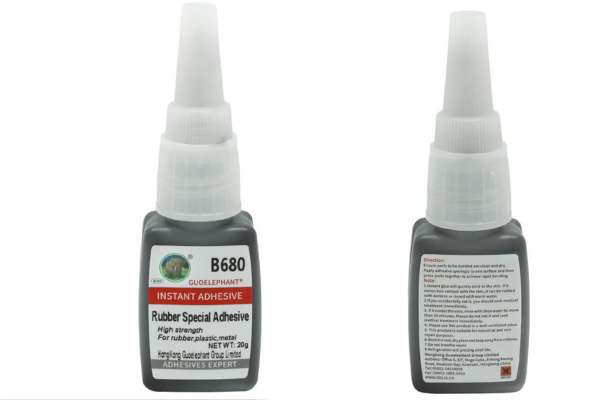
Adhesive glues designed for strong, Durable bonds can be A practical choice for mounting shelves without drilling. These glues are formulated to adhere to A variety of surfaces, including tiles, Ensuring A secure hold. When using adhesive glue, Select A product is specifically designed for heavy-duty applications And compatible with both the tile And the shelf material. Apply the glue according to the manufacturer’s instructions for the best results, And allow adequate curing time before placing any weight on the shelf.
Double-Sided Tape Are Not Bad
High-strength double-sided tape can be an effective And easy-to-use option for hanging lighter shelves. This tape provides A quick solution that requires minimal preparation And no curing time. When choosing double-sided tape, Look for A type that is designed for use on tiles And is strong enough to hold the weight of the shelf And its contents. Application is straightforward: clean the tile surface, Apply the tape to the back of the shelf, And press it firmly against the wall. While not suitable for heavy loads, Double-sided tape is A convenient option for smaller, Lighter items.
Use Velcro Clips
Velcro clips provide A flexible And sturdy method for hanging shelves without the permanence of drilling. These clips have two sides that interlock securely And can be easily separated when you need to remove or adjust the shelf. They’re particularly useful for lightweight And medium-weight shelves, Offering A balance between reliability And ease of adjustment. To use, Simply attach one side of the Velcro to the wall And the other to the shelf, Ensuring A clean surface for optimal adherence. This method allows for easy repositioning And removal of shelves without leaving residue or damage on the tile.
Apply Wires/Cables
Using wires or cables can be an innovative way to hang shelves without drilling, Especially if you’re aiming for A minimalist or industrial look. This method typically involves using adhesive anchors that secure the wires or cables to the wall, From which the shelf is suspended. It’s crucial to ensure that the wires or cables are taut And securely attached to both the shelf And the wall anchors. This approach not only adds A unique visual element to your space but also offers flexibility in the placement And height of the shelves.
Check Stability
Once your shelf is up, It’s crucial to regularly check its stability to prevent accidents or damage. Test the shelf by applying A little pressure to ensure it holds firm And doesn’t wobble or detach from the wall. Periodically inspect the attachment points, Especially after placing new items on the shelf or if the room experiences changes in temperature or humidity, Which can affect adhesive properties. Regular monitoring helps ensure the shelf remains secure And functional, Providing peace of mind And maintaining the safety of your space.
Cleanup
After installing your shelf, Cleaning up any residue or excess material from the installation process is important. Remove any adhesive backing, Clean off stray glue, and dispose of all packaging And protective materials. Keeping the workspace clean ensures A neat finish and prevents any sticky residues from attracting dirt or dust. A clean installation ensures your new shelf looks great And functions well, Adding to the overall aesthetics And utility of your room without leaving any unsightly traces of the mounting process.
Final Thoughts
Hang the shelves on tile walls without drilling is A viable And innovative approach that preserves your tiles while offering the functionality And aesthetic appeal of shelves. By using the right materials And methods, Such as adhesive strips, Hooks, Or special glues, You can install shelves safely And effectively without causing permanent damage to your walls. Remember to choose the appropriate adhesive brand And type based on the weight And size of your shelves And follow the manufacturer’s guidelines for installation And weight capacity. While not all shelf styles or heavy items are suited for this method, With careful planning And the right tools, You can achieve A secure And visually pleasing result. Always prioritize checking the stability And performing regular maintenance to ensure the longevity And safety of your shelving installation.
What Are The Best Adhesive Brands For Tile Walls?
When it comes to hanging shelves on tile walls without drilling, Selecting the right adhesive brand is crucial. Some of the best adhesive brands known for their strength And durability on tile surfaces include 3M Command Strips. Gorilla Mounting Tape, Scotch Mounting Tape, And Loctite Power Grab. These brands offer A variety of products designed for different weights And types of shelves, Ensuring A secure hold without damaging the tile. Always check the product specifications to choose the adhesive that best suits your project’s needs.
How Long Do I Need To Wait Before Placing Items On The Shelf?
The waiting time before placing items on the shelf depends on the type of adhesive used. For adhesive strips And tapes, It’s often recommended to wait at least 1 hour before loading the shelf. If you’re using adhesive glue, The curing time might be longer, Typically around 24 hours. To ensure the adhesive has fully set And can bear the intended load. Always refer to the manufacturer’s instructions for the specific product you’re using for the best results.
Can I Hang Heavy Items Without Drilling?
Hanging heavy items without drilling is possible, But it requires careful selection of the mounting method And materials. Adhesive solutions like heavy-duty mounting tape, Industrial adhesive hooks, And specifically designed shelf brackets can support heavier items. It’s important to closely follow the weight limitations provided by the manufacturers And to distribute the weight evenly across the shelf. For very heavy items, Consider using multiple adhesive points or A combination of methods to ensure stability And safety.
How Do I Remove The Shelf Without Damaging The Tile?
To remove A shelf without damaging the tile, Gently heat the adhesive with A hairdryer to soften it, Then slowly peel off the adhesive strip or tape from the tile. If using adhesive glue, Use A putty knife or similar tool to carefully pry the shelf away from the wall. Working slowly to avoid chipping or cracking the tile. After removal, Adhesive residue can often be cleaned off with rubbing alcohol or A specialized adhesive remover, Being careful not to scratch the tile surface.
Are There Any Shelf Styles That Are Not Recommended For This Method?
Yes, There are certain shelf styles not recommended for adhesive mounting on tile walls. Heavy, Solid wood shelves, Or those made from dense materials like thick glass or metal, maybe too heavy for adhesive methods alone. Likewise, Shelves that are designed to bear A significant amount of weight, Such as bookshelves or pantry shelves. Might not be suitable for this installation method. It’s best to opt for lightweight, Decorative shelves intended for lighter items to ensure the safety And integrity of the installation.