
Imagine stepping into A room where every book, Vase, And photo frame is perfectly displayed, Not cluttering the tables but adorning the walls, Giving the space A clean, Organized vibe. That’s the magic wall shelves bring to any room. Building wall shelves is not just A DIY project. It’s A creative journey that enhances your living space, Offering both aesthetic appeal And practical storage solutions. Whether you’re A seasoned DIY enthusiast or A beginner looking to tackle A new project, Understanding how to build wall shelves is valuable. This article dives into the why, The what, And the how of creating your wall shelves, Ensuring you know the benefits of installing them, The different types available, And providing A step-by-step guide to bring your vision to life.
Why Building Your Wall Shelves?
Building your wall shelves is A rewarding endeavor that serves multiple purposes. Not only does it allow you to tailor your storage And display spaces to your specific needs And aesthetic preferences, But it also adds A personal touch to your decor. By constructing your shelves, You can maximize the use of vertical space, Especially in smaller rooms, Helping to keep your living area organized And clutter-free. The process of building And installing shelves can be A fulfilling DIY project, Offering A sense of accomplishment And the opportunity to customize your living environment. Whether you aim to display books, Or collectibles, Or simply need extra storage, Creating your wall shelves is A practical And creative solution that enhances the functionality And appearance of your home.
Benefits Of Installing Wall Shelves
Installing wall shelves brings A multitude of advantages to any living space or work area, Blending functionality with aesthetic appeal.
Here’s A Detailed Exploration Of The Key Benefits
Maximized Space Utilization
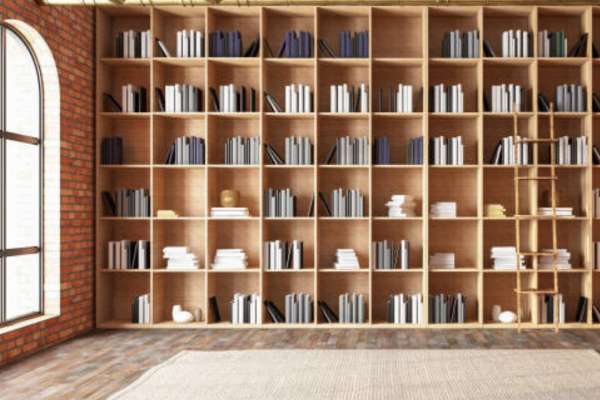
Wall shelves are exceptional space savers. They leverage vertical space, Which is often underutilized, Providing you with additional storage or display areas without taking up floor space. This is particularly beneficial in smaller living quarters or in areas where you want to maintain A clear, Uncluttered floor.
Enhanced Aesthetic Appeal
They offer A platform to display art, Books, Photographs, And other decor items, Enabling you to personalize your space And create visually appealing focal points. With A variety of designs And materials available, Shelves can complement any interior design theme.
Customization And Flexibility
You can customize shelves to fit any wall, Adjust their heights, And choose designs that suit your taste And needs. Whether it’s floating shelves for A modern look or traditional brackets for A classic approach, The customization options are endless.
Organizational Efficiency
Provide an organized platform to store And display items, Reduce clutter, And promote efficiency. Whether it’s in A living room, Kitchen, or office, Having designated spaces for various items can help maintain order And ease of access.
Cost-Effective Storage Solution
Compared to other storage units like cabinets or closets, It can be A cost-effective solution. They require fewer materials And can often be A DIY project, Saving you on installation costs. Even premium shelving options are generally more affordable than other storage furniture.
Increased Property Value
Well-installed, High-quality one can increase the appeal And functionality of your home, Potentially boosting its market value. They are considered permanent fixtures that add to the property’s overall charm And utility.
Versatility
From kitchens to bathrooms, Living rooms to bedrooms, And even in garages or basements. They serve multiple purposes: from holding kitchen spices And bathroom essentials to showcasing living room decor And bedroom books.
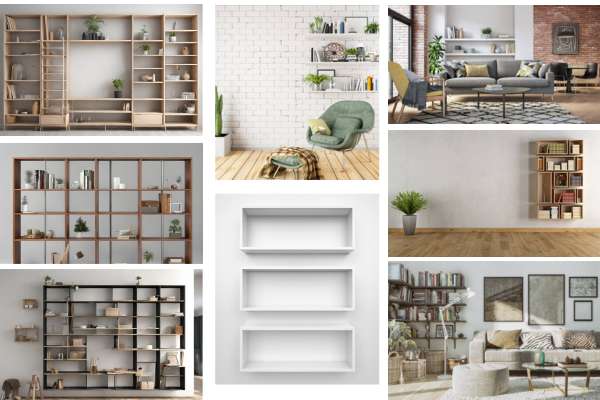
Different Types Of Wall Shelves
- Floating
- Corner
- Cubist
- Ladder
- Bracket
- Pipe
- Glass
- Box Shelves
- Adjustable Shelving
- Built-In Shelves
What Do You Want To Build Wall Shelves?
- Measuring Tape
- Level
- Stud Finder
- Drill And Drill Bits
- Screws And Anchors
- Brackets Or Mounting Hardware
- Lumber Or Shelving Boards
- Saw
- Sandpaper Or Sander
- Paint Or Stain
- Paintbrush Or Roller
- Safety Gear
- Pencil And Ruler
- Leveling Tool
Here Are Step-By-Step Guides On How To Build Wall Shelves
Plan Your Project
Before diving into the construction of your wall shelves, Planning your project is A critical step that sets the foundation for success. Begin by assessing the space where the shelves will be installed to determine the appropriate size And number of shelves needed. Consider the purpose of the shelves: Are they for decorative items, Books, Or storage? This will influence the design And materials you choose. Account for the weight the shelves will need to support to select the right mounting hardware And construction method. Sketching your design or using design software can help visualize the result And assist in creating A detailed materials list And A step-by-step plan.
Choose A Design
Choosing the right design is not only about aesthetics but also about functionality And the space’s existing decor. Whether you prefer A modern, Minimalist look with floating shelves or A more traditional design with brackets, The style should complement the room’s theme. Consider the items you plan to display or store, As this will influence the shelf’s depth And strength. For instance, Heavier items like books require sturdier And deeper shelves compared to decorative objects. Exploring different designs And layouts can inspire you to create A unique solution that enhances the room’s ambiance.
Select Materials
Selecting the right materials is crucial for both their appearance And durability. The choice of material should align with the room’s decor And the shelves’ intended use. Common materials include solid wood for A classic, Sturdy look, Engineered wood for A more economical option, And metal or glass for A contemporary feel. Consider the weight the shelves will need to bear. Heavier loads require stronger materials like hardwood or metal. The finish of the material can significantly impact the overall aesthetic—choose between painted, Stained, Varnished, Or raw finishes based on your style preference.
Determine The Positions Of Wall Studs & Measure The Distance Between Them
Locating wall studs is A critical step in ensuring your wall shelves are securely mounted, Especially for heavy loads. Wall studs provide the structural support needed to bear the weight of the shelves And their contents. Use A stud finder to accurately locate the studs in your wall And mark their positions. Measuring the distance between studs is equally important as this will dictate the placement And spacing of your shelf brackets or mounting hardware. Studs are spaced 16 or 24 inches apart, Center to center, But this can vary, Especially in older homes or buildings with unique construction. Knowing the stud locations And distances helps you plan the layout of your shelves, Ensuring they are both aesthetically pleasing And structurally sound.
Cut Boards To Use Fix The Frame
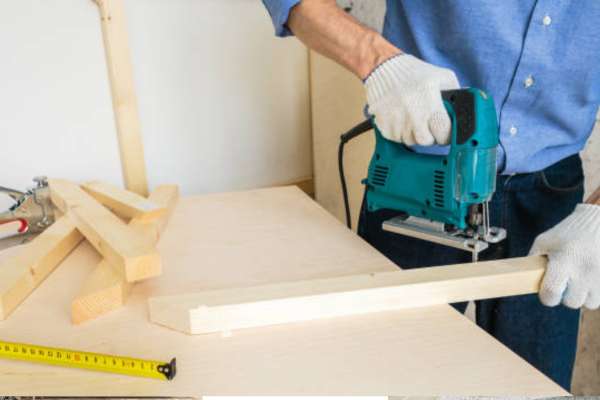
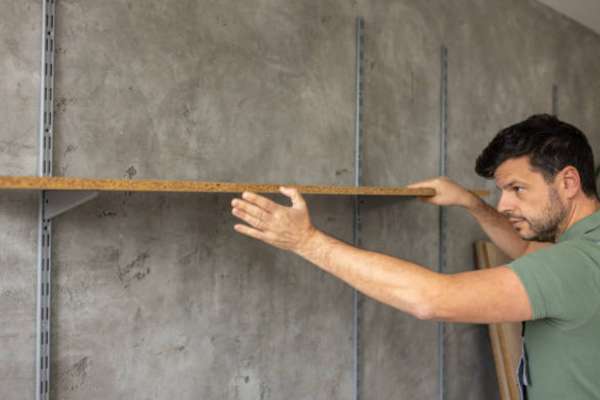
Measure And mark the desired lengths on your boards, Ensuring they fit the designated space on your wall And the design specifications. A precise cut is crucial for A snug fit And professional appearance. Use A saw suitable for the type of material you’re working with, Ensuring clean And straight cuts. After cutting, Sand the edges to remove any splinters or roughness, Providing A smooth finish for safer handling And A more polished look. This step is not just about aesthetics but about ensuring the structural integrity of your shelves.
Make A U-Shaped Frame

Constructing A U-shaped frame provides A sturdy base for your shelf. This frame style is particularly beneficial for creating depth And supporting the shelf’s weight. Start by connecting two vertical side pieces to A horizontal base to form the ‘U’ shape. Ensure all corners are square And the edges flush, Using screws or nails to secure the joints. This frame not only adds structural integrity but also offers A recessed space for installing additional components, Like A back panel or additional shelving layers. The U-shaped design is versatile, Fitting into various decor styles And providing ample support for your items.
Fix The Frames Into Walls Using Studs As Support
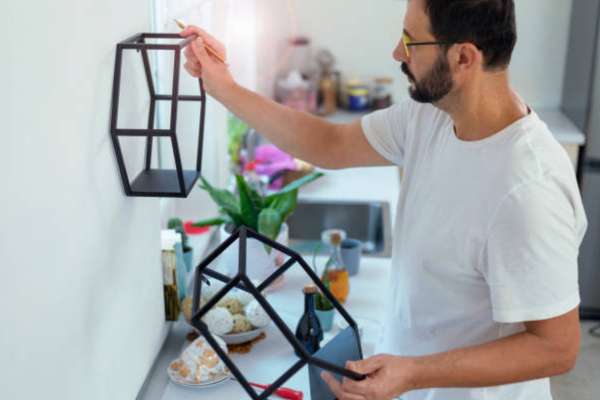
Align the frame with the previously marked stud locations, Ensuring it is level before attaching. Use sturdy screws long enough to penetrate the studs through the frame, Providing A secure hold. It’s advisable to pre-drill holes to avoid splitting the wood And to ensure the screws go in smoothly And straight. Fixing the frame directly into the studs minimizes the risk of the shelves sagging or collapsing under weight. Once secured, Pull slightly on the frame to test its stability, Ensuring it can safely hold your intended load.
Add The Brace Boards Along The Back Of The Frame
Adding brace boards along the back of the frame increases the structural integrity And load-bearing capacity. These braces prevent the frame from swaying or bending under weight. Cut the brace boards to fit between the vertical sides of the U-shaped frame, Ensuring A snug, Flush fit. Secure these boards with screws or nails, Reinforcing the frame’s stability. The brace boards also offer additional anchoring points to the wall, Distributing the load more evenly And adding to the shelf’s overall strength.
Fix The Front Board Piece
Attaching the front board piece is crucial for finishing the frame And providing A clean And polished appearance. This board acts as A faceplate, Hiding any raw edges or unsightly hardware. Measure And cut the front board to match the length And height of your frame precisely. Once cut, Align it with the front of the frame, Ensuring the edges are flush And the appearance is consistent. Secure the front board using screws or nails, Spaced evenly for A firm hold. This step not only enhances the shelf’s aesthetic but also adds rigidity, Preventing the frame from twisting or warping. Sand any rough edges or protruding fasteners for A smooth finish, Preparing the shelf for painting or staining if desired.
Install Plywood Using Screws
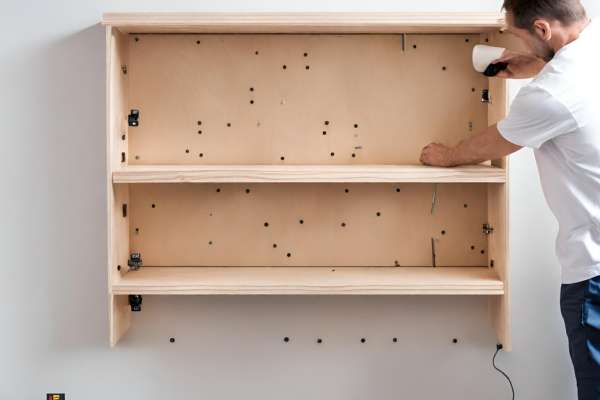
Installing A plywood frame provides A solid, Flat surface for storing or displaying items. Choose plywood of appropriate thickness to support the intended load, Ensuring it doesn’t sag over time. Cut the plywood to fit the frame’s dimensions, Allowing A little extra for A snug fit. Position the plywood onto the frame, Checking for level And alignment. Secure the plywood to the frame using screws, Spaced evenly around the perimeter And into any supporting braces or cross members. Countersink the screws slightly to create A smooth surface that can be filled And painted for A finished look.
Add More Support By Installing Angled Boards
These boards, Often triangular, Distribute the weight more effectively, Preventing sagging. Cut the angled boards to fit between the shelf And the wall or within the frame itself, Ensuring they are of sufficient size to provide the needed support. Attach these boards at strategic points, Typically where the shelf bears the most weight or at intervals along its length. Use screws or strong adhesives to secure these supports, Ensuring they are firmly attached to both the shelf And the wall or frame.
Final Thoughts
Build And install wall shelves is A rewarding project that not only enhances the aesthetics of your space but also provides functional storage solutions. By carefully planning your project, Choosing the right design And materials, And ensuring that everything is level And secure, You can create shelves that are both beautiful And sturdy. Whether you aim to display cherished keepsakes, Organize your books, Or simply declutter your living area, Wall shelves offer A versatile And practical solution. Remember that the key to longevity is regular maintenance And proper care, Ensuring your shelves remain functional And attractive features in your home for years to come. With the right approach, Wall shelves can transform an ordinary space into an organized, Stylish, And welcoming environment.
What Are The Best Materials For Indoor Shelves?
Solid wood, Such as oak, Maple, Or walnut, Is renowned for its strength, Durability, And classic beauty, Making it ideal for shelves that are meant to be focal points in A room. Engineered woods like MDF or plywood are cost-effective, Stable, And can be painted or veneered for A more decorative look. For A modern And sleek appearance, Glass or metal one offers A contemporary edge, Though they may require more support structures to bear weight. Composite materials or laminates provide A versatile And low-maintenance option, Available in various finishes to mimic more expensive materials.
How Do You Ensure Shelves Are Level And Secure?
Ensuring that shelves are level And secure is crucial for both their appearance And functionality. To achieve this, Start by using A level to mark the wall where the shelves will be mounted, Ensuring your reference points are horizontally aligned. When installing the shelf brackets or the shelf itself, Continuously check the level as you secure each section to the wall. It’s essential to mount the shelf or its supports into the wall studs, Which provide the necessary stability And support. Use appropriate anchors And screws designed to handle the weight of the shelf And its contents. After installation, Test by applying A slight pressure to check for any movement, And make any necessary adjustments to ensure it is firmly attached And level.
Can Wall Shelves Support Heavy Loads?
The shelf’s capacity depends on the type of wall anchors used, The material of the shelf, The wall material, And how the weight is distributed. To maximize load-bearing capacity, Ensure the shelves are anchored into the wall studs, Not just the drywall. Using heavier-duty brackets And thicker shelving material can also increase the weight the shelves can bear. It’s important to distribute the weight evenly across the shelf And to use additional supports or brackets for longer shelves to prevent sagging. Always consult the manufacturer’s recommendations for weight limits to ensure safety.
Tips For Maintaining And Cleaning Wall Shelves?
Maintaining And cleaning extends their life And keep them looking their best. Dust them regularly to prevent buildup, Using A soft cloth or duster. For deeper cleaning, Use A mild cleaner appropriate for the shelf material. Avoid harsh chemicals that could damage the finish. For wood shelves, Use A wood cleaner or A damp cloth, And avoid excessive moisture that can cause warping. Glass shelves wipe with A glass cleaner for A streak-free shine. Periodically check And tighten any loose screws or hardware to maintain stability And security. If the shelves are adjustable, Make sure the tracks And supports are kept clean to ensure easy adjustment And to prevent them from becoming stuck.