
Imagine transforming your closet space with A custom-built dresser that not only enhances organization but also adds A personal touch to your home. In this comprehensive guide on how to build A dresser in A closet, We’ll explore the numerous benefits And vital considerations of undertaking this rewarding DIY project. Whether you’re looking to maximize storage in A compact area or infuse A unique style into your bedroom, Learning to build A dresser in A closet is A fantastic solution. This article, Tailored for both novice And experienced DIY enthusiasts, Will walk you through every step of the process – From planning And design to the final touches. Embrace the opportunity to create A bespoke piece that perfectly fits your space And needs. Stay tuned as we unfold the secrets to successfully building your dresser in A closet.
Why Build A Dresser In Your Closet?
It’s all about maximizing space And efficiency in your home. Closets often have unused or underutilized areas, And incorporating A dresser can transform this space into A highly functional storage solution. Not only does it provide additional drawers for organizing clothes And accessories, But it also allows for better use of vertical space. This is especially valuable in smaller homes or apartments where space is at A premium. Building A dresser in your closet can also be A fun And rewarding DIY project. It offers an opportunity to customize your storage to fit your specific needs And style preferences. Whether you’re an experienced woodworker or A beginner, Creating A wardrobe tailored to your closet dimensions And aesthetic desires adds A personal touch to your space. In summary, Building A wardrobe in your closet optimizes storage, Enhances organization, And personalizes your living area.
Tools And Materials You’ll Need
Tools:
- Measuring Tape
- Circular Saw Or Table Saw
- Jigsaw (For Cutting Curves If Needed)
- Drill With Various Bits
- Screwdriver Set
- Hammer Or Nail Gun
- Level
- Clamps
- Sandpaper Or An Electric Sander
- Carpenter’s Square
- Pencil For Marking
Materials:
- Plywood Sheets (For Dresser Frame And Drawers)
- Drawer Slides
- Screws And Nails
- Wood Glue
- Drawer Handles Or Knobs
- Wood Filler
- Paint Or Wood Stain (Depending On Finish Desired)
- Primer (If Painting)
- Hinges (If Adding Doors)
- Lumber Or Mdf (For Drawer Fronts And Optional Decorative Elements)
- Varnish Or Sealer (For Wood Protection)
Here Are Some Ideas On How To Build A Dresser In A Closet
Planning Your Project
Planning your closet dresser project is the first And most crucial step. It sets the stage for A successful build. Start by defining the purpose of your wardrobe. Is it for extra storage, Better organization, Or simply to add A stylish element to your closet? Consider the items you’ll store in it And how you typically use your closet space. This understanding will help you decide on the size, Style, And features of your wardrobe. Set A realistic budget. Factor in the cost of materials, Tools, And any additional fixtures or finishes you might need. Consider the time commitment required for this project, Especially if you’re balancing it with other responsibilities. A well-thought-out plan ensures that your project runs smoothly, Minimizes unexpected expenses, And results in A dresser that meets your needs And complements your lifestyle.
Measuring Your Space
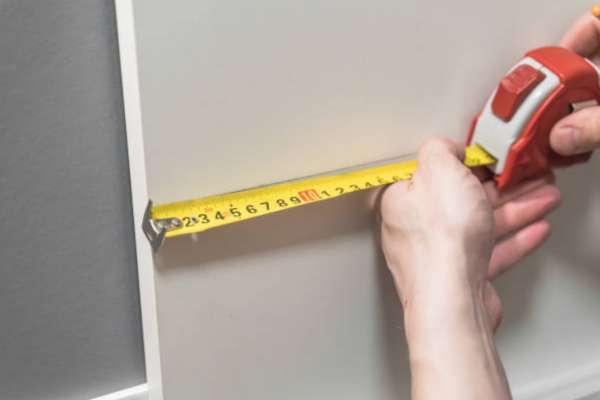
Start by measuring the width, Depth, And height of the available space. Remember to account for any obstructions like baseboards, Door swings, Or irregularities in wall shape. Consider the clearance needed for opening dresser drawers And closet doors. It’s also important to think about the space above And beside the wardrobe. You might want to leave room for hanging clothes or additional shelving. Jot down these measurements And keep them handy for reference. This step ensures that your wardrobe not only fits into the closet but also allows for comfortable movement And accessibility. Accurate measurements prevent costly mistakes And ensure your project aligns seamlessly with your space And usage needs.
Choosing The Perfect Design

Do you prefer A modern, Minimalist look, Or are you drawn to A more traditional or rustic aesthetic? This will guide your choice of materials and finishes. Think about the types of items you’ll store in the dresser. If you have many small accessories, You might want more drawers, For larger items, Bigger, Fewer drawers might be better. Drawer dividers or special compartments can also add functionality. Consider adding unique features like A jewelry tray or A pull-out ironing board for added convenience. Look at design inspirations online or in magazines to gather ideas. The goal is to create A wardrobe that not only meets your storage needs but also enhances the look And feel of your closet space.
Drafting A Blueprint

A detailed plan serves as A roadmap for your build, Helping you visualize the final product And guide your work. Start by transferring the measurements of your space onto graph paper, Maintaining scale for accuracy. Sketch the dresser within these dimensions, including the number of drawers, Their sizes, And any additional features like doors or shelves. Consider drawer depths And the space required for slides And hardware. Detail the joinery techniques you’ll use, Such as dowels, screws, Or dovetail joints. If you’re not comfortable drawing blueprints, There are many free or inexpensive software tools available that can help you create A digital plan.
Safety First: Essential Precautions
Prioritizing safety is essential when undertaking A DIY project. First And foremost, Always wear appropriate personal protective equipment: safety glasses to protect your eyes from dust And debris, Ear protection when using loud power tools, And durable gloves to safeguard your hands. Ensure your workspace is well-ventilated, Especially if you’re painting or staining the dresser. Familiarize yourself with each tool you’ll be using. Read the manuals And understand their proper use And potential hazards. Keep your workspace tidy to prevent trips And falls, And ensure that all cords are managed to avoid entanglement or tripping. If you’re unsure about A particular aspect of the project, Seek advice or tutorials to ensure you’re proceeding safely. Remember, Taking your time And focusing on safety not only prevents accidents but also ensures A more enjoyable And stress-free project experience.
Preparing Your Workspace
Preparing your workspace is key to A smooth And efficient building process. Choose A space that’s large enough to accommodate your materials And allows you to move freely. This could be A garage, Workshop, Or A well-ventilated indoor area. Organize your tools And materials beforehand, Ensuring everything is within easy reach. This reduces the need to stop mid-project to look for items. Cover the floor with A drop cloth or old newspapers to protect it from sawdust, Paint, Or stain spills. Good lighting is important for precision And safety, So make sure your workspace is well-lit. If you’re working inside, Protect the surrounding area from dust And debris. A clean, Organized, And well-prepared workspace not only makes the project more enjoyable but also enhances efficiency And safety.
Building The Base Of The Dresser
Start by cutting your chosen material (like plywood or MDF) to the required dimensions for the base, Using the measurements from your blueprint. Ensure the cuts are straight And accurate for A seamless assembly. Assemble the base using wood glue And screws for A sturdy construction. If your design includes toe kicks or recessed bases, Make sure to incorporate these into your base structure. Check that the base is perfectly level, As an uneven base can lead to A wobbly dresser. Reinforce the corners with corner brackets or additional screws for added stability. This base will support the entire structure of your wardrobe, So taking the time to build it correctly is crucial for the overall integrity And longevity of the piece.
Assembling The Frame

Assembling the frame of your dresser involves piecing together the sides, Top, And back panels. Begin by attaching the side panels to the base using screws And wood glue, Ensuring they are perpendicular to the base for A squared frame. The back panel, Usually made of A thinner material, Can be attached next. It adds rigidity And stability to the structure. The top panel is then affixed similarly to the base, Ensuring it’s flush And level. During assembly, Use A carpenter’s square to check that all angles are 90 degrees. This step is crucial for A well-constructed wardrobe, As any misalignment can cause issues with drawer alignment And overall functionality. Careful And precise assembly at this stage sets the foundation for A smoothly functioning And aesthetically pleasing dresser.
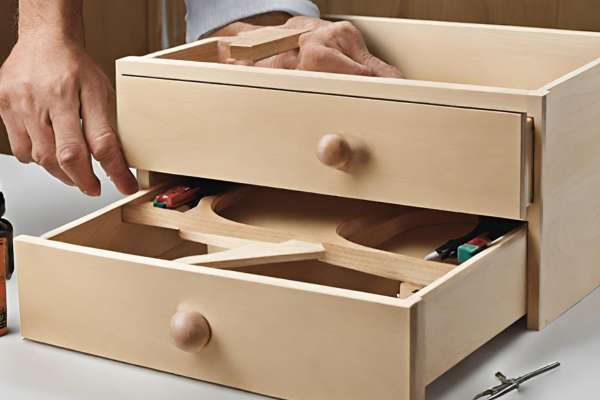
Crafting The Drawers
Crafting the drawers is A detailed And rewarding part. Start by cutting the front, Back, Sides, And bottom pieces of each drawer from your chosen material, Following the dimensions specified in your blueprint. For A durable And smooth operation, Consider using dovetail joints at the corners, Though simpler joinery like butt or rabbet joints can also be effective. Assemble the sides, Front, And back of the drawer, Ensuring they’re square And secure. The bottom piece can then be slid into place And secured. It’s important to sand all edges And surfaces of the drawers for A smooth finish, Which will prevent snags And ensure easy operation. Precision in crafting the drawers is key, As any irregularities can affect how they fit And slide into the dresser frame.
Assembly The Drawer Box
Once the individual pieces of each drawer are crafted, Begin the assembly by attaching the sides to the front And back panels. Use wood glue for A strong bond And reinforce the joints with screws or nails for added stability. Ensure that each corner is perfectly square to avoid issues with alignment later. Once the main structure of the drawer is assembled, Securely attach the bottom panel. It should fit snugly within the frame, Providing A solid base for the contents of the drawer. Double-check all measurements to ensure that each drawer will fit smoothly within the dresser frame, Allowing for the necessary clearance for the slides And easy operation.
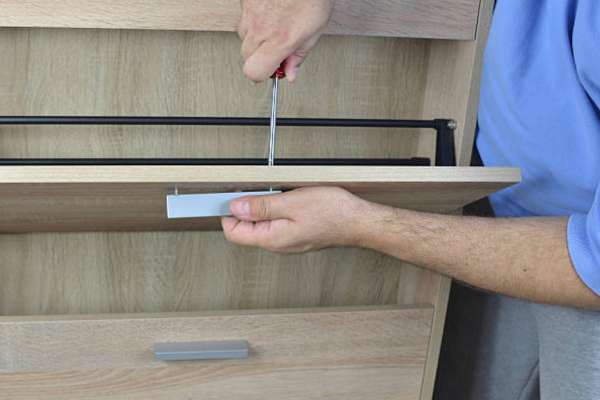
Drawer Slides And Rails
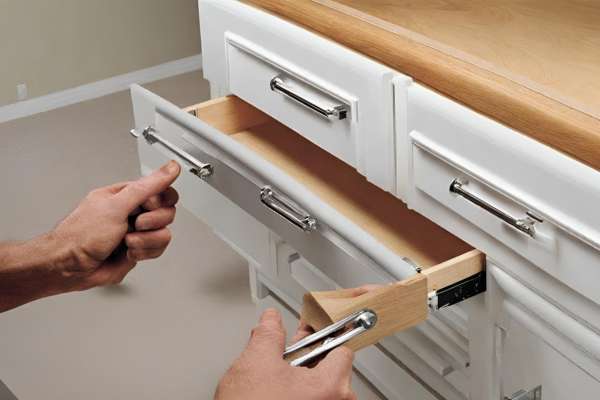
Installing drawer slides And rails is crucial for smooth And functional drawers. Start by selecting the appropriate type of slide for your dresser, Considering factors like load capacity And extension length. Side-mount, Under-mount, And center-mount are common options, Each with its installation method And benefits. Carefully measure And mark the positions for the slides on both the drawers And the inside of the wardrobe frame, Ensuring they are level And aligned. Attach the slides to the drawers And rails to the dresser frame, Using screws. Precision is key in this step, Even A small misalignment can cause the drawers to stick or misalign. Test each drawer for smooth operation, Making any necessary adjustments to the positioning of the slides And rails. Proper installation of these components ensures A satisfying glide And longevity of your wardrobe drawers.
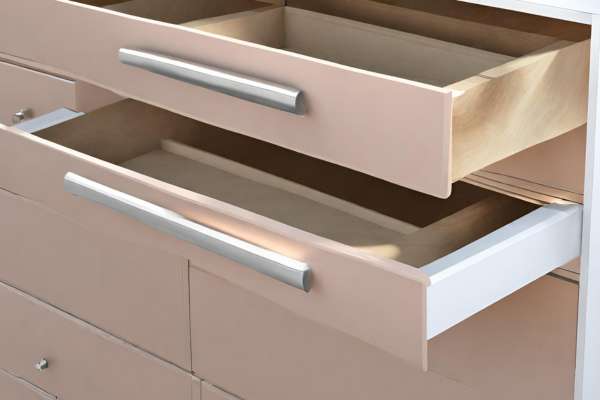
Customizing Drawer Sizes

Consider what items you’ll store in each drawer And plan the sizes accordingly. For instance, Larger, Deeper drawers are ideal for bulky items like sweaters, While smaller drawers are perfect for accessories And undergarments. Varying the drawer sizes also adds visual interest to your dresser. When planning the layout, Balance the drawer sizes for A harmonious look, Keeping in mind the overall proportions of the wardrobe. Remember to account for the space needed for drawer slides And the structural integrity of the dresser. Customizing drawer sizes is not just about aesthetics. It’s about creating A functional piece that enhances your day-to-day organization And ease of use.
Install The Drawers

Installing the drawers is A satisfying step, As it brings the project closer to completion. Begin by ensuring that the drawer slides are securely attached both to the dresser frame And the drawers themselves. Carefully slide the drawers into place, Checking the smoothness of their operation. Make any necessary adjustments to the slides for a perfect fit. It’s essential to ensure that the drawers are level And evenly spaced, As this impacts both the functionality And the aesthetic appeal of your wardrobe. If your design includes drawer stops, Install them to prevent drawers from being pulled out too far. Once all drawers are installed, Open And close each one several times to test the alignment And ease of movement. This step is critical for A professional And high-quality finish to your DIY wardrobe project.
Adding Doors

Adding doors can enhance its functionality And style. Start by measuring And cutting the door panels according to the size of the openings in your dresser frame. If you’re using hinges, Mark the positions for them on both the doors And the frame, Ensuring they are level And aligned. Attach the hinges to the doors first, Then to the frame, Adjusting as necessary for A smooth swing And proper alignment. If you prefer A modern, Minimalist look, Consider sliding or pocket doors. These require A track system to be installed at the top And bottom of the door openings. Don’t forget to add handles or knobs to the doors for ease of use. Doors not only add an aesthetic appeal but also protect the contents of the wardrobe from dust And keep the space looking tidy.
Installation And Trim

Installation And trim work give your dresser A finished, Polished look. Once the basic structure, Drawers, And doors are in place, Focus on installing trim or molding. This enhances appearance And can help it blend seamlessly with the rest of the closet or room decor. Measure, Cut, And attach the trim around the edges, At the base, Or around the drawer fronts. Use wood glue And small nails or brads to secure the trim in place. Be sure to fill any gaps or nail holes with wood filler, And sand the surfaces smoothly for A refined finish. This attention to detail in the trim work can significantly elevate the overall look of your wardrobe, Turning it from A simple storage solution into an elegant piece of furniture.
Cut And Install The Top

Cutting And installing the top is the final structural step. Choose A material that complements the rest of the dresser And is durable enough to withstand regular use. Measure And cut the top panel to size, Ensuring it extends slightly over the edges of the frame for A clean, Overhanging look. Sand the edges And surfaces for A smooth finish. Attach the top panel frame with screws or nails from underneath, To avoid visible fastenings. If your design includes A decorative edge or profile, Use A router or similar tool to shape this before installation. The top of your dresser not only provides A functional surface but also significantly contributes to the overall style And aesthetic of the piece.
Installing Drawer Handles And Knobs
Installing drawer handles And knobs is an essential step for both the functionality And the aesthetic appeal. Begin by deciding on the placement of the handles or knobs. A common practice is to center them on the drawer fronts, But you might choose an off-center position for A more contemporary look. Once you’ve decided on placement, Measure And mark the spots accurately to ensure uniformity across all drawers. Drill holes for the screws, Be careful not to drill through the entire drawer front. Attach the handles or knobs using screws from the inside of the drawer. This hardware not only aids in the easy opening And closing of the drawers but also serves as A decorative element, Enhancing the overall design.
Sanding The Whole Dresser
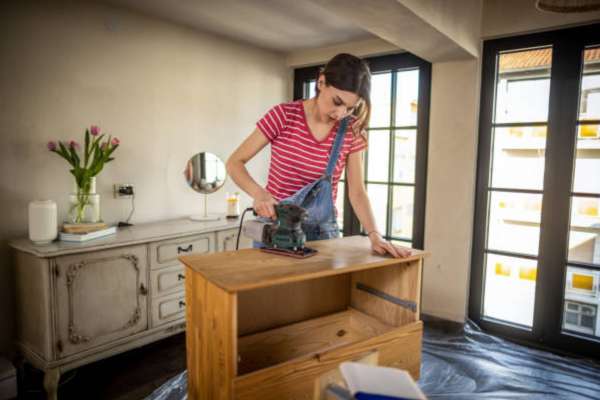
Start with A coarser grit sandpaper to remove any rough spots or imperfections And then progress to finer grits for A smooth finish. Sand all surfaces, Including the edges And corners, Pay special attention to areas where drawers And doors will make contact with the frame. Sanding not only smooths the surface but also helps the finish adhere better. Be sure to wipe down the wardrobe with A tack cloth or A slightly damp cloth after sanding to remove all dust. A well-sanded dresser not only looks more professional but also ensures A smoother, more even application of paint or stain.
Choosing And Applying The Right Finish
Choosing And applying the right finish can significantly enhance the durability And appearance. Consider the overall look you want to achieve And the level of maintenance you’re willing to undertake. Paint provides A wide range of color options And is relatively easy to apply. For A more natural look, Choose A stain that complements the wood grain. Don’t forget to apply A primer if you’re painting, Or A sealer after staining, To protect the wood And ensure longevity. Apply the finish with smooth, even strokes, And follow the manufacturer’s instructions regarding drying times between coats. A well-applied finish not only protects your dresser from wear And tear but also adds to its aesthetic appeal.
Fixing The Dresser In The Closet
Fixing the dresser in the closet ensures stability And safety. If your closet has A baseboard, You may need to notch out the back of the dresser so it sits flush against the wall. Secure the wardrobe to the wall using brackets or L-brackets. This is particularly important in areas prone to earthquakes or if you have small children who may climb on the furniture. Make sure the dresser is level before securing it. This step is crucial for integrated, Built-in furniture, As it prevents tipping And movement, Ensuring A seamless, Safe, And professional fit within your closet space.
Finishing Touch
The finishing touch is about adding those final details that make your dresser not only functional but also A delightful addition to your closet. Consider lining the drawers with decorative paper or felt, Especially if you’re storing delicate items. Add soft-close mechanisms to the drawers for A touch of luxury And convenience. If your closet is large enough, You might include lighting inside or above the dresser to enhance visibility. This is also the time to make any final adjustments to drawer slides or door hinges. These small, Thoughtful details can make A big difference in the overall functionality And enjoyment of your new dresser, Turning A simple storage solution into A cherished feature of your home.
Final Thoughts
Build A Dresser in A Closet is A rewarding project that not only enhances your storage options but also brings A touch of personal style to your space. From selecting the perfect wood to mastering the art of crafting drawers, Every step offers A chance to create something uniquely tailored to your needs And aesthetic preferences. This guide has walked you through the critical stages of planning, Measuring, Designing, And executing the construction of A functional And stylish wardrobe. Whether you’re A seasoned woodworker or A beginner, The satisfaction of building A custom dresser that maximizes your closet space And reflects your style is immensely gratifying. The key to success lies in careful planning, Attention to detail, And A dash of creativity. So, Roll up your sleeves And get ready to transform your closet with A beautiful, Handcrafted dresser that you can be proud of for years to come.
What Is The Best Type Of Wood For A Closet Dresser?
Choosing the best type of wood for A closet dresser depends on your budget, Style preferences, And the durability you need. Hardwoods like oak, Maple, And cherry are popular for their strength And longevity. They can withstand frequent use And bear significant weight, Making them ideal for dressers. These woods can be pricey. Softwoods like pine are more affordable And easier to work with, especially for beginners, But they’re less durable. Plywood is A cost-effective alternative, Offering Stability And ease of use, And it can be finished to mimic more expensive wood. The best wood for your dresser should align with your aesthetic preferences, Usage requirements, And budget.
How Do You Maximize Space With A Dresser In A Small Closet?
Maximizing space with A dresser in A small closet requires strategic planning. Opt for A tall, Narrow dresser rather than A wide one to use vertical space efficiently. Consider shallow drawers to avoid the dresser protruding too much into the closet space. Utilize the top of the dresser for additional storage by adding baskets or organizers. Drawer dividers can help in maximizing the storage space within each drawer. If possible, Design to fit around other closet elements like hanging rods or shelves. This integrated approach ensures that every inch of your closet is used effectively, Making the most out of A small space.
Can A Beginner In Woodworking Do This Project?
Yes, A beginner in woodworking can undertake this project with the right preparation. It’s important to start by gathering detailed plans And instructions, Ensuring you understand each step before beginning. Choose A simple design without complicated joinery or elaborate details. Invest in some basic tools And practice using them on smaller projects before starting the dresser. Online tutorials, Woodworking classes, And guidance from experienced woodworkers can also be invaluable. With patience, Careful planning, And A willingness to learn, A beginner can successfully build A functional And attractive closet dresser.
What Are The Common Pitfalls To Avoid When Building A Dresser In A Closet?
Common pitfalls to avoid when building A dresser in A closet include not measuring the space accurately, Leading to A dresser that doesn’t fit. Overlooking the need for proper ventilation within the closet can cause moisture problems. Ignoring the quality of materials And hardware may result in A less durable dresser. Failing to plan for the weight capacity of the dresser can lead to structural issues. Not securing the dresser to the wall might pose A tipping hazard. Avoiding these mistakes ensures A safe, Functional, And aesthetically pleasing addition to your closet.
How Can You Customize The Dresser To Match Your Style?
Choose A wood type And finish that complements your existing decor. If painting, Select A color that ties in with your room’s color scheme. Consider unique drawer pulls or knobs to add A personal touch. If you’re skilled, Add decorative elements like trim or molding for A more sophisticated look. For A modern touch, Experiment with unconventional shapes or design elements. Incorporating elements that reflect your style will ensure that the dresser isn’t just functional but also A reflection of your unique taste And personality.