
Diving into A project like to build A 6-drawer dresser from scratch is not just an opportunity to unleash your creativity, But A practical way to tailor your space to your needs And taste. Why settle for off-the-shelf when you can craft A piece that’s uniquely yours? This guide will walk you through the nitty-gritty of constructing your dresser, Ensuring that each step, From selecting the perfect wood to the final stroke of paint, Is clear And doable. Not only will you end up with A sturdy, Functional piece of furniture, But you’ll also gain skills And A sense of accomplishment that comes with creating something from scratch. So, Roll up your sleeves And get ready to transform simple materials into A Beautiful And practical 6-drawer dresser that will enhance the charm And organization of your space.
Why Build Your 6-Drawer Dresser?
Crafting A dresser yourself offers A unique blend of personalization And practicality. It’s not just about having extra storage. It’s about creating A piece that perfectly fits your space And style. By building it yourself, You have the freedom to choose the materials, Design, And size that best meet your needs. The satisfaction of using A dresser that you’ve built with your own hands is incomparable. It’s A rewarding project that enhances your woodworking skills And gives you A sense of accomplishment every time you use it. Whether you’re A seasoned DIY enthusiast or A beginner looking to tackle A new challenge, Build A 6-drawer dresser can be A fulfilling And functional addition to your home.
Here Are Some Easy Guides On How To Build A 6-Drawer Dresser From Scratch
Tools And Materials
Tools
- Drill/Driver
- Circular Saw
- Miter Saw
- Sander
- Clamps
- Tape Measure
- Level
- Pencil
- Safety Glasses
- Hearing Protection
- Dust Mask
- Kreg Jig Or Pocket Hole Jig
- Table Saw
- Dowel Jig
Materials
For The Carcass (Body)
- 2 Sheets Of 3/4-Inch Plywood (Size Will Depend On The Dimensions Of Your Dresser)
- 2×4 Lumber For Framing (Optional)
The Drawers
- 1/2-Inch Plywood Or Solid Wood (Size Will Depend On The Dimensions Of Your Drawers)
- Drawer Slides (Full Extension Ball Bearing Slides Are Recommended)
- Wood Glue
For The Hardware
- Drawer Pulls
- Wood Screws
- Pocket Hole Screws (If Using A Kreg Jig)
- Nails (If Using A Nail Gun)
For The Finishing
- Sandpaper
- Wood Stain Or Paint
Wood Selection
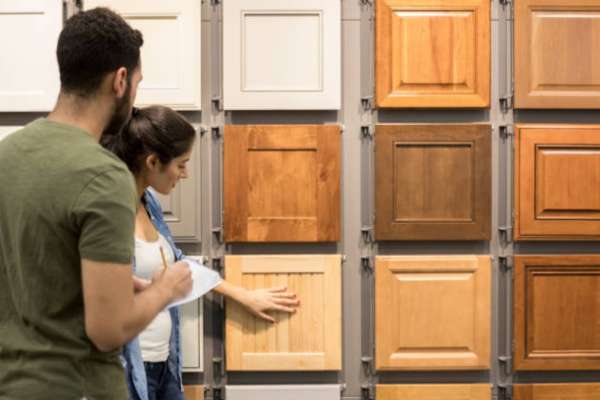
Choosing the right wood is crucial to build A 6-drawer dresser from scratch. The type of wood you select determines not only the look but also the durability of your dresser. Hardwoods like oak, Maple, And cherry are popular choices for their strength And aesthetic appeal, Although they can be pricier. Softwoods like pine offer A more budget-friendly option And are easier to work with, Making them ideal for beginners. Consider the wood grain And color, As these will significantly impact the final appearance of your dresser. Opt for wood that aligns with the style And decor of the room where the dresser will be placed. Keep in mind, That the choice of wood also affects the working techniques And tools needed, So pick something that matches your skill level And the tools you have at your disposal.
Designing Your Dresser

This step is about more than just aesthetics, It’s about functionality And practicality. Start by determining the dimensions of the dresser, Ensuring it fits well in the intended space. Consider the drawer size And number, Keeping in mind what you plan to store. This is your chance to add personal touches, Perhaps A unique drawer handle design or an unconventional drawer layout. Don’t forget to plan for the structural integrity of the dresser, Like the placement of supports And the type of joinery you’ll use. Sketch your design or use design software to visualize the final product. This step is critical as it lays the groundwork for the entire project And helps avoid costly mistakes down the line.
Workspace Preparation

A well-organized And safe workspace can make the process of building your dresser smoother And more enjoyable. Ensure you have enough space to work comfortably And store your materials. Good lighting is essential to avoid mistakes And ensure precision in your work. Keep your tools well-arranged And within easy reach to streamline your workflow. It’s also crucial to prioritize safety make sure you have protective gear like gloves And goggles And familiarize yourself with the safety features of your tools. Keep the workspace clean And free of clutter to reduce the risk of accidents. A well-prepared workspace is not just about convenience. It’s about creating A conducive environment that allows for focus, Precision, And creativity.
Wood Preparation

Begin by inspecting the wood for any defects, Like knots or cracks, And plan your cuts to avoid these areas. Wood often comes with rough surfaces, So sanding is crucial for A smooth finish. Depending on the type of wood, Different grits of sandpaper may be needed. Make sure the wood is properly planned And squared to ensure that all pieces fit together accurately during assembly. If your wood has any moisture content, It’s essential to allow it to dry completely to prevent warping or shrinkage after the dresser is built. This step requires patience And attention to detail, As rushing through it can lead to issues in the later stages of construction. Properly prepared wood not only looks better but also provides A stronger foundation for your dresser.
Assembling The Carcass

Start by laying out all the pieces according to your design plan. Use A reliable method for joining the pieces, Such as dowels, Screws, Mortise, And tenon joints, Depending on your skill level And tools. Ensuring everything is square And level at this stage is crucial. Use A carpenter’s square And take your time to check each joint. Apply wood glue for extra strength, But be mindful of any excess that can seep out And mar the finish. Clamp the pieces together while the glue dries to maintain alignment. This step is all about precision, A well-assembled carcass sets the tone for the drawers And the overall stability of your dresser, Ensuring it withstands the test of time.
Drawer Slides Installation

Choose the right type of slides for your dresser – under-mount or side-mount, Depending on your design And preference. Carefully measure And mark the position of the slides on both the carcass And the drawers, Ensuring they are perfectly aligned. This ensures the smooth opening And closing of the drawers. If you’re using ball-bearing slides, Ensure they are level And secure them with screws. For wooden slides, Ensure they are sanded smooth And apply A lubricant like wax for smooth operation. The ease of use of your drawers heavily depends on this step, So take your time to get it right.
Crafting The Drawers
Start by cutting your wood to the exact dimensions of your drawer design, Ensuring each piece is perfectly square. Assemble the drawer box, Paying attention to the joints – dovetail joints are strong And visually appealing, But simpler joints like rabbets or butt joints can also be effective. Ensure the bottom panel fits snugly And is secured without warping. Once assembled, Test fit each drawer in its respective slot in the carcass to ensure A smooth fit. Adjustments may be necessary for A perfect fit, So be prepared to sand or trim as needed. The effort put into crafting the drawers will be evident in the final look And functionality of your dresser.
The Outer Finish
Start by sanding the entire dresser to remove any imperfections And create A smooth surface for finishing. Choose A finish that complements the wood And fits the style of the room where the dresser will be used. This could be paint, Stain, Or varnish. Apply the finish evenly, Using brushes or A sprayer for A consistent coat. Consider multiple coats for enhanced durability, Sanding lightly between each coat. If you’re painting, A primer can be helpful for an even color. Add A sealant for extra protection, Especially if the dresser will be heavily used. The right finish will not only beautify your dresser but also safeguard your hard work for years to come.
Top Panel Installation

Choose A panel that complements the overall design And is sturdy enough to withstand regular use. Measure And cut the panel to fit precisely on top of the carcass. Before attaching, Check for any overhang or alignment issues And adjust accordingly. Use A strong adhesive, Like wood glue, For A secure bond And reinforce with screws or nails for added stability. Make sure the fasteners are appropriately sized to avoid piercing through the top surface. This step requires A balance of delicacy And strength. The top panel not only adds to the aesthetic but also provides structural support to the dresser.
Back Panel Installation

The back panel adds rigidity And completes the structure. Typically, A thinner material like plywood is used for the back panel. Measure And cut it to fit the back of the carcass snugly. If the dresser is large, Consider adding support struts or an A-frame to the panel for extra sturdiness. Attach the panel using small nails or staples, Ensuring it’s flush And square with the carcass. This step is crucial for overall stability, Preventing any wobbling or skewing over time. A well-installed back panel also helps in keeping the drawers aligned And functioning smoothly.
Trim And Moldings

These elements not only enhance the aesthetic but also hide any imperfections or joints. Choose trim that complements the design And theme of the dresser. Measure And cut the trim accurately, Mitering the corners for A clean, Professional look. Attach the trim using A suitable adhesive, Small nails, Or brads, Making sure it’s perfectly aligned And secure. Sand any rough edges for A seamless transition. This step is where craftsmanship can elevate your dresser from A functional piece of furniture to A work of art, Showcasing attention to detail And personal flair.
Sanding

Start with coarse grit sandpaper to remove any major imperfections or glue residue. Gradually move to finer grits to achieve A smooth, even surface. Pay special attention to edges And corners, Ensuring they are smooth but not overly rounded unless that’s part of your design. Hand sanding can offer more control for intricate areas, While an orbital sander can speed up the process on larger, Flat surfaces. The goal is to create A surface that’s smooth to the touch And free of any blemishes, Providing the ideal base for painting, Staining, Or sealing.
Staining And Painting
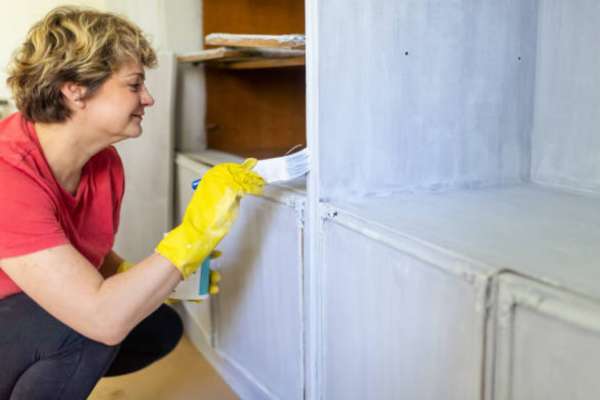
For staining, Choose A shade that enhances the natural grain of the wood And complements your decor. Apply the stain evenly with A brush or rag, Working in the direction of the grain, And wipe off any excess. Select A color that fits your room’s aesthetic. Apply A primer first to ensure even coverage And better adhesion of the paint. Use A high-quality brush or roller to apply the paint in smooth, even strokes. You may need several coats, Sanding lightly between each for A flawless finish. Both staining And painting require patience And attention to detail, As the quality of this step will significantly impact the overall appearance of your dresser.
Hardware Installation
Installing hardware is the finishing touch that can define the. Select handles, Knobs, Or pulls that complement the dresser’s design And are comfortable to use. Mark the position of the hardware accurately, Ensuring it is aligned And evenly spaced. Drill pilot holes for the screws to avoid splitting the wood. Attach the hardware securely, But be careful not to over-tighten And damage the wood or the hardware itself. The right hardware not only adds functionality to your dresser but also serves as an accent piece that can enhance or transform its overall look.
Quality Checks And Troubleshooting
After assembly, It’s important to conduct thorough quality checks. Ensure all drawers open And close smoothly And that the dresser stands level on the floor. Check for any sharp edges or corners And sand them down if necessary. Inspect the finish for any missed spots or drips And touch up as needed. If you encounter any issues, Like A sticking drawer or A wobbly leg, Address them immediately. Troubleshooting problems now will save you from more significant issues later.
Care And Maintenance
Proper care And maintenance will keep your handmade dresser looking great And functioning well for years. Dust it regularly with A soft cloth to prevent buildup. If stained or painted, Use products appropriate for the finish to clean any spills or marks. Avoid placing the dresser in direct sunlight or near heat sources to prevent warping or discoloration. Check And tighten any loose hardware periodically. If the dresser is heavily used, Consider reapplying A sealant or finish every few years to keep it protected. With proper care, Your custom-built dresser will remain A cherished piece in your home, Showcasing both your craftsmanship And personal style.
Final Thoughts
Build A 6-drawer dresser from scratch is A rewarding endeavor that combines skill, Creativity, And functionality. From selecting the right wood to applying the final coat of paint or stain, Each step in this process allows for A deep engagement with the craft of woodworking. This project not only provides you with A custom piece of furniture that perfectly fits your space And style, But it also offers the satisfaction of creating something tangible And useful with your own hands. The skills And techniques learned through this process are invaluable, And the finished dresser stands as A testament to your hard work And dedication. Whether you’re an experienced woodworker or A beginner looking to dive into A new challenge, The journey of building your dresser is sure to be as rewarding as the beautiful, Functional piece you end up with.