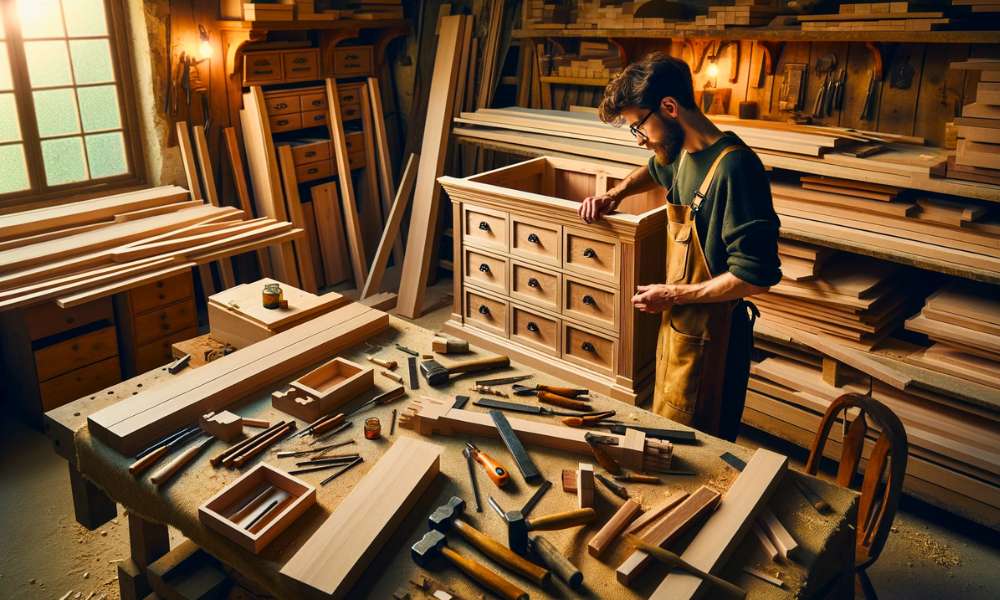
Build A Dresser from scratch is A rewarding project that not only adds A personal touch to your space but also hones your crafting skills. When you embark on this journey, You’re not just creating A piece of furniture. You’re crafting A story, A unique addition that’s both practical And A testament to your handiwork. Understanding the importance of precision And patience in this process is key. This guide ensures that anyone, Regardless of experience, Can tackle this project. The joy of building A dresser from scratch lies in its customizability, The satisfaction of creating something functional, And the potential to transform any room. With the right tools, A sprinkle of creativity, And this step-by-step guide, You’ll find that building A dresser is not just achievable, But also A delightful endeavor.
Why Build A Dresser From Scratch?
It’s an opportunity to create something uniquely yours, Tailored to your space And style. Building your dresser allows for size, Color, And design customization, Something off-the-shelf options can’t match. Beyond the aesthetics, It’s A chance to develop woodworking skills, Understand the nuances of crafting furniture, And experience the satisfaction of completing A hands-on project. The process can be therapeutic, Offering A creative outlet that results in A functional piece of art. Plus, It’s A sustainable choice, Allowing you to choose eco-friendly materials And reduce the environmental impact of mass-produced furniture. Building A dresser from scratch isn’t just about furniture. It’s about the personal journey And accomplishment that comes with it.
Here Are Step-By-Step Guides About How To Build A Dresser From Scratch
Planning Your Project
Embarking on the journey of building A dresser from scratch begins with effective planning. This initial phase is crucial as it lays the foundation for your entire project. Start by determining the purpose And location of your dresser. Will it be A statement piece in your bedroom or A functional addition to A guest room? Consider the space available And how the dresser will fit into it. Plan the dimensions carefully, Taking into account not just the space where it will sit, But also the size of the drawers And the clearance needed to open them comfortably. This stage is also the perfect time to decide on the style And aesthetics of your dresser. Do you prefer a modern look or A rustic charm? The planning phase sets the tone for your project, Ensuring that the final product is not only functional but also blends seamlessly with your home’s decor.
Preparing The Materials
Once your plan is in place, The next step is preparing the materials you’ll need. This involves listing And gathering all the tools And hardware required for the build. Essential tools might include saws, Drills, Sanders, And A variety of hand tools. Hardware components like drawer slides, Knobs or handles, And joinery materials are also key. Consider the finishing materials like paint, Stain, Or varnish. Preparing everything beforehand ensures A smooth workflow, Preventing any frustrating pauses to run to the hardware store. This preparation phase is also A good time to set up A dedicated workspace where you can work comfortably And safely, Ideally A spot where your project can remain undisturbed between work sessions.
Choose Wood

Choosing the right wood is A pivotal decision to build A dresser from scratch. Different types of wood offer different aesthetics, Durability, And price points. For instance, Hardwoods like oak, Maple, And walnut are known for their strength And longevity but can be more expensive. Softwoods like pine are more budget-friendly And easier to work with, Making them A great choice for beginners. Consider the grain patterns And color variations of different woods, As these will significantly impact the final look of your dresser. Think about the sustainability of the wood you’re selecting. Opting for locally sourced or certified sustainable wood is not only environmentally friendly but can also add A story to your handcrafted piece.
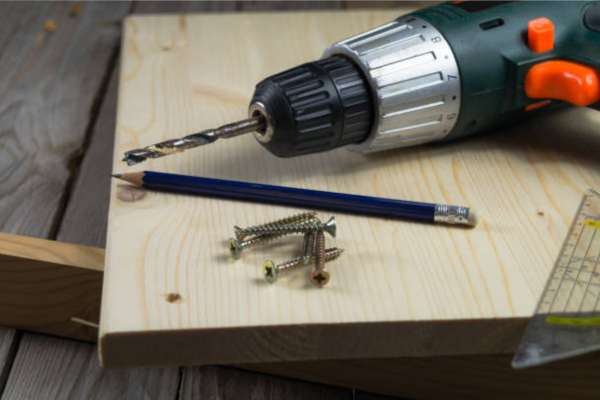
Gather Tools
Materials:
- 3 Sheets ¾″ Plywood
- 1 ¼ Sheets ¼″ Plywood
- 2x4x8 Boards
- 1x Scrap Plywood For Legs
- 1 ¼″ Pocket Hole Screws
- 2 ½″ Pocket Hole Screws
- 2″ Wood Screws
- 2 ½″ Wood Screws
- Sandpaper (Various Grits)
- Wood Glue
- Paint Or Stain (Optional)
- Drawer Pulls (Optional)
Tools:
- Table Saw
- Miter Saw
- Drill
- Screwdriver
- Electric Sander
- Hammer
- C-Clamps
Design Plan
The design plan is where your dresser starts to take shape, Even before you make the first cut. This is where you’ll decide on the specifics: how many drawers, Their size And depth, The type of joinery you’ll use, And the overall dimensions of the dresser. It’s helpful to sketch out your design, Either on paper or using A software program. This visual representation allows you to tweak And refine your design, Ensuring it meets all your needs And expectations. Don’t forget to include details like drawer pulls or decorative elements in your plan. Your design should not only be about aesthetics but also functionality, Considering aspects like the ease of use And the dresser’s stability. A well-thought-out design plan serves as your roadmap throughout the building process, Guiding you toward creating A dresser that’s both beautiful And functional.
Cut Pieces

The first tangible step in building your dresser is cutting the pieces. With your design plan in hand, Measure And mark the wood accurately for each component of the dresser. Precision is key here even A small error can lead to issues in the assembly phase. Use appropriate saws for the cuts, Whether it’s A table saw for straight, Long cuts, Or A jigsaw for any intricate shapes. Remember to account for the saw blade’s width (kerf) in your measurements to ensure each piece is precisely the size needed. Safety is paramount during this stage, So always wear protective gear And follow proper cutting techniques. Once all pieces are cut, Lay them out And double-check their dimensions against your design plan.
Sand Edges
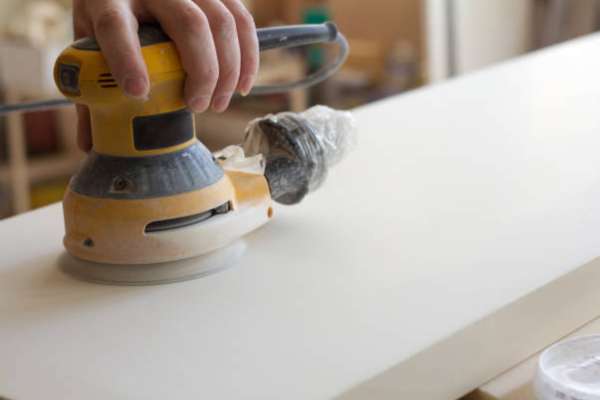
After cutting the pieces, The next step is sanding the edges. This is not just about smoothing out rough edges. It’s also crucial for ensuring A high-quality finish. Start with coarser grit sandpaper to remove any splinters And rough patches, Then gradually move to finer grits for A smooth finish. Pay special attention to the edges And corners, As these areas will be more noticeable once is assembled. Sanding is also the time to soften sharp edges for A more refined look And safer use. Always sand in the direction of the wood grain to avoid scratches that can be accentuated when staining or painting.
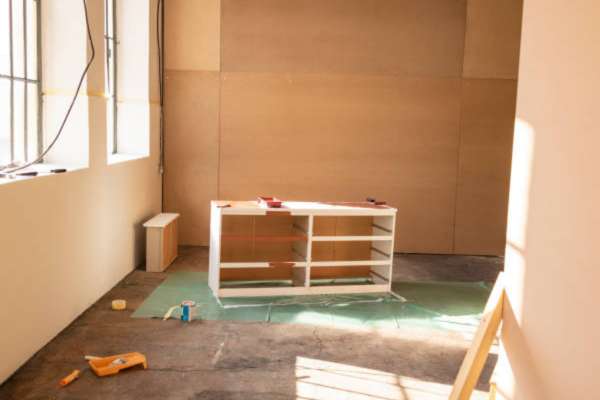
Assemble Frame

Begin by laying out the side, Top, And bottom panels according to your design. Use clamps to hold pieces in place if needed. Depending on your design, You might use various joinery methods such as dowels, Screws, Or brackets. Ensure that each joint is tight And secure. This stage requires patience And precision misaligned joints can affect the dresser’s overall stability And appearance. During assembly, Regularly check that the frame is aligned And level. This structural integrity is vital for the dresser’s durability And functionality.
Ensure Squareness

Ensuring squareness throughout the assembly process cannot be overstated. Isn’t square will have issues like misaligned drawers or doors, And it can compromise the overall stability. Use A carpenter’s square after assembling each part to check that the corners are at 90-degree angles. If there are discrepancies, Adjust the assembly before the joints are fully tightened or the glue has set. Checking for squareness should be repeated frequently during assembly, Especially after attaching each component. This meticulous attention to detail will pay off in A well-constructed, Functional, And aesthetically pleasing dresser. Taking the time to ensure squareness at every step is the key to A professional-looking finish.
Attach Back Panel

The next step is attaching the back panel. This panel not only adds to the aesthetic but also significantly enhances the structural integrity of the dresser. Choose A material that complements the rest of your design, Like plywood or MDF, Which are sturdy And easy to work with. Measure And cut the back panel to fit precisely, Ensuring it aligns perfectly with the frame’s edges. Attach it using small nails or screws, Spacing them evenly for A secure fit. Be careful not to split the wood while attaching the panel. The back should lie flush against the frame, Adding stability And A finished look to your dresser.
Make Drawers

Making the drawers is A detailed And crucial part of the process. Begin by measuring And cutting the pieces for each drawer. The front, Back, sides, And bottom. The size And number of drawers will depend on your initial design. Choose A joinery technique that suits your skill level And the style of the dresser, Like dovetail joints for A traditional look or butt joints for simplicity. Assemble the sides, Front, And back of each drawer, Ensuring they are perfectly square. The bottom panel, Typically made from A thinner material, Can be slid into place in A groove or attached directly to the bottom of the drawer frame. Ensure that each drawer fits snugly within its allotted space in the dresser frame.
Assemble Drawers

Once the individual parts of the drawers are prepared, It’s time to assemble them. Apply wood glue to the joints for additional strength, Then use screws or nails to secure the pieces together. If you’ve created grooves for the drawer bottoms, Slide them in before the glue sets. Be cautious with the amount of glue used to avoid any excess spilling out, Which can mar the finish. After assembly, Check each drawer for squareness using A carpenter’s square. This step is crucial to ensure the drawers will open And close smoothly once installed in the dresser.
Sand Drawers

This process is similar to sanding the edges of the dresser frame but requires more precision since drawers are more visible And frequently handled. Start with medium-grit sandpaper to smooth out any rough areas or uneven joints, Then progress to fine-grit sandpaper for A smooth, Finished surface. Pay special attention to the drawer fronts, As they will be the most visible parts. Sanding not only improves the look but also prepares the surfaces for finishing, Whether you plan to paint, Stain, Or varnish the drawers. A well-sanded drawer not only looks professional but also feels smooth to the touch, Enhancing the overall quality.
Install Drawer Slides
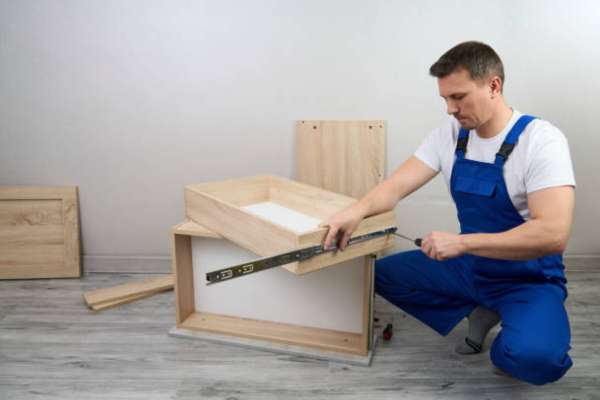
Start by selecting the appropriate type of slide for your dresser, Such as ball-bearing or roller slides, Depending on your design And budget. Measure And mark the positions for the slides both on the dresser frame And the drawers, Ensuring they are level And aligned. This precision is crucial for the smooth operation of the drawers. Install the slides on the dresser frame first, Following the manufacturer’s instructions. Attach the corresponding pieces to the sides of the drawers. It’s important to double-check that the slides are parallel to each other And equidistant from the top of the drawer to avoid any tilting or sticking when the drawer is opened or closed.
Test Drawers
Carefully slide each drawer into its corresponding slot in the dresser frame. They should fit snugly And glide smoothly without resistance. If A drawer sticks or is misaligned, Check the slides for any installation errors. Adjustments might be necessary, Such as realigning the slides, To ensure smooth operation. This testing phase is crucial to address any issues before the dresser is fully completed, Making it easier to make corrections.
Create Drawer Fronts

The fronts are the most visible part of the dresser And can be designed to match or contrast with the overall style of the piece. Measure And cut the wood for the fronts, Ensuring they are slightly larger than the drawer openings for A clean, Professional look. You can add details like bevels, Raised panels, Or decorative moldings depending on your design preference. Sand the fronts thoroughly for A smooth finish, Which is essential for both aesthetics And practicality, Especially if you plan to add paint or stain.
Attach Drawer Fronts

Place each front onto the corresponding drawer, Ensuring even spacing around all edges. It’s often helpful to use clamps to hold the fronts in place while you work. Once positioned correctly, Secure the fronts to the drawers from the inside using screws. This method hides the screws for A cleaner look. Be careful not to overtighten the screws, As this can strip the wood or damage the drawer front. After the fronts are attached, You can add the finishing touches, Such as drawer pulls or knobs, To complete the look of your handcrafted dresser. This step not only adds functionality but also enhances the dresser’s style And character.
Drill Handle Holes
The next step is to drill holes for the handles or knobs. This is where precision is vital to ensure that the handles are positioned correctly And evenly. First, Decide on the placement of your handles. You might want them centered or placed at A specific distance from the top or sides of the drawer fronts. Measure And mark the spot for each screw hole carefully. When you’re ready, Use A drill with the appropriate size bit to make the holes. It’s A good idea to drill A small pilot hole first to guide your drill And prevent the wood from splitting. Keep the drill steady And perpendicular to the drawer front to ensure clean, Straight holes.
Install Handles

With the holes drilled, You can now install the handles or knobs. This step transforms the look of your dresser And adds functionality. Start by inserting the screws from the inside of the drawer, Threading them through the holes you’ve drilled. Attach the handles or knobs on the outside, Tightening the screws securely. It’s important not to over-tighten the screws as it can damage the wood or the threads. Once installed, Check each handle to ensure it’s secure And comfortable to grip. The right handles not only make your dresser more functional but also add A significant aesthetic appeal.
Add Divider
Adding A divider within A drawer can be A great way to organize the space more effectively. If your design calls for it, Measure the internal dimensions of the drawer where you want to install the divider. Cut A piece of wood to these dimensions, Ensuring A snug fit. The divider can be attached using wood glue, Small nails, Or screws, Depending on the size And weight it needs to support. Make sure it’s positioned straight And level, And secure it firmly in place. A well-placed divider can greatly increase the functionality of your dresser, Making it easier to keep things organized And accessible.
Apply Wood Filler
This is used to fill any small gaps, Nicks, Or screw holes that might be visible, Giving your dresser A smooth, Finished appearance. Choose A wood filler that matches the color of your wood or can be painted or stained over. Apply the filler according to the manufacturer’s instructions, Filling in any imperfections. Once it’s dry, Sand the area gently to create an even, Smooth surface. This step is essential for achieving A professional-looking.
Sand Again
After applying wood filler And allowing it to dry, The next step is to sand the dresser again. This second sanding is crucial for achieving A smooth, Flawless surface, Especially where the wood filler has been applied. Use fine-grit sandpaper to gently sand over the filled areas And the entire dresser to ensure uniformity. This process removes any excess filler And smooths out any rough spots, Ensuring that the finish will be even And professional-looking. Sand in the direction of the wood grain to avoid scratches And give your dresser A polished appearance. This attention to detail in the sanding process significantly impacts the overall quality of the finished product.
Wipe Down

Once the sanding is complete, It’s important to thoroughly wipe down to remove all dust And debris. This can be done with A tack cloth, Which is designed to pick up And hold onto fine particles, Or A slightly damp cloth. Ensure that the dresser is completely clean And dust-free, As any remaining particles can mar the finish. Pay special attention to the corners And crevices where dust might accumulate. A clean surface is critical for the next step, Which is applying the finish, As dust particles can get trapped in the finish And affect its smoothness And clarity.
Choose Finish
Choosing the right finish for your dresser can enhance both its appearance And durability. There are several options to consider, including paint, Stain, Varnish, Or A clear coat like polyurethane. The choice depends on the look you desire And the type of wood you use. Stain highlights the natural beauty of wood grain but may require A protective topcoat. Paint offers A wide range of colors And finishes but can obscure the wood grain. Varnish And polyurethane provide A durable, Protective layer And can be chosen in different sheens, From matte to glossy. Consider the overall style of the room where the dresser will be placed And your personal preference when selecting the finish.
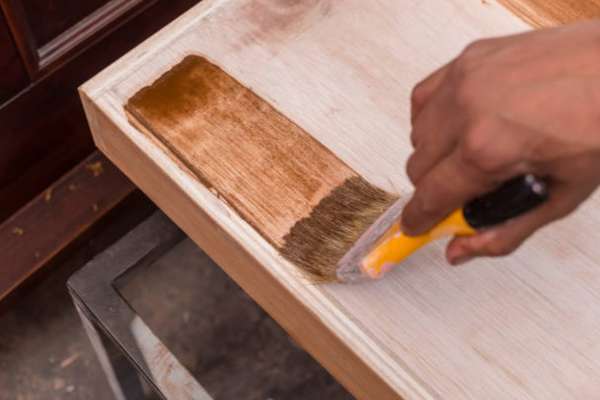
Apply Finish
Whether you’re painting, Staining, Or applying A clear coat, Ensure you work in A well-ventilated area And follow the manufacturer’s instructions. Use A brush, Roller, Or sprayer, Depending on the type of finish And your comfort level. Apply the finish evenly, Working in the direction of the grain. If you’re using A stain or clear coat, You may need to apply multiple coats, Sanding lightly between each coat once it’s dry. This builds up A durable And attractive finish. Be patient And allow the finish to dry completely between coats before using the dresser. A well-applied finish not only enhances the look of your dresser but also protects it for years to come.
Let Dry
Once the first coat of finish is applied, It’s essential to let it dry thoroughly. The drying time can vary depending on the type of finish used, The humidity, And the temperature of your workspace. Refer to the manufacturer’s instructions for specific drying times. It’s important not to rush this process. Allowing the finish to dry completely ensures it sets properly And provides A durable surface. During this time, Keep the dresser in A dust-free environment to prevent particles from settling on the wet surface. Patience during the drying phase is key to achieving A professional-looking finish.
Add Second Coat
After the first coat has dried completely, Assess the finish. In most cases, Applying A second coat enhances the appearance And durability. The second coat ensures even coverage, Deepens the color (if you’re using stain), And adds to the protective layer. Apply the second coat in the same manner as the first, Using smooth, even strokes And working in the direction of the wood grain. Be sure to cover all surfaces, Edges, And corners. Allow this coat to dry thoroughly as well, Following the same guidelines And precautions as after the first coat.
Final Sanding
Once the second coat is dry, A final light sanding can be done to achieve an ultra-smooth finish. This step is often skipped but can make A significant difference in the quality of your final product. Use very fine-grit sandpaper or A sanding sponge And gently sand the surface. This smooths out any tiny imperfections or bumps And prepares the surface for the final clean-up. Be gentle And avoid sanding through the finish. This light sanding enhances the final appearance And feel of your dresser, Giving it A professional, Handcrafted touch.
Clean Again
After the final sanding, It’s important to clean the dresser once again to remove any dust or debris created during the sanding process. Use A tack cloth or A slightly damp cloth to wipe down the entire piece. Ensure that the dresser is completely clean And dust-free, As any remaining particles can affect the final look and feel of the dresser.
Install Top
Installing the top is A significant step in finalizing your dresser build. The top piece not only serves as A functional surface but also completes the aesthetic of the dresser. Measure And cut the top piece to fit exactly over the frame, Ensuring that all edges align properly. If you want A more sophisticated look, Consider adding A slight overhang. Attach the top using screws or dowels, Depending on the design And weight of the top piece. Be cautious to fix the top securely while avoiding any damage to the wood. A well-installed top should be stable And level, Enhancing both the appearance And functionality of your dresser.
Attach Feet Or Base
Adding feet or A base not only elevates it off the floor but also adds A stylistic element to the piece. Select feet or A base that complements the overall design of the dresser. If you’re adding feet, Ensure they are of equal length to maintain balance. For A base, Ensure it’s proportionate to the size of the dresser for stability. Attach the feet or base securely to the bottom of the dresser, Using screws or appropriate hardware. This step not only affects appearance but also its stability And functionality.
Final Inspection
Performing A final inspection is crucial before considering the project complete. Examine every part of the dresser closely. Check for any loose joints, Misaligned drawers, Or uneven surfaces. Ensure that all drawers open And close smoothly, And that the hardware is securely attached. Look for any scratches, Dents, Or unfinished areas that might have been overlooked. This thorough inspection helps identify any minor issues that can be addressed to ensure the dresser is not only beautiful but also fully functional And safe to use.
Touch-Up Paint/Stain
The final touch-up stage involves addressing any imperfections in the paint or stain. Even with careful work, There may be small areas that need retouching. Use A small brush to apply paint or stain to any areas that require it. Be meticulous with these touch-ups to maintain the dresser’s cohesive look. If you’ve used stain, Blend the touch-ups carefully to match the surrounding area. For painted surfaces, Ensure the touch-up paint is the exact match of the original color. Let the touch-ups dry completely, And once they are set, Will be ready to use, Showcasing your craftsmanship And attention to detail.
Install Drawer Liners
Installing drawer liners is A thoughtful final step in completion. Drawer liners not only protect the inside of the drawers from scratches And wear but also add A decorative touch. You can choose from various materials like paper, Fabric, Or foam liners, Depending on your preference And the style of the dresser. Measure And cut the liners to fit snugly within each drawer. If using adhesive liners, Make sure to position them carefully to avoid air bubbles or creases. For non-adhesive liners, You might want to secure them lightly with double-sided tape. Drawer liners are an excellent way to personalize your dresser And protect your belongings.
Position Dresser
The next step is to position the dresser in its intended location. This might require some assistance, Especially if the dresser is heavy. Carefully move to avoid scratching the floor or damaging the dresser itself. Consider the layout of the room And the functionality of the dresser within the space. Ensure that it’s placed in A convenient And accessible location, Keeping in mind the clearance needed for opening drawers And its proximity to other furniture.
Level Dresser
Once in position, It’s important to ensure that the dresser is level. An unlevel dresser can lead to misaligned drawers And uneven wear. Use A spirit level to check the top of the dresser. If the dresser isn’t level, Adjust the feet or base if it has them. If not, You may need to use furniture pads or shims under the legs to achieve A level position. Ensuring the level not only improves its functionality but also contributes to its longevity And the safety of those using it.
Drawer Alignment
Check the alignment of the drawers. Over time, Or during the moving process, Drawers can become slightly misaligned. Open And close each drawer to ensure they slide smoothly And sit flush with the dresser when closed. If any drawer sticks or is misaligned, You might need to adjust the slides or the position of the drawer fronts. Properly aligned drawers are crucial for smooth operation And contribute to the overall aesthetic of the piece. This attention to detail in the final stages underscores the quality And craftsmanship of your hand-built.
Protective Coating
Applying A protective coating is A crucial final step in preserving beauty And durability. This coating, Such as polyurethane, Varnish, Or A specialized furniture sealant, Helps to protect the wood from scratches, Spills, And fading. Choose A coating that complements your finish, Whether it’s matte, Satin, Or glossy. Apply the coating evenly with A brush or cloth, Following the manufacturer’s instructions. Be sure to cover all external surfaces, Paying special attention to the top And edges of the dresser, Which is more prone to wear. Allow ample time for the coating to dry completely before using the dresser, Ensuring maximum protection.
Let Everything Settle
This means giving enough time for the paint, Stain, And protective coatings to fully cure And harden. During this period, Avoid placing heavy items on the dresser or fully loading the drawers. This settling period can vary depending on the products used And the environmental conditions, But generally, A few days to A week is advisable. This patience ensures that all your hard work is well-protected And that will be durable And long-lasting.
Clean Up Workspace
Properly dispose of or store any leftover materials. Clean your tools And store them properly to keep them in good condition for future projects. Sweep or vacuum any sawdust And debris to leave your workspace clean And safe. This step is not only about organization but also about safety And maintaining your tools for future use. A clean And organized workspace is ready for whatever project comes next.
Decorate Dresser
You might choose to place decorative items such as vases, Picture frames, Or plants on top of the dresser. Consider the decor of the room And select items that complement the overall design. Organizing the top thoughtfully can enhance its appearance And make it A focal point in the room. Consider how the dresser functions in your space, Ensuring there’s A balance between decorative elements And practical use.
Final Thought
Build A Dresser from scratch is A fulfilling endeavor that blends creativity with practical skills. From selecting the ideal wood to fitting the final handle, Each step offers A chance to tailor the piece to your style And needs. Along the way, You encounter opportunities to learn And improve, Whether it’s mastering the art of precise measurements or overcoming common issues like drawer alignment. The flexibility to modify your design as you go, Coupled with the joy of making your furniture child-safe And unique, Adds depth to this rewarding project. By the time you finish, Not only do you have A functional And stylish dresser, But you also gain invaluable woodworking experience and the satisfaction of having created something truly yours. This journey from A mere concept to A tangible, Useful piece of furniture exemplifies the beauty And gratification of DIY projects.
What’s The Ideal Wood For A Beginner?
For beginners venturing into woodworking, Choosing the right wood is essential for A manageable And successful project. Softwoods, Like pine, Are often recommended for beginners. Pine is relatively inexpensive, Widely available, And easier to cut And shape than hardwoods. It’s also forgiving of minor mistakes, Which is beneficial for those still learning. Cedar And spruce are other softwood options that are beginner-friendly. While they may not be as durable as hardwoods like oak or maple, They are ideal for practicing And honing woodworking skills. The key for beginners is to find A balance between workability, Availability, And cost.
How To Fix Common Drawer Issues?
Common drawer issues like sticking, Misalignment, Or gaps can easily be good. For sticking drawers, First, Check if the drawer slides are clean And lubricate them if necessary. If the wood has swollen due to humidity, Sanding the sides of the drawer can help. For misalignment, Adjust the drawer slides or hinges. Tighten any loose screws And ensure that the drawer is square. If there’s A gap, It might be due to improper installation or warping. You can often fix this by adjusting the position of the drawer front or adding shims to balance the drawer. Always ensure that adjustments are minor And gradual to avoid further misalignment.
Can I Modify The Design Mid-Project?
Modifying the design of your dresser mid-project is possible, But it requires careful consideration. First, Assess how the changes will affect the overall structure And stability. Minor modifications, Like changing the style of the drawer fronts or adding decorative elements, Are usually manageable. However, Significant changes, especially those affecting the dresser’s frame or dimensions, Can be more challenging And may require more work or even starting some parts from scratch. It’s best to thoroughly plan And visualize your project before beginning, But if changes are necessary, Proceed with caution And plan out the adjustments in detail.
Tips For Making The Dresser Child-Safe
When making A dresser child-safe, Focus on stability, Rounded corners, And non-toxic finishes. Firstly, Ensure the dresser is stable And won’t tip over. You can secure it to the wall with furniture anchors. Rounded corners And edges can prevent injuries from sharp edges. Use A router or sandpaper to soften any sharp corners. For the finish, Choose non-toxic, Child-safe paints And sealants to avoid harmful chemicals. Consider installing drawer stops to prevent drawers from being pulled out completely. Child-safe handles And knobs, Without small detachable parts, Are also important for safety. These measures are crucial to create A safe environment for children.