
Embarking on A DIY dresser project offers A rewarding blend of creativity And practicality, And our guide on Simple Ways How to Build a DIY Dresser is the perfect starting point. Not only does building A dresser yourself allow for A customized design tailored to your space And style, But it also imparts A sense of accomplishment. This article will delve into the essentials of dresser construction, Ensuring even beginners can confidently undertake this project. Whether you’re looking to save money, Unleash your creative flair, Or simply enjoy the process of crafting something with your own hands, Learning how to build A dresser is A fulfilling endeavor that brings tangible benefits to your home.
Why Build Your Own Dresser?
Building your dresser is A fantastic way to add A personal touch to your home decor. It’s not just about creating A piece of furniture. It’s about the satisfaction of crafting something unique that perfectly fits your space And style. When you build your living room dresser, You have complete control over the design, Size, And color, Ensuring it meets all your storage needs while also blending seamlessly with your existing decor. Moreover, It can be A more cost-effective option compared to buying A pre-made dresser, And the skills you gain during the process are invaluable. The experience of building your dresser from scratch also offers A wonderful opportunity for learning And personal growth, Making it A fulfilling And practical project.
Materials And Tools To Build A Dresser
- Wood (Pine, Plywood, Or Mdf Are All Good Options)
- Circular Saw
- Jigsaw
- Drill
- Sander
- Wood Glue
- Clamps
- Screws Or Nails
- Drawer Slides
- Drawer Pulls
- Paint Or Stain (Optional)
Here Are Some Simple Ways How To Build A DIY Dresser
Create A Plan
Before diving into the actual construction of your DIY dresser, The first step is to create A comprehensive plan. This involves deciding on the size, Design, And functionality of your dresser. Consider the space where will be placed And how much storage you need. Sketch A blueprint of your design, Including dimensions for each part. This plan will serve as your roadmap, Guiding you through each step of the build process. Planning helps in estimating the materials needed, Ensuring you have everything on hand before you start, Which saves time And reduces the likelihood of errors.
Cutting The Wood

Once your plan is set, The next step is cutting the wood according to the measurements in your blueprint. This step requires precision, As accurate cuts are essential for the pieces to fit together correctly. Use A high-quality saw for clean cuts, And always double-check measurements before cutting. If you’re A beginner, Consider using pre-cut wood pieces available at hardware stores, Which can simplify this step. Remember, Safety is paramount, So wear protective gear And work in A well-ventilated area.
Sanding

After cutting the wood, The next phase is sanding. Sanding smoothens the surface of the wood, Removes any rough edges or splinters, And prepares it for painting or staining. Start with coarse sandpaper to remove the rough patches quickly And then switch to finer grit sandpaper for A smooth finish. This step is crucial for achieving A professional look And feel for your build dresser. It’s also A good time to wipe down the wood with A damp cloth to remove any sawdust before moving on to the next step.
Assembling The Frame
Assembling the frame is where your dresser starts to take shape. Begin by laying out all the cut pieces according to your plan. Attach the sides, Bottom, And top of the dresser first, Ensuring everything is square And aligned. Use wood glue And screws for A sturdy assembly. Once the frame is assembled, Add the back panel And then the drawer rails. This step requires patience And attention to detail, As A well-assembled frame is key to the durability And functionality of your build dresser. Remember to regularly check that everything is aligned correctly as you progress.
Attaching The Back

Once the frame is assembled, The next step is to attach the back panel. This panel adds stability And rigidity to the structure. Choose A sturdy material for the back, Like plywood or MDF, And cut it to match the size of the dresser’s frame. Attach it using nails or screws, Ensuring it’s flush And secure. This step not only reinforces but also provides A clean, Finished look from all angles. Be precise with your measurements And cuts, As A well-fitted back panel significantly enhances the overall strength And durability.
Building The Drawers

Building the drawers is A crucial aspect of your project. Start by cutting the wood for the drawer sides, Front, Back, And bottom based on your initial plan. Assemble each drawer carefully, Ensuring that the pieces fit together snugly. Use wood glue And screws for A robust construction. The key here is to make sure that the drawers are perfectly square And the same size, Which will allow them to slide in And out smoothly. Take your time with this step, As well-built drawers are central to the functionality of your dresser.
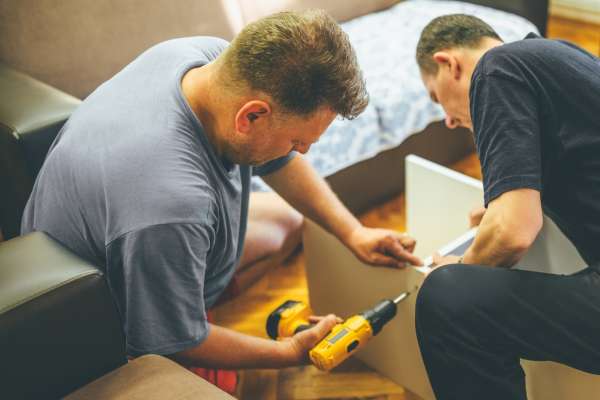
Installing Drawer Slides

Installing drawer slides is A step that requires precision And attention to detail. Drawer slides allow your drawers to open And close smoothly And are crucial functionality. First, Measure And mark where the slides will be placed on both the dresser frame And the drawers. Ensure that these are perfectly aligned And level. Attach the slides with screws, And then carefully slide the drawers into place to check for smooth operation. Adjust as necessary to ensure a perfect fit. This step might seem challenging, But it’s essential for creating A high-quality piece of furniture.
Attaching Drawer Faces

This is where your dresser starts to look complete. Measure And cut the faces from your chosen material, Ensuring they align perfectly with the size of your drawers. Before permanently attaching them, Temporarily place the faces on the drawers to check for alignment And even spacing. Once satisfied, Use wood glue And screws to attach them securely.
Adding Drawer Handles Or Knobs

Once the drawer faces are securely attached, The next step is adding handles or knobs, Which are essential for functionality, And also add A decorative touch. Choose handles or knobs that complement the style of your dresser And fit comfortably in your hand. Mark the position of the handles or knobs carefully on each drawer, Ensuring they are evenly placed for A uniform look. Drill the holes, And then attach the handles or knobs using screws. This step is relatively straightforward but can dramatically change the look, Allowing for personalization And character.
Finishing Touches To The Frame
With the structural work complete, It’s time to focus on the finishing touches to the frame of your dresser. This involves checking for any imperfections, Such as nail or screw holes, And filling them with wood filler. Once the filler is dry, Sand these areas smooth to ensure an even surface. This is also the time to add any decorative elements or trim to the frame, Enhancing its aesthetic appeal. These finishing touches are important for achieving A polished And professional look, Making it not just functional but also A stylish addition to your room.
Sanding For Finishing

Before applying any finish, It’s essential to sand the entire dresser thoroughly. Start with A medium-grit sandpaper And then progress to a finer grit for A smooth finish. Sanding prepares the wood by creating A surface that the finish can adhere to effectively. It also removes any last imperfections, Ensuring A flawless final appearance. Make sure to sand all surfaces evenly, Including the corners And edges. After sanding, Wipe down the dresser with A damp cloth to remove all dust, Preparing it for the final finishing step.
Adding A Protective Coating
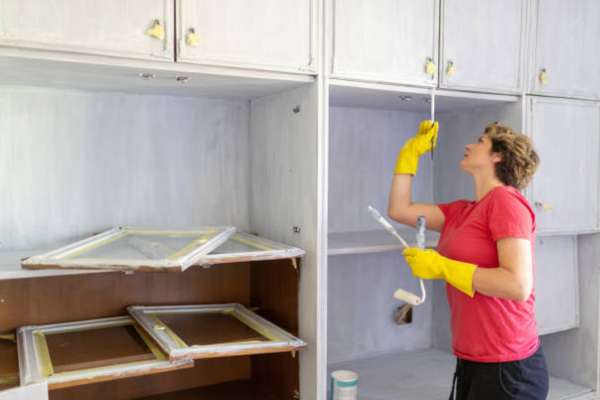
The step in building your DIY dresser is applying A protective coating. This could be paint, Stain, Or A clear sealer, Depending on the look you desire. A protective coating not only enhances the appearance of your dresser but also protects the wood from wear And tear, Ensuring longevity. Apply the finish evenly, Following the manufacturer’s instructions, And allow it to dry completely. If using paint or stain, You may need multiple coats to achieve the desired color And coverage.
Attaching The Top
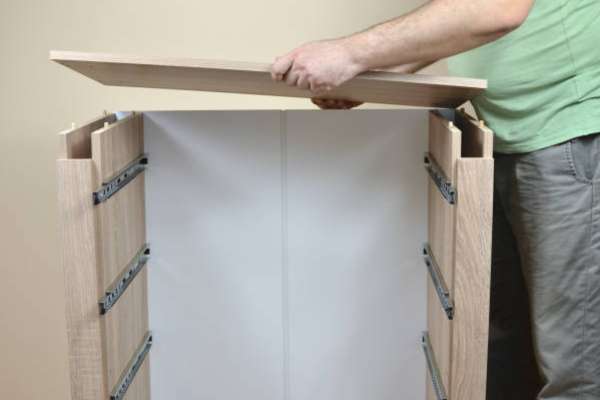
The next significant step is attaching the top piece. This component not only completes the structure but also provides A solid surface for your dresser. Choose A top that complements the overall design And is sturdy enough to withstand daily use. Place the top piece on the frame, Ensuring it’s perfectly aligned on all sides. Secure it using wood screws, Drilling from underneath to keep the screws hidden for A cleaner look. It’s crucial to ensure the top is attached securely, As it will bear the weight of anything placed on the dresser.
Installing The Drawers

With the frame And top in place, It’s time to install the drawers. Slide each drawer into its corresponding slot on the drawer slides installed earlier. Make sure they fit snugly And glide smoothly. If there’s any sticking or misalignment, Adjust the slides accordingly. This step is satisfying as you see the functional elements of your dresser come together. The smooth operation of the drawers is essential for A high-quality piece, So take your time to get this right.
Quality Check
Once the drawers are installed, Conduct A thorough quality check of the entire dresser. Inspect each joint, Ensuring they are tight And secure. Open And close each drawer to check for smooth operation And proper alignment. Look for any sharp edges or splinters that might need sanding. This quality check is crucial to ensure not only the dresser’s functionality but also its safety. Any issues found should be addressed immediately to guarantee the longevity And reliability of your DIY project.
Final Touch-Ups
The last step involves final touch-ups. This might include applying additional coats of paint or finish, Tightening any loose screws, Or adjusting drawer handles for better alignment. If you’ve painted the dresser, You may want to add A final layer of sealant for extra durability. It’s also A good opportunity to clean the entire dresser, Removing any fingerprints, Dust, Or debris from the building process. These final touch-ups are what transform your project from A simple DIY build into A polished, Professional-looking piece of furniture. Once completed, Your handmade one is ready to be proudly displayed And used in your home, A testament to your craftsmanship And dedication.
Clean Up And Placement
The next step is clean-up And placement. Clear away all tools, Materials, And debris from your work area. A clean And organized space is important for safety And for maintaining the condition of your tools. Once the area is tidy, It’s time to move the dresser to its designated spot. Be careful during transportation to avoid any damage. Place it in A suitable location that complements the room’s layout And is accessible for use. Adjust the position to ensure it’s level And stable. This final step of placement transforms your project from A work-in-progress into A functional piece of your home.
Final Thoughts
To Build A Dresser from Scratch is A rewarding project that combines craftsmanship, Creativity, And functionality. From planning And selecting the right wood to cutting, Sanding, And assembling, Each step offers A unique opportunity to create A piece that’s not just practical but also A reflection of your style. Customizing it for specific needs, Like A child’s room, Adds another layer of satisfaction. While the process requires attention to detail, Patience, And safety consciousness, The result is A durable, Stylish, And self-made piece of furniture. This guide has hopefully demystified the process And inspired you to embark on this fulfilling journey, Adding A handcrafted charm to your home. The key to A successful DIY dresser lies in careful planning, Steady work, And avoiding common mistakes, Ensuring your creation stands the test of time And use.
What’s The Ideal Wood For A Beginner?
For beginners, The ideal wood for building A dresser is pine. Pine is affordable, Readily available, And relatively easy to work with. It’s soft enough for easy cutting And shaping, Yet sturdy enough for furniture making. Pine takes paint And stains well, Allowing for A variety of finishing options. Other beginner-friendly options include poplar And some varieties of plywood, Which are also forgiving for first-time projects. When selecting wood, Consider its workability, Cost, And the final look you desire for your dresser.
How Can I Customize My Dresser For A Child’s Room?
Customizing for A child’s room can be both fun And creative. Start by choosing bright And playful colors that match the room’s theme or your child’s favorite hues. Consider using non-toxic, Child-safe paints And finishes. Adding whimsical knobs or handles, Like ones shaped like animals or stars, Can make the dresser more appealing to A child. For added functionality, You might incorporate lower drawers that are easily accessible to them. Decorative stenciling, Decals, Or even A chalkboard paint section for drawing can add A unique And personal touch, Making the dresser not just A storage piece but also A source of creativity And joy for your child.
What Are The Most Common Mistakes To Avoid?
- Not Measuring Accurately: Precision is key in furniture making. Inaccurate measurements can lead to misaligned or ill-fitting parts.
- Skipping Sanding: Proper sanding is crucial for A smooth finish. Skipping this step can result in A rough, Unprofessional appearance.
- Ignoring Wood Movement: Wood expands And contracts with changes in humidity. Not accounting for this can cause cracks And warping.
- Using Inadequate Tools: Using the wrong or low-quality tools can affect the precision And quality of your work.
- Overlooking Safety: Not wearing proper safety gear or neglecting safe working practices can lead to accidents.
- Rushing The Process: Take your time, Especially if you’re A beginner. Rushing can lead to mistakes And A lower-quality finished product.