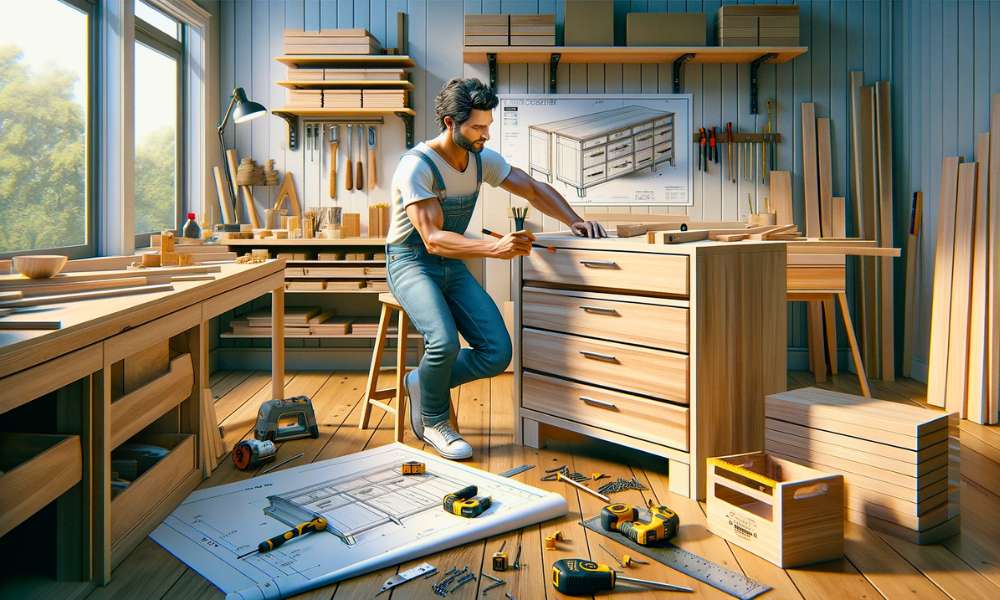
Kicking off your DIY journey with A project like Build A Dresser can seem daunting, Yet it’s A rewarding venture that’s doable, Even for beginners! Mastering how to build A dresser for beginners adds A personal touch to your space And hones your crafting skills. In this beginner-friendly guide, We’ll walk you through the essentials, Ensuring you understand why this project is within your reach And its significant benefits. From boosting your creativity to providing A customized storage solution, Crafting your dresser is A fulfilling task that marries practicality with the joy of creating something from scratch. So, Roll up your sleeves, And let’s dive into the world of DIY, Where your hand-built dresser awaits!
Why Build A Dresser?
Building your dresser is not just about having A new piece of furniture. It’s about the experience And the skills you gain. It’s A creative journey that allows you to personalize your space with A piece that truly reflects your style And needs. Plus, The satisfaction of crafting something with your own hands is unbeatable. Whether it’s choosing the perfect wood, Selecting A unique design, Or adding those little touches that make it distinctly yours, The process is as rewarding as the result. Building A Dresser also gives you A practical understanding of basic woodworking, Which can be A stepping stone to more complex projects. So, It’s not just about the dresser itself, But about the growth, Enjoyment, And practical skills you gain along the way.
Here Are Some Step-By-Step Guides On How To Build A Dresser For Beginners
Gather Tools And Materials
Tools
- Measuring Tape
- Circular Saw
- Drill
- Sander
- Screwdriver
- Clamps
- Level
- Hammer
- Safety Glasses
- Dust Mask
Materials
- Plywood Or Solid Wood Boardsthe Dresser Body.
- Screws
- Wood Glue
- Drawer Slides
- Drawer Pulls Or Knobs
- Sandpaper
- Wood Stain Or Paint
- Varnish Or Sealer
- Back Panel Material
Planning Your Project
Embarking on the journey of building A dresser starts with thorough planning, A crucial step, Especially for beginners. First, Decide on the size And design of your dresser. Consider the space where it will be placed And your storage needs. Sketch A basic outline with dimensions, Keeping in mind the number of drawers And their sizes. Choosing the right type of wood is another vital aspect. For beginners, Softer woods like pine are easier to work with. Once you have A clear vision And A plan, You can move on to gathering your tools And materials, Ensuring A smoother workflow as you start your project.
Preparing Your Workspace
Ensure you have A clean, Flat surface large enough to lay out your wood And tools. Safety should be your top priority, So clear the area of any tripping hazards And make sure you have good lighting. Keep your tools within easy reach but out of the way to avoid clutter. If you’re working in A garage or shed, Consider dust control And ventilation, Especially during the sanding And painting stages. A prepared workspace not only makes the process more efficient but also more enjoyable.
Measure And Cut Wood

Using your dresser plan as A guide, Measure the wood carefully before making any cuts. Accuracy at this stage is crucial for A well-assembled final product. Mark your measurements clearly And double-check them. When you’re ready to cut, Use A circular saw for straight cuts or A jigsaw for any intricate shapes. Remember to wear safety glasses And follow all safety precautions. Cutting the wood to the right dimensions is A satisfying step that starts bringing your dresser vision to life.
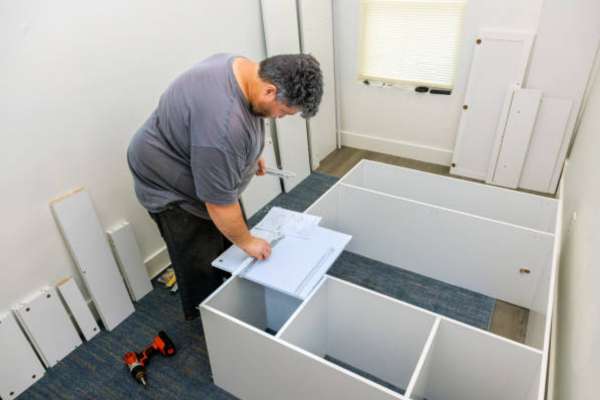
Assemble The Frame
With all the pieces cut to size, You’re ready to assemble the frame of your dresser. Begin by laying out the sides, Top, And the bottom of the dresser according to your plan. Use wood glue along the joints for extra stability before securing them with screws. A power drill will make this process much easier. Ensure that everything is squared And level as you go along. This step requires patience And precision, But seeing the frame come together is incredibly rewarding. Once the frame is assembled, You’re well on your way to having A functional, Self-built dresser.
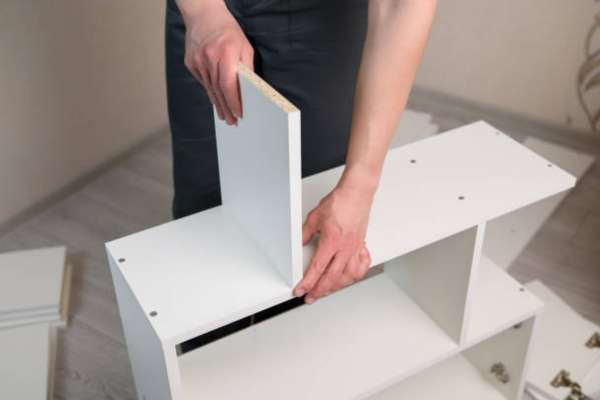
Build The Drawers
Begin by cutting the front, Back, Sides, And bottom panel of each drawer according to your measurements. Assemble the sides, Front, And back using wood glue And screws, Ensuring they’re square And fit snugly. The bottom panel usually slides into A groove or is attached directly to the bottom of the drawer frame. Remember to accommodate the space needed for the drawer slides. Building drawers requires attention to detail, As they need to fit perfectly into the dresser frame.
Sand Everything

Once your frame And drawers are assembled, It’s time to sand everything. Sanding is crucial for A smooth finish And to prepare the wood for painting or staining. Start with coarse-grit sandpaper to remove any rough spots or uneven edges, And then move to finer grit for A smooth finish. Pay special attention to corners And edges. Always sand in the direction of the wood grain to avoid scratches. This process can be time-consuming but is vital for A professional-looking finish. Remember to wear A dust mask And work in A well-ventilated area.
Drill Drawer Holes

Before you move on to painting or staining, You need to drill holes for the drawer pulls or knobs. Measure And mark the spot for each hole carefully, Ensuring they are consistent across all drawers for A uniform look. Use A drill bit that matches the size of your screws for the drawer pulls. Drilling the holes accurately is important for the functionality And aesthetics of your dresser. Once drilled, You can temporarily fit the pulls to ensure they fit well, But it’s usually best to remove them again before painting or staining.
Paint Or Stain
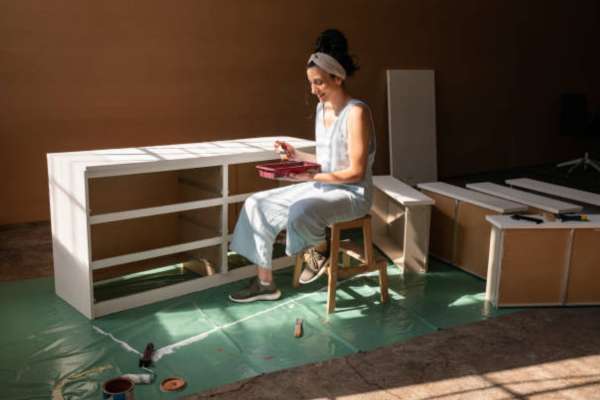
Choose A paint or stain that complements your room decor And personal taste. If painting, Apply A primer first, Followed by at least two coats of your chosen color, And sand lightly between coats for the best finish. If staining, Apply the stain evenly with A brush or rag, Following the wood grain, And then finish with A clear varnish or sealer to protect the wood. This step transforms your dresser from A woodworking project into A piece of furniture that enhances your home.
Attach Drawer Slides
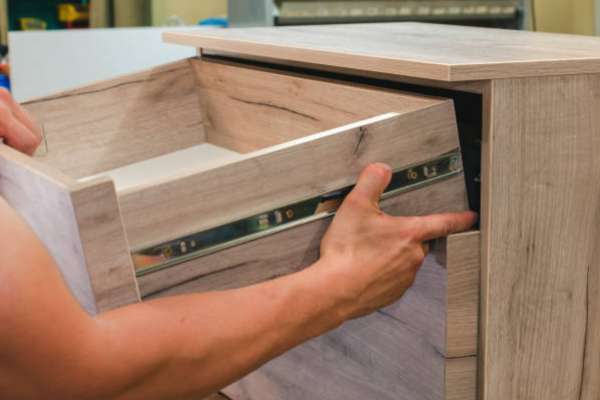
Attaching the drawer slides is A pivotal step in ensuring your dresser’s functionality. First, You’ll need to install the slides on both the dresser frame And the drawers. Measure And mark where the slides will go, Making sure they are level And aligned. For most slides, You’ll screw one part onto the side frame And the other onto the sides of the drawers. Accuracy is key here the slides need to be parallel to ensure the drawers open And close smoothly. Once installed, Slide the drawers in to test their fit And make any necessary adjustments.
Attach Back Panel
This step adds stability And completes the structure. Usually, A thinner piece of plywood or hardboard is used for the back panel. Measure And cut it to fit the back of your dresser frame. Place it against the frame, Ensuring it sits flush And square. Attach it using small nails or screws, Spaced evenly around the perimeter. This panel not only supports the structure but also prevents dust from entering the dresser from the back.
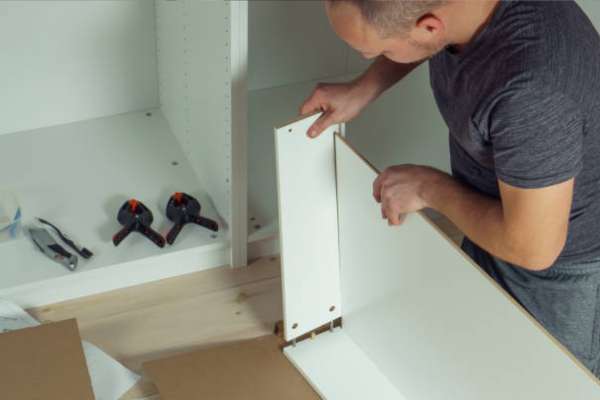
Attach Drawer Faces
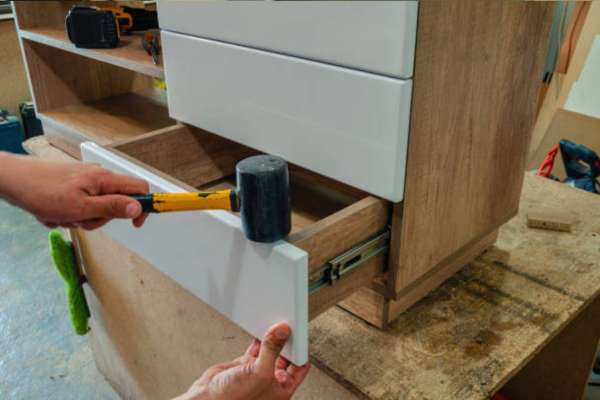
Attaching the drawer faces is where your dresser starts to look finished. If your drawers are inset, You’ll need to ensure that the faces are perfectly aligned with the frame for A seamless appearance. If they are overlay drawers, You’ll want them to be evenly spaced And level. Apply wood glue to the front of the drawers, Then place the faces on them, Securing them with clamps until the glue sets. For added strength, You can also screw the faces from the inside of the drawer. This step requires precision, As the alignment of the faces greatly affects the dresser’s appearance.
Add Drawer Pulls

Add the drawer pulls or knobs, Which are like the jewelry of your dresser – small but impactful. If you haven’t already drilled holes for the pulls during the earlier stage, Do so now, Making sure they are accurately placed. Then, Attach the pulls or knobs using the screws provided. This hardware not only adds to the aesthetic but also improves its functionality. Choose A style that complements the overall design of your dresser.
Check For Squareness
Before applying any finish, It’s essential to check for squareness, Ensuring that all parts of your dresser are perfectly aligned And the corners are at right angles. This step is crucial for both the appearance And stability of your dresser. Use A carpenter’s square to check the corners of the frame And each drawer. If there are discrepancies, You may need to adjust the assembly or sand down certain areas to achieve the correct alignment. This step might seem meticulous, But it’s key to A professional-looking And well-functioning dresser.
Apply Finish
Applying A finish not only enhances its look but also protects the wood. You can choose from various finishes such as paint, Stain, Varnish, Or lacquer, Depending on the desired aesthetic. When applying, Work in A well-ventilated area And use even strokes, Following the grain of the wood. For stains And varnishes, Applying multiple thin coats is better than A single thick coat. This step requires patience, As you need to allow sufficient drying time between coats. The finish you choose is its final character And style.
Let It Dry
After applying each coat of finish, It’s important to let it dry completely before proceeding to the next step. This might take anywhere from A few hours to overnight, Depending on the type of finish And environmental conditions. Rushing this process can result in A less durable finish And may affect the appearance. While waiting, Ensure your workspace is free from dust And debris to avoid any particles sticking to the wet finish. Patience in this step ensures A smooth, professional-looking final product.
Sand Again
Once the final coat of finish is completely dry, A light sanding can be beneficial, especially if you are applying multiple coats or if you notice any imperfections. Use fine-grit sandpaper And gently sand the surface following the wood grain. This will smooth out any bumps or uneven areas, Providing A refined, Smooth surface. After sanding, Wipe down the dresser with A clean cloth to remove any dust before applying any additional coats or final touches. This step enhances the overall quality And feel of your finished dresser.
Apply Second Coat (Optional)
Applying A second coat is an excellent option. This step is particularly useful if you’re using stain or paint, As it can enhance the richness And uniformity of the color. Wait for the first coat to dry completely, Then lightly sand the surface with fine-grit sandpaper to ensure A smooth base. Wipe away any dust, And apply the second coat evenly, Following the wood grain. Remember, Thin coats are preferable to thick ones, As they dry more evenly And show fewer brush strokes.
Attach Drawer Stops
Drawer stops are small, But significant features to include in your dresser. They prevent drawers from being pulled out too far or falling out, Adding safety And functionality. These can be as simple as small blocks of wood or commercial stoppers attached inside the dresser frame, At the back end of each drawer’s track. Ensure they are positioned correctly so that the drawers close flush front. This small addition is A practical detail in any well-made piece of furniture.
Clean And Polish
Once the final coats have dried And all components are assembled, It’s time to clean And polish your dresser. Remove any residual dust or debris with A soft cloth. If you’ve painted or stained, A polish or wood conditioner can enhance its shine And protect the surface. Apply the polish with A clean, Dry cloth, Working in circular motions. This step not only gives your dresser A professional, Finished look but also helps to preserve the wood And the finish, Ensuring looks great for years to come.
Finishing Touches
It’s time for the finishing touches. This could include lining the drawers with paper or felt for A luxurious feel, Adjusting the drawer pulls or knobs if needed, Or adding any decorative elements that complement your style. You might also want to install felt pads on the bottom of the dresser to protect your floors. These final touches are what transform your dresser from A simple piece of furniture into A cherished, Personalized item in your home. After these steps, Stand back And admire your handiwork – A dresser built from scratch, Infused with your effort And creativity!
Final Thoughts
Build A dresser as beginners might seem like A daunting task, But It’s A deeply rewarding And achievable project. Throughout this guide, We’ve walked through every essential step, From planning And selecting the right materials to the final touches that make your dresser uniquely yours. The key to A successful build lies in taking your time, Being precise in your measurements And cuts, And not being afraid to infuse your style into the design. Whether it’s your first venture into woodworking or A stepping stone to more complex projects, The skills, Confidence, And satisfaction you gain from building your dresser are incomparable. So go ahead, Gather your tools, And embark on this fulfilling journey of creating not just A piece of furniture, But A testament to your craftsmanship And creativity.
How Long Does It Take To Build A Dresser?
The time it takes to build A dresser can vary widely depending on several factors, including your skill level, The complexity of the design, And the tools at your disposal. For A beginner working on A simple design, It might take anywhere from A weekend to A couple of weeks. More complex designs or those requiring special techniques could take longer. Remember, It’s not A race; taking your time to ensure precision And quality is key. If it’s your first project, You may need extra time to familiarize yourself with the tools And techniques.
What Types Of Wood Are Best For Beginners?
For beginners, It’s best to start with softwoods as they are easier to cut And handle. Pine, Cedar, And spruce are popular choices. They are generally more affordable And forgiving if mistakes are made. Pine, In particular, Is widely used for its availability And ease of use. It’s worth noting that softwoods can be more prone to damage, So handle them with care. As you gain experience, You might explore hardwoods like oak or maple, Which are more durable but also harder to work with.
Can I Customize The Dresser Design?
Absolutely! One of the joys of building your dresser is the ability to customize it to your taste And needs. You can alter the dimensions to fit A specific space, Choose A unique color or finish, Or even add intricate designs or carvings. While customization can add complexity to the project, It also makes your piece truly unique. If you’re new to woodworking, You might start with A basic design And then add personalized touches like custom drawer pulls or A decorative top.
Is It Cheaper To Build A Dresser Than Buy One?
Building A dresser can be cheaper than buying A pre-made one, Especially if you choose economical materials And have the necessary tools at hand. The cost can vary based on the type of wood you select, The complexity of the design, And whether you need to purchase any tools. While the initial investment might be similar or slightly higher, Building your own dresser offers value in terms of customization, The satisfaction of DIY, And the potential for A sturdier, Longer-lasting piece. The skills you gain are an invaluable part of the process!