
Embarking on A DIY journey to build A 3-drawer dresser can be A rewarding endeavor, Offering more than just A piece of furniture. This guide aims to unravel the process of creating your 3-drawer dresser, A perfect addition to any living room. The significance of A 3-drawer dresser lies not only in its practicality but also in the personal touch it brings to your space. As we explore how to build A 3-drawer dresser, We’ll delve into the essential steps, From planning And design to the final inspection. Whether you’re A beginner or an experienced woodworker, This guide offers valuable insights into choosing the right materials, Ensuring durability, And even eco-friendly options. We’ll discuss how to avoid common pitfalls And adapt the design to your needs. Get ready to transform simple wood into A stunning, Functional masterpiece that resonates with your style And needs.
Why Build 3 Drawer Dresser?
Building A 3-drawer dresser can be A fulfilling project for several reasons. Firstly, It’s A practical addition to any home, Providing ample storage space for Various items. The three drawers offer A balance between size And accessibility, Making it ideal for organizing clothes, Accessories, Or household items. Creating A dresser yourself allows for customization. You can choose the wood, Finish, And hardware to match your style And the decor of your room. This personalization makes the dresser not just A piece of furniture, But A reflection of your taste And craftsmanship. The process of building the bureau can be A valuable learning experience. It’s an opportunity to develop woodworking skills, Understand the intricacies of furniture design, And gain A sense of accomplishment. In A world where mass-produced furniture is the norm, A handcrafted 3-drawer dresser stands out as A unique, Functional work of art.
Importance Of 3 Drawer Dresser In Living Room
The importance of A 3-drawer dresser in the living room extends far beyond its functional purpose of storage. This piece of furniture brings A blend of utility, Aesthetics, And personalization to the heart of your home.
Versatile Storage Solution
The drawers are perfect for decluttering, Providing A discreet space to store A variety of items, From documents And remote controls to toys And craft supplies. By keeping these items neatly tucked away, The dresser helps maintain A clean And organized living space.
Focal Point
With the right design, Materials, And finish, It can complement or enhance the room’s decor. Whether you’re aiming for A modern, Minimalist look or A more traditional, Cozy feel, The dresser can be customized to fit seamlessly into your living space. The top surface also provides A platform for decorative items like vases, Photo frames, Or A collection of books, Adding A personal touch to the room.
Space More Functional
It can serve as A media console, A display for decorative items, Or even A makeshift bar when entertaining guests. This versatility makes the living room not just A place for relaxation, But also A hub for social gatherings And family activities.
Here Are Some Ideas About How To Build A 3 Drawer Dresser
Planning And Design
Planning And design are crucial first steps in building A 3-drawer dresser. This phase sets the foundation for your project. Begin by deciding the dresser’s dimensions, Ensuring it fits comfortably in your intended space while providing adequate storage. Consider drawer size, Depth, And the overall height of the bureau. Sketching A detailed plan or blueprint helps visualize the final product And guides you through each step. Select A design that meets your storage needs and complements your living space’s decor. During the design phase, Think about the type of wood And finishes you’ll use. These choices will affect the dresser’s durability, Appearance, And how it blends with other furniture. Good planning And thoughtful design are key to creating A bureau that is both functional And aesthetically pleasing, Turning A simple piece of furniture into A cherished item in your home.
Gathering Materials And Tools
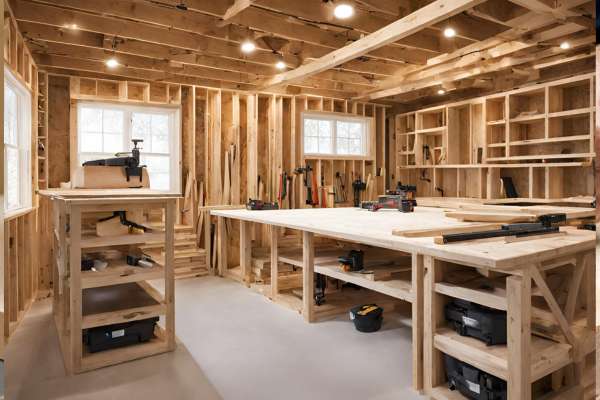
The next step is gathering materials And tools. This stage is about precision And ensuring you have everything needed for the build. Start with choosing the right wood. Common options include pine, Oak, Or plywood, Depending on your budget And desired finish. You’ll also need hardware like screws, Drawer slides, And handles or knobs. Don’t forget adhesives like wood glue And finishing materials such as sandpaper, Paint, Or varnish. When it comes to tools, A saw (hand saw or power saw), Drill, Screwdriver, Measuring tape, Level, And clamps are essential. Consider the quality And condition of your sharp, Well-maintained tools to make for easier And safer work. Having all materials And tools at hand before you start cuts down on interruptions And ensures A smoother building process.
Cutting The Wood
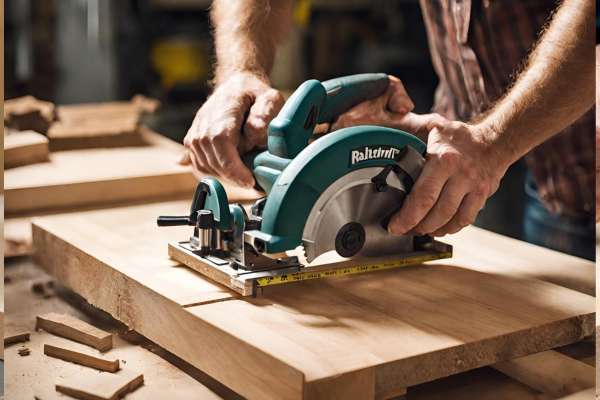
Follow your design plans carefully, Measuring twice before cutting. Accuracy in this step is vital for ensuring all pieces fit together perfectly. Use A saw suitable for your chosen wood type – A table saw is great for straight cuts, While A jigsaw is ideal for any intricate cuts. Remember to consider safety. Wear protective gear like goggles And gloves, And work in A well-ventilated area. Cut each piece for the bureau frame, Drawers, And any decorative elements. This step requires patience And attention to detail. The precision of your cuts will greatly influence the dresser’s overall stability And appearance. It’s not just about following the lines. It’s about crafting the core components of A piece that will be both functional And aesthetically pleasing in your home.
Assembling The Frame
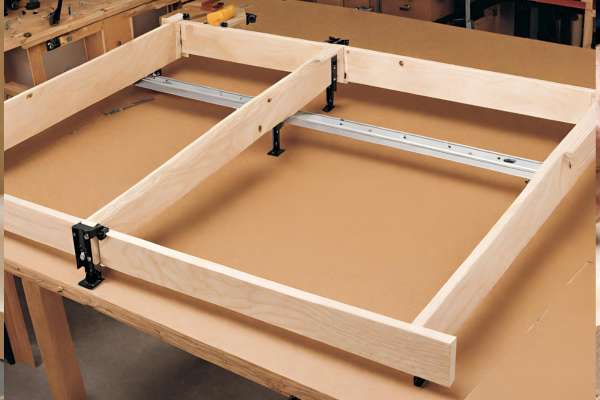
This stage requires careful alignment And securing of each part. Begin by constructing the dresser’s main frame, Ensuring all corners are square And surfaces level. Use clamps to hold pieces in place as you work. Joinery techniques like dowels, Screws, Or brackets add strength to the frame. Each joint should be reinforced with wood glue for extra stability. Pay attention to the frame’s overall squareness, As any misalignment can cause issues with drawer fitting And operation. This stage might be challenging, But it’s also rewarding as you see your bureau take form. Patience And precision in assembling the frame are key.
Making The Drawers
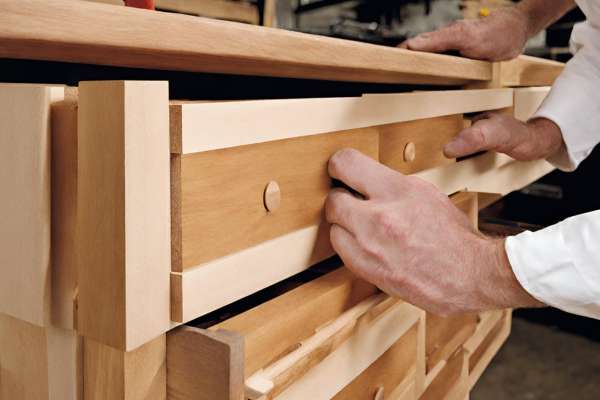
Start by cutting the wood for the drawer fronts, Sides, Back, And bottom, Ensuring each piece aligns with your design specifications. The joints of the drawers are critical for durability. Techniques like dovetail or rabbet joints are popular for their strength. Once the pieces are cut, Assemble the sides, Front, And back of the drawer, Ensuring they are perfectly square. The bottom of the drawer should fit snugly, adding structural integrity. When attaching the drawer faces, Align them carefully with the frame to ensure they open And close smoothly. This step is where the functionality of your dresser comes into play. The drawers should slide in And out effortlessly And hold the weight of the items they’ll store. Quality craftsmanship here means drawers that are not only functional but also enhance the dresser’s overall appearance.
Attaching The Drawers

Begin by installing the drawer slides on the dresser frame, Ensuring they are level And aligned. This precision is key to smooth drawer operation. Attach the corresponding part of the slides to the sides of the drawers. Take your time to ensure that the drawers fit perfectly within the frame And slide in And out without any hitches. This might require some adjustments to achieve the perfect fit. Once the drawers are properly aligned And slide smoothly, You can secure them in place. This stage demands attention to detail, As the ease of use And functionality of your dresser hinges on how well the drawers are fitted. Properly attached drawers not only make the bureau more functional but also prevent future issues like misalignment or sticking.
Finishing Touches
Start by sanding the entire dresser to smooth out any rough edges And prepare the surface for finishing. This step is crucial for A professional-looking finish. Next, Choose A finish that complements the wood And fits the style of your room – this could be paint, Stain, Or varnish. Apply the finish evenly, Following the manufacturer’s instructions, And allow ample time for it to dry. Install the hardware – handles or knobs – on the drawers. Select hardware that matches the style of your bureau And enhances its design. These finishing touches not only improve the dresser’s appearance but also protect the wood And extend the life of your dresser. This final creative step is where your project truly comes together, Reflecting your style And attention to detail.
Final Inspection
Review each aspect of the dresser carefully. Check the stability of the frame, The smooth operation of the drawers, And the overall finish. Ensure that all screws And joints are tight And that the drawers align correctly with the frame. Look for any missed spots in the finish or areas that might need A little extra sanding. This is also the time to make any necessary adjustments or touch-ups. The final inspection isn’t just about quality control. It’s about taking pride in your craftsmanship. A thorough final inspection ensures that the bureau is not only beautiful but also safe And functional, A piece of furniture that will be used And appreciated for years to come.
Final Thoughts
Build A 3-drawer dresser from scratch is A rewarding project that combines practicality, Creativity, And skill. Throughout this journey, From initial planning And design to the final inspection, Each step presents an opportunity to create something both functional And personal. Choosing the right wood, Mastering the art of precise cutting, Assembling A sturdy frame, And carefully crafting And attaching the drawers all contribute to the creation of A unique piece of furniture. Applying the finishing touches And conducting A thorough final inspection ensure that the dresser is not only aesthetically pleasing but also durable And high-quality. This project not only provides additional storage And enhances your living space but also instills A sense of accomplishment And pride in your craftsmanship. Whether you’re A beginner or an experienced woodworker, Build A 3-drawer dresser is A fulfilling endeavor that hones your skills And leaves you with A timeless addition to your home.
What’s The Ideal Wood For A Beginner?
For beginners, The ideal wood to use for building A dresser is pine. Pine is not only affordable but also widely available. It’s A softwood, Which makes it easier to cut And shape, A crucial factor for those just starting in woodworking. Its forgiving nature allows beginners to practice And refine their skills without the frustration of dealing with harder woods. Pine also takes paint And stain well, Giving you the freedom to finish your bureau in various styles. It’s important to note that pine can be prone to dents And scratches, So handle it with care. Other beginner-friendly options include poplar And some types of plywood, Which also offer A good balance of workability And durability.
How Can I Make My Dresser More Durable?
Use high-quality wood, Like oak or maple, Which are known for their strength And longevity. In the construction, Use sturdy joinery techniques like dovetail or mortise And tenon joints, Which provide more stability than simple screws or nails. Protecting the wood with A durable finish, Like polyurethane, Can also help your dresser withstand wear And tear over time. Ensure the drawers are well-supported And slide mechanisms are of good quality to prevent sagging or sticking. Regular maintenance, Like tightening loose screws And knobs, Also plays A crucial role in extending the life of your bureau.
Are There Eco-Friendly Material Options?
Yes, There are eco-friendly material options for building A dresser. Consider using sustainable woods like bamboo, Which is A fast-growing, Renewable resource. Reclaimed wood is another excellent choice, Adding unique character to your bureau while being environmentally responsible. Look for wood that’s certified by organizations like the Forest Stewardship Council (FSC), Which ensures that the wood is sourced from responsibly managed forests. Using water-based finishes And eco-friendly paints minimizes harmful emissions And contributes to A healthier indoor environment.
Can I Modify The Design For More Drawers?
You can modify the design to include more drawers. When doing so, It’s important to consider the overall balance And proportions of the dresser. Ensure the frame is reinforced to support the additional weight And consider the functionality – like how the drawers will be organized And accessed. Adjusting the size of individual drawers or the dresser’s height might be necessary to accommodate the extra drawers. It’s A good idea to sketch out the modified design or use design software to visualize the changes before you start building. This modification allows for additional storage And lets you customize the bureau to your specific needs.
Tips For Dealing With Common Mistakes During Construction?
- Measure Twice, Cut Once: Double-check measurements before cutting to avoid material wastage.
- Use Sharp Tools: Dull tools can cause inaccurate cuts or wood damage. Keep your tools sharp for clean cuts.
- Ensure Squareness: Regularly check that your frame And drawers are square during assembly to avoid misalignment.
- Test Drawer Slides Before Installation: Make sure the drawer slides work smoothly before finalizing the installation.
- Don’t Rush The Finish: Apply finishes in A dust-free environment And allow adequate drying time between coats.
- Plan For Wood Movement: Wood expands And contracts with humidity changes. Account for this in your design to prevent cracking or warping.
- Keep A Clean Workspace: A cluttered workspace can lead to mistakes And accidents. Keep your area clean And organized.