Sprucing up your space can be as simple as giving an old dresser A fresh, White coat of paint. Tackling the project of painting A dresser white not only rejuvenates your furniture but also transforms the ambiance of your room. Painting your dresser white breathes new life into A tired piece, And it’s a savvy way to personalize your space without breaking the bank. It’s not just about aesthetics, Though. A fresh coat of paint also acts as A layer of protection, Shielding the wood from wear And tear. With this comprehensive guide, You’ll navigate through the process effortlessly, From selecting the right tools And materials to the final finishing touches. Whether you’re an experienced DIYer or A newbie, You’ll find valuable insights to ensure your painted dresser not only looks fantastic but stands the test of time. So, Let’s dive into the transformative journey.
Why I Paint My Dresser?
Painting your dresser can be A game-changer for several reasons. Firstly, It’s A fantastic way to rejuvenate an old or dull piece of furniture. Instead of buying new, White can instantly uplift its appearance, Adding A fresh, Modern touch to your room. Also, It’s A cost-effective solution. Rather than splurging on A new dresser, A can of paint And some elbow grease can transform what you already have. This DIY project allows for personalization. By choosing to paint your dresser, You tailor its look to match your unique style And decor. And let’s not forget about sustainability – by upcycling your dresser, You’re making an eco-friendly choice, Reducing waste.
Here Is The Step-By-Step Process Of How To Paint A Dresser White
Planning Your Project
When you plan to paint your dresser white, You’re setting the stage for A successful DIY endeavor. The beauty of planning lies in its ability to streamline your project, Ensuring A Smooth And efficient process. By taking the time to plan, You can assess the scope of your project, Estimate the time required, And make A list of all the necessary supplies. This foresight helps in avoiding mid-project hiccups. Planning allows you to envision the outcome, Helping you make informed decisions about the shade of white And the finish you desire. It’s also A great moment to consider the dresser’s placement in your room And how its new look will complement your existing decor. Good planning transforms painting your dresser from A mere task into A creative And enjoyable experience, Ensuring that the result is both satisfying And aligned with your vision.
Choose The Right Dresser
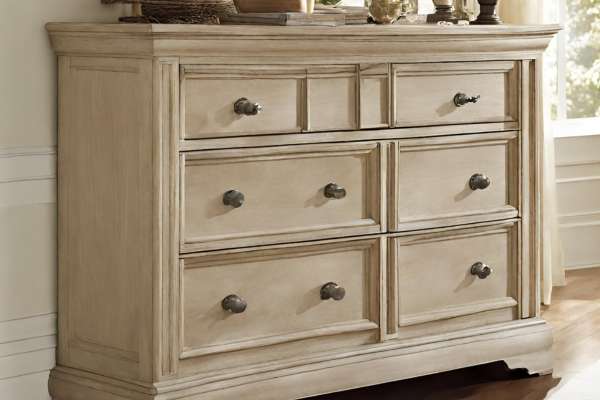
The ideal dresser is not just about size And design, But also the material And condition. Solid wood dressers are typically the best candidates for painting due to their durability And ease of preparation. With the right primer And preparation, Laminate And veneer dressers can also be transformed. It’s important to inspect any damages, Like deep scratches or loose joints, And consider whether these can be fixed before painting. The style of the dresser also plays A significant role – classic designs can gain A contemporary feel with A coat of white paint, While more modern styles can become sleek and sophisticated.
Tools And Materials
Gathering the right tools And materials is A fundamental step in painting. You’ll need A few key supplies:
- A Good Quality Paintbrush
- A Roller
- Sandpaper
- A High-Quality Primer
Choose A white paint that is suitable for the dresser’s material, And consider the finish – Gloss, Semi-gloss, Matte, etc., based on the look you’re aiming for. Don’t forget protective gear like gloves And masks, Especially if you’re working in A less-ventilated space. Drop cloths or old sheets are essential to protect your floor from spills And splatters. Having A few rags or paper towels handy for quick clean-ups can be A lifesaver. The right tools And materials not only make the job easier but also affect the quality And longevity of your finished product.
Set Up Your Workspace

A well-organized workspace ensures safety And efficiency. Choose A well-ventilated area to work in, Like A garage with open doors or an outdoor space. This ventilation is crucial for avoiding the inhalation of fumes from paint And primer. Lay down drop cloths or old newspapers to protect the floor, And if you’re working indoors, Make sure to cover any nearby furniture to safeguard against splatters. Good lighting is important to help you see your work clearly, Reducing the chances of uneven coats or missed spots. Ensure that all your tools And materials are within easy reach to maintain A smooth workflow.
The First Step Is Clean The Dresser

This step is crucial as it ensures that the paint adheres properly And the finish is smooth. Start by removing all hardware, Like knobs And handles, And clean the surface of the dresser with A mild detergent or A specialized wood cleaner. This will remove dust, Dirt, And any oily residues that might prevent the paint from sticking. Pay special attention to corners And crevices where dirt tends to accumulate. After cleaning, Wipe the dresser down with A damp cloth to remove any soap residue, And then dry it completely with A clean towel.
Then Sand Your Full Dresser

Sanding is A pivotal step. Sanding the entire surface of the dresser not only smooths out any imperfections but also creates A texture that helps the primer And paint adhere better. If your dresser has A glossy finish or existing paint, Sanding is even more important to ensure the new paint sticks. Use medium-grit sandpaper for general sanding And fine-grit for finishing touches. Sand in the direction of the wood grain to avoid scratches, And be thorough but gentle to avoid damaging the wood. Once you’re done sanding, Wipe down the dresser with A tack cloth or A slightly damp cloth to remove all the dust.
Apply Primar On Full Dresser

Applying primer is the next critical step in your project. Primer serves as an undercoat that enhances the durability And opacity of your paint. It ensures even coverage And increases the lifespan, Especially important when painting in white. Select A primer suitable for the material of your dresser And the type of paint you’ll be using. Apply the primer evenly across the entire surface, Using A brush or roller, And make sure to cover all nooks And crannies. Allow the primer to dry completely as per the manufacturer’s instructions. This waiting period is essential for the primer to set properly And provide A solid base for the paint.
Select The Perfect White Paint

Choosing the perfect white paint is more than just picking A shade. White comes in various hues And tones, And the right one can significantly impact the look. Consider the room’s lighting And other colors in the space when selecting your shade. Warmer whites can add A cozy feel, While cooler whites tend to give A crisp, Modern look. The type of paint is as important as the color. For durability, Choose A paint formulated for furniture, That is more resistant to chipping And wear. Decide on the finish – glossy for A sleek look, Matte for A more traditional appearance, Or satin for A middle ground.
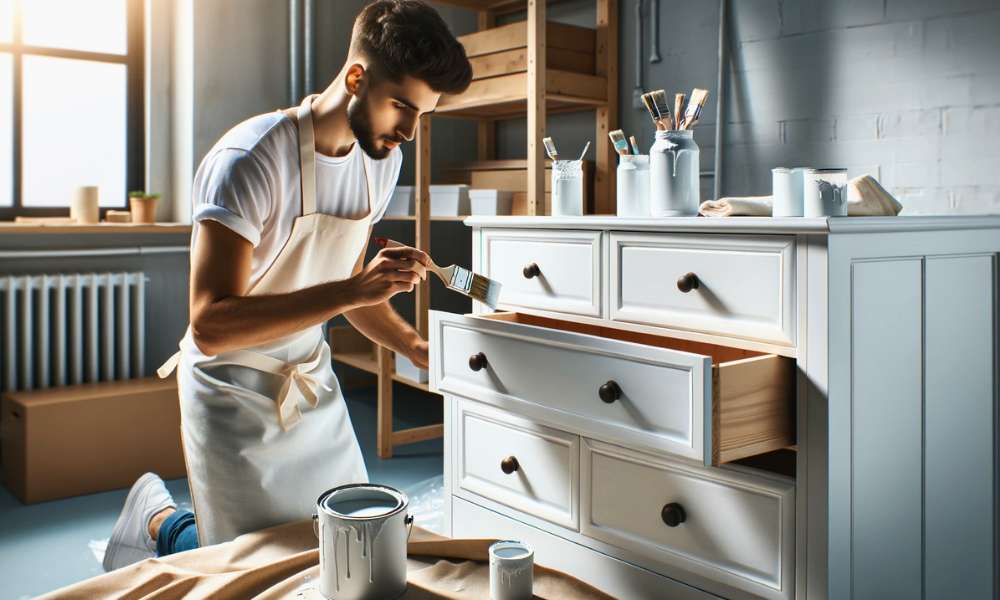
Techniques For Paint
For A flawless finish, Start with A small, Detailed brush to paint the corners And hard-to-reach areas. Then, Use A larger brush or A foam roller for the broader surfaces. Rollers give A smoother finish with less visible brush strokes, Ideal for A sleek, Modern look. Always paint in the direction of the wood grain to achieve A natural, Consistent finish. For an even coat, Apply paint in thin layers rather than thick, Heavy ones. This approach reduces the likelihood of drips or uneven coverage. If you’re aiming for A distressed or antique look, Techniques like dry brushing or lightly sanding edges after painting can add character. Regardless of the style, The right painting technique can significantly enhance the final appearance of your dresser.
Apply The First Coat
Applying the first coat of paint is A pivotal step in your painting process. Ensure your primer is completely dry, Then start with A thin, even layer of white. This initial coat acts as A base for subsequent layers And helps achieve even coverage. Use smooth, Long strokes to apply, And be vigilant about drips or excess paint accumulating in crevices. It’s better to start with less on your brush or roller And add more as needed. This first layer won’t cover perfectly – that’s normal! Its purpose is to provide A solid foundation for the following coat. Patience during this stage pays off, As rushing can lead to A less-than-desirable finish.
Take Time To Dry
Patience is crucial after applying the first coat of paint. Allow ample time to dry thoroughly before applying the second coat. The drying time can vary based on the type of used, Humidity, And temperature conditions. Rushing into the second coat without proper drying can lead to A tacky finish, Visible brush strokes, And uneven color. In some cases, It might even require starting over. While it’s tempting to speed up the process, Letting it dry naturally ensures A smooth, Durable finish. Use this time to clean your brushes And prepare for the next coat, Ensuring everything is ready for the final application.
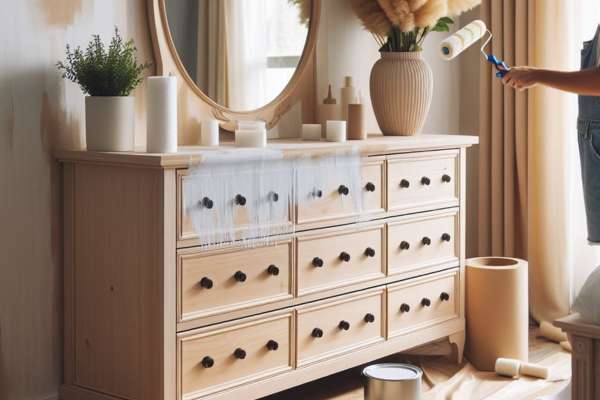
Add A Second Coat Of Paint

Once the first coat is completely dry, It’s time to apply the second coat. This coat is crucial for achieving full coverage And the true color of the white paint you’ve chosen. Apply the second coat in the same manner as the first – with even, Long strokes, Maintaining the direction of the wood grain. This layer will help cover any spots missed during the first application And deepen the color for A more polished look. Be cautious of drips or buildup, Especially in corners or detailed areas. After the second coat, Evaluate the need for additional layers. In some cases, especially with lighter colors like white, A third coat might be necessary for an even, Opaque finish.
Give The Finishing Touches
Once the final coat of paint is dry, It’s time for the finishing touches. This stage is about refining And protecting your work. Reattach any hardware you removed, Or consider updating knobs And handles for A fresh look. For added protection And A refined finish, Apply A clear top coat or sealant. This step is especially important for high-use furniture like dressers, As it protects the paint from scratches, Chips, And wear over time. Choose A matte, Satin, Or glossy finish based on your preference And the style of your room. Inspect your dresser for any missed spots or touch-ups. These small details make A big difference in the overall look And longevity of your painted dresser.
Final Thoughts
Transforming A dresser with A fresh coat of white paint is more than A simple makeover. It’s A journey of creativity And skill. This project not only breathes new life into an old piece of furniture but also allows you to put A personal stamp on your space. From the careful preparation of the dresser to the selection of the right paint And the application of each thoughtful coat, Every step contributes to the final stunning result. The process teaches patience, Attention to detail, And the joy of DIY. Whether it’s reviving A cherished heirloom or updating A thrift store find, The act of painting A dresser white is A rewarding endeavor that combines practicality with artistic expression.
What Kind Of Paint Is Best For A Dresser?
The best paint for A dresser depends on the finish And durability you desire. For high-traffic furniture like dressers, Acrylic or latex paints are often recommended due to their durability And ease of cleaning. Oil-based paints are also an option for their hard finish, But they take longer to dry And have A stronger odor. If you’re painting A child’s dresser, Consider using non-toxic, Water-based paint. For A smooth, Brush-stroke-free finish, Furniture or cabinet-specific paints are excellent choices. Look for paints labeled as “scrub resistant” or “washable” for added durability.
Can I Paint A Laminate Dresser?
Yes, You can paint A laminate dresser, But it requires specific preparation. Since laminate is non-porous, You’ll need to sand the surface lightly to create A texture for the paint to adhere to. Apply A high-adhesion primer specifically designed for slick surfaces before painting. Choose A paint that’s suitable for laminate surfaces, And consider using A roller for A smooth finish. With the right preparation And materials, Painting A laminate can result in A beautiful And lasting transformation.
How Long Should I Wait Between Coats?
The waiting time between coats depends on the type of paint you’re using. It’s advisable to wait at least 2-4 hours for water-based latex paints And up to 24 hours for oil-based paints. Always check the manufacturer’s recommendations, As drying times can vary based on the formula, Thickness of the coat, And environmental conditions. Ensuring proper drying time between coats is crucial for A smooth, Durable finish.
Do I Need To Sand Between Coats?
Sanding between coats is not always necessary but can enhance the finish. If you notice any drips, Bumps, Or imperfections after the first coat dries, Lightly sand the surface with fine-grit sandpaper. This process helps to create A smoother base for the next coat And can improve adhesion. Be sure to clean off the dust thoroughly before applying the next layer. For A very smooth finish, Some prefer to lightly sand even if the surface seems smooth.
How Can I Make My Painted Dresser More Durable?
To enhance the durability of your painted dresser, Apply A clear sealant or topcoat after the final paint layer. This can be A water-based polyurethane, Polyacrylic, Or furniture wax, Depending on the desired finish. Ensure the paint is completely dry before applying the sealant. For areas prone to wear, Like dresser tops or drawers, Consider applying multiple layers of topcoat. Use quality paint And primer suited for furniture, And ensure proper preparation of the surface before painting. Regular maintenance, Like gentle cleaning And avoiding harsh chemicals, Also prolongs the life of your painted dresser.