Crafting a chiseled bookshelf can transform an ordinary room into a captivating space filled with character and charm. This unique piece of furniture not only serves a functional purpose but also adds an artistic element to your decor. In this guide, we will delve into the step-by-step process of how to craft a chiseled bookshelf, covering everything from selecting the right materials to mastering the chisel technique. Whether you’re a seasoned woodworker or a beginner eager to embark on a new project, this comprehensive tutorial will equip you with the knowledge and skills to create a stunning chiseled bookshelf that stands out in any room.
Do I Need Special Tools to Chisel the Wood?
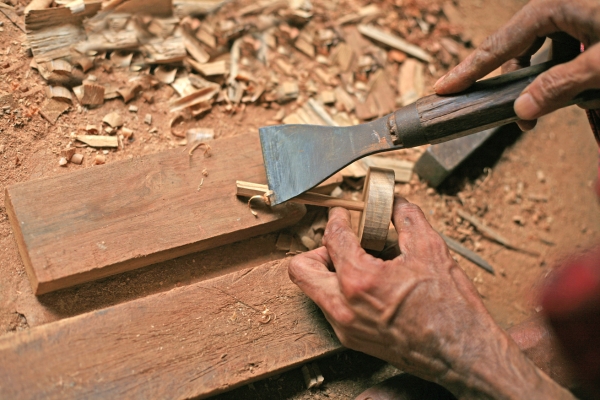
To craft a chiseled bookshelf, having the right tools is essential. While some basic woodworking tools can be used, investing in specialized chisels can make the process more efficient and yield better results. High-quality chisels come in various shapes and sizes, designed for different types of cuts and detailing. Additionally, a sturdy mallet is necessary to apply consistent pressure without damaging the chisel or wood. Sharpening stones are also important to maintain the sharpness of your chisels throughout the project. For those looking to add intricate designs, gouges and carving tools can enhance the detailing on your bookshelf. Although these specialized tools might seem like an added expense, they significantly improve the precision and quality of your work, making the investment worthwhile for a truly chiseled bookshelf.
What Safety Precautions Should I Take?
Safety is paramount when working with chisels and other woodworking tools. Before you start crafting your chiseled bookshelf, ensure you have protective gear, including safety goggles and gloves, to prevent injuries from wood chips and sharp tools. A sturdy workbench with clamps can secure your wood, preventing it from slipping during the chiseling process. Always use sharp chisels, as dull blades require more force and increase the risk of slipping and causing accidents. Keep your hands behind the cutting edge and use a mallet to control the force applied. Additionally, work in a well-ventilated area to avoid inhaling wood dust, and clean your workspace regularly to prevent clutter and accidents. By following these safety precautions, you can enjoy a smooth and injury-free experience while crafting your chiseled bookshelf.
Materials Needed
- Wood Boards
- Chisels
- Measuring Tape
- Pencil
- Wood Glue
- Clamps
- Sandpaper
- Wood Finish
- Brushes Or Rags
Step-By-Step Instructions
1. Plan Your Design

The first step in crafting a chiseled bookshelf is to plan your design. Consider the size, shape, and style you want for your bookshelf. Sketch out your ideas on paper, noting the dimensions and any specific details you wish to include. Think about the type of wood that will best suit your design and the room where the bookshelf will be placed. Planning your design thoroughly ensures you have a clear vision and reduces mistakes during the construction process.
2. Cut the Wood
Once your design is finalized, it’s time to cut the wood. Measure and mark the wood pieces according to your design specifications. Use a saw to cut the pieces to the desired lengths and shapes. Ensure all cuts are straight and precise to ensure a smooth assembly later. If you’re including shelves, make sure they are evenly spaced and cut to the same size. Sand the edges to remove any splinters or rough spots, preparing the wood for chiseling.
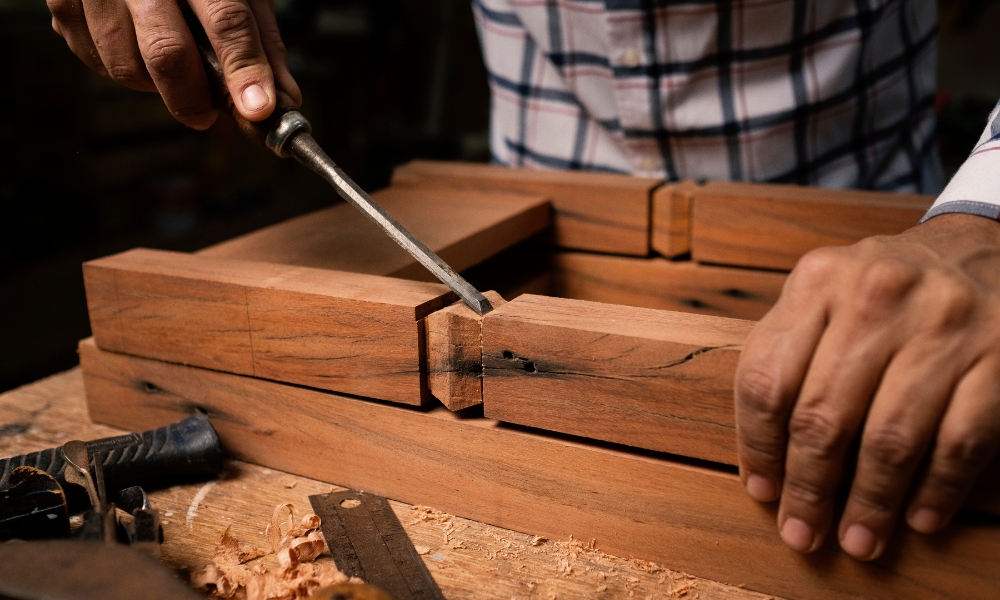
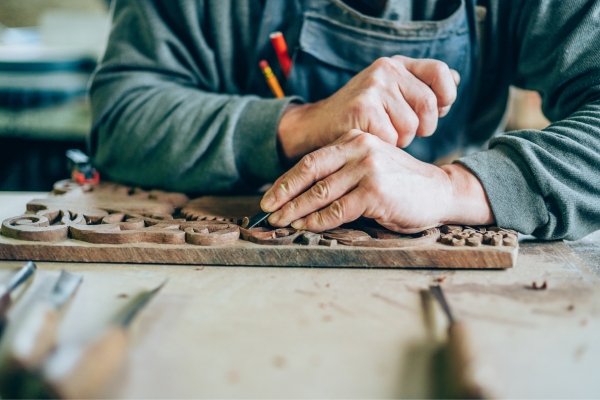
3. Chisel the Details
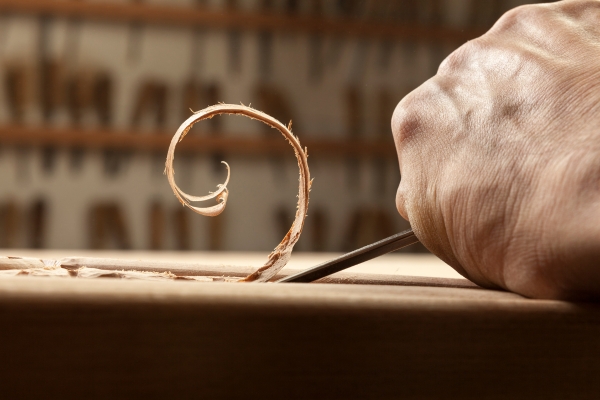
With the wood pieces cut, you can now begin chiseling the details. Secure each piece of wood on a workbench using clamps to prevent movement. Using your chisels, carefully carve out the designs and details you planned. Start with the larger chisels for broader cuts and switch to smaller, more precise chisels for intricate detailing. Work slowly and methodically, ensuring each cut is clean and follows your design. Regularly sharpen your chisels to maintain precision and ease of use. The chiseling process is where your bookshelf gains its unique, artistic character.
4. Assemble the Bookshelf

After all the pieces are chiseled, it’s time to assemble your bookshelf. Begin by laying out the pieces according to your design. Use wood glue to attach the joints, and reinforce them with screws or nails for added stability. Ensure each piece is aligned correctly and check for any gaps or misalignments. Once the glue has dried, sand any rough edges and apply a finish to protect the wood and enhance its appearance. Your chiseled bookshelf is now ready to be placed in your room, showcasing your craftsmanship and adding a touch of elegance to your space.
5. Sand the Bookshelf

Sanding is a crucial step to ensure a smooth and polished finish on your chiseled for How To Make A Bookshelf. Start with coarse-grit sandpaper to remove any rough areas or imperfections, then gradually move to finer grits for a smoother surface. Pay extra attention to the chiseled details, ensuring all edges and surfaces are even. Sanding not only enhances the appearance but also prepares the wood for the finishing process. Be thorough but gentle, preserving the intricate details you’ve carved.
6. Apply the Finish
Applying a finish to your bookshelf protects the wood and enhances its natural beauty. Choose a finish that complements the wood type and the overall aesthetic of your room. Options include varnish, stain, or paint, depending on your desired look. Apply the finish in thin, even coats, allowing each coat to dry completely before applying the next. Follow the manufacturer’s instructions for best results. A well-applied finish will highlight the chiseled details and provide durability.
7. Final Assembly
After the finish has dried, it’s time for the final assembly. Reattach any parts that were temporarily removed for finishing, such as shelves or decorative elements. Ensure all joints are secure and everything is aligned properly. This step is about putting the final touches on your bookshelf, making sure it’s sturdy and ready for use. Double-check for any loose screws or nails, and make any necessary adjustments.
8. Place and Decorate

Your chiseled bookshelf is now complete and ready to be placed in your chosen spot. Position it carefully, ensuring it’s stable and secure. Once in place, you can begin to decorate it with your favorite books, decorative items, and personal mementos. The chiseled details will add a unique charm to your decor, making your bookshelf not only a functional piece but also a focal point in the room. Enjoy the satisfaction of having created a beautiful, custom piece of furniture.
Conclusion
Crafting a chiseled bookshelf is a rewarding project that combines functionality with artistry. By following these step-by-step instructions, you can create a stunning piece that showcases your woodworking skills and enhances your home decor. From planning your design to the final assembly, each step is crucial in achieving a high-quality result. With the right tools, safety precautions, and attention to detail, your chiseled bookshelf will be a unique addition to your living space, reflecting your craftsmanship and style.