In today’s homes, Maximizing space And organization is paramount, And one effective solution lies in learning how to build wall shelves with brackets. These versatile storage units offer both functionality And aesthetic appeal, Allowing you to showcase decor or store everyday items with ease. Building wall racks with brackets is not only practical but also A rewarding DIY project that anyone can undertake. By following simple guidelines And understanding the benefits of this method, You can transform your living space into A clutter-free And visually pleasing environment. Whether you’re A seasoned DIY enthusiast or A beginner looking to embark on A new project, The process of building wall racks with brackets is accessible And achievable.
Why Build Wall Shelves With Brackets?
Building wall shelves with brackets serves as A practical solution for maximizing space And organizing belongings. By utilizing vertical space, These racks effectively free up floor area, Making them ideal for small rooms or areas with limited space. Wall racks with brackets offer easy accessibility to stored items, Ensuring essentials are within reach without cluttering countertops or floor surfaces.
Beyond their functional benefits, Wall racks with brackets also enhance the aesthetic appeal of any space. Whether you’re showcasing decor or storing everyday items, These shelves provide A stylish And customizable storage solution. With A variety of materials And designs available, You can choose options that complement your decor style while adding visual interest to your walls.
Understanding The Benefits Of Wall Shelves
Wall shelves with brackets offer many benefits that make them A popular choice for both practical storage And decorative purposes. Let’s delve into some key advantages of incorporating these racks into your living space.
Maximizing Space And Organization
One of the primary benefits of wall racks with brackets is their ability to maximize vertical space. By installing shelves on walls, You can efficiently utilize space that might otherwise go unused. This is particularly advantageous in smaller rooms or areas with limited floor space, Such as bathrooms, Kitchens, Or entryways. By elevating storage off the floor, You create A sense of openness And reduce clutter, Making the room feel more spacious And organized.
Enhancing Accessibility
Another significant advantage is their accessibility. Unlike traditional freestanding shelves or storage units, Wall shelves keep items within easy reach. Whether you’re storing books, Kitchen essentials, Or decorative items, Having them displayed on wall-mounted racks ensures they are readily accessible when needed. This accessibility enhances convenience And encourages better organization as items are visible And easily retrievable.
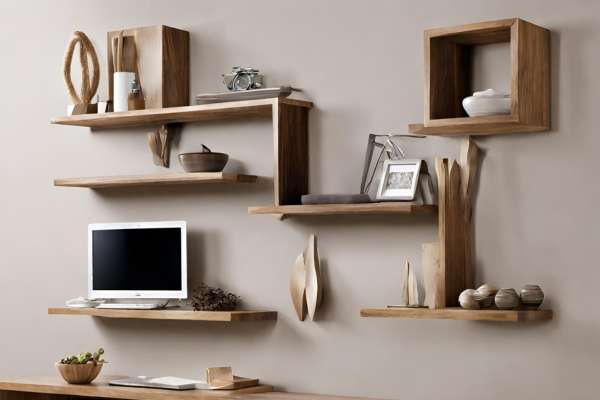
Customization And Style
Wall shelves with brackets come in A variety of designs, Materials, And finishes, Allowing for customization to suit your style And decor preferences. Whether you prefer sleek metal shelves for A modern look, Rustic wooden racks for A cozy feel, Or minimalist floating racks for A contemporary vibe, There are options to complement any aesthetic. You can choose from different bracket designs to add visual interest And personality to your shelves.
Versatility in Use
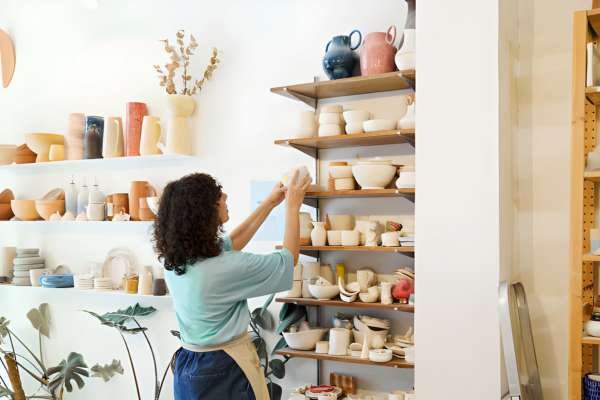
While they serve as practical storage solutions for everyday items like books, Kitchenware, Or bathroom essentials, They also provide opportunities for decorative displays. You can showcase artwork, Photographs, Or decorative accents on these shelves, Adding personality And visual interest to your walls. With the addition of hooks, Baskets, Or small drawers, Wall racks with brackets can adapt to various storage needs, Enhancing their versatility And functionality.
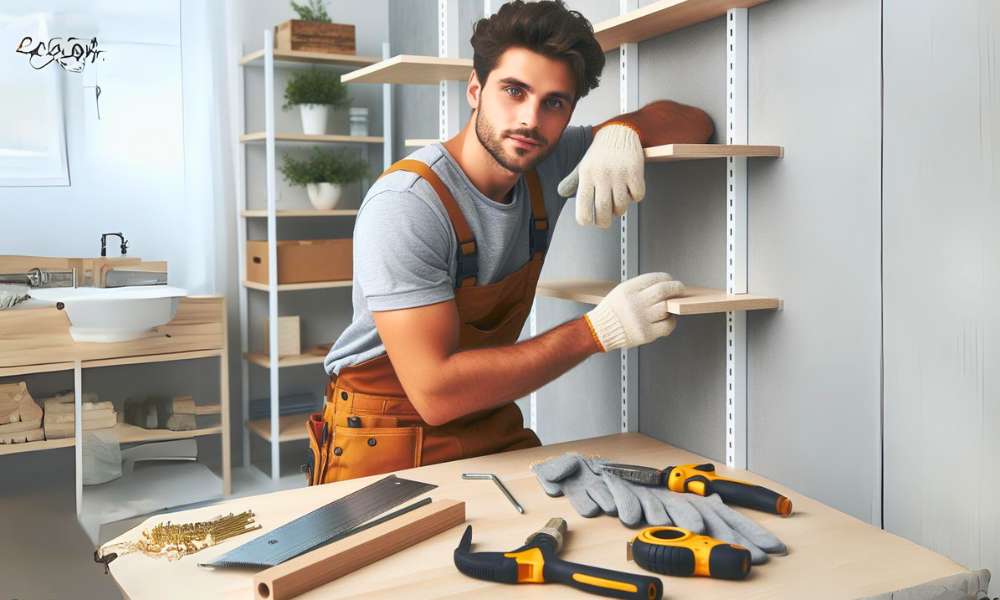
Here Are Some Easy Guides To Build Wall Shelves With Brackets
Assess Your Space: Finding The Perfect Spot
Before embarking on the project of building wall racks with brackets, It’s essential to assess your space thoroughly. Take A close look at the walls where you intend to install the shelves, Considering factors such as available wall space, Proximity to furniture or fixtures, And overall room layout. By carefully evaluating your space, You can determine the optimal location for the shelves that maximizes both functionality And aesthetics.
Determine Shelf Size And Quantity

Once you’ve identified the ideal spot, The next step is to determine the size And quantity of shelves needed. Consider your storage needs And the items you plan to display or store on the racks. Measure the available wall space to determine the maximum dimensions for each shelf, Ensuring they fit comfortably without overcrowding the area. Consider the visual balance of multiple shelves if installing more than one, Aiming for A cohesive And proportionate arrangement.
Select Materials: Wood, Metal, Or Alternative Options
Select materials for your wall racks with brackets considering both aesthetic preferences And practical considerations. Wood shelves offer warmth And natural beauty, Making them A popular choice for A variety of decor styles. Metal racks, On the other hand, Provide A sleek And modern look, Ideal for contemporary or industrial-inspired spaces. Explore alternative options such as glass or acrylic for A minimalist And lightweight design. Choose materials that not only complement your existing decor but also align with your durability And maintenance preferences.
Gather Necessary Tools And Supplies
Before beginning the construction of Build Wall Shelves With Brackets, Ensure you have all the necessary tools And supplies on hand. Common tools needed for this project include
- A Drill
- Screws
- A Measuring Tape
- A Level
- A Saw
- Shelf Material (Wood, Metal, Etc.)
- Paint Or Stain
- Decorative Elements
Measure And Marking
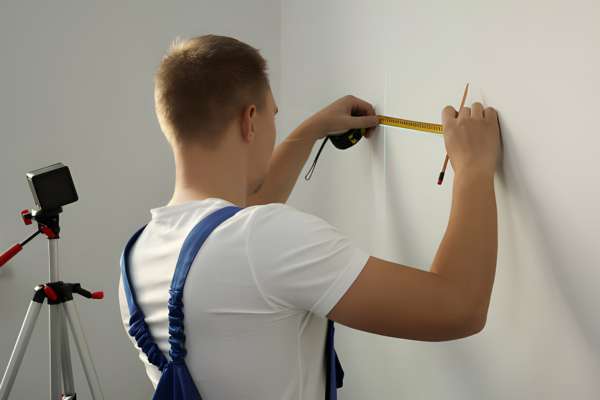
Use A measuring tape And A level to ensure accuracy And alignment. Start by marking the position of the first bracket, Ensuring it is level And properly aligned with the rest of the room. Then, Measure the distance between brackets according to your shelf dimensions, Marking each bracket’s placement accordingly. Double-check your measurements And markings before proceeding to ensure the precise placement of the brackets.
Cutt And Preparing Your Shelf Material
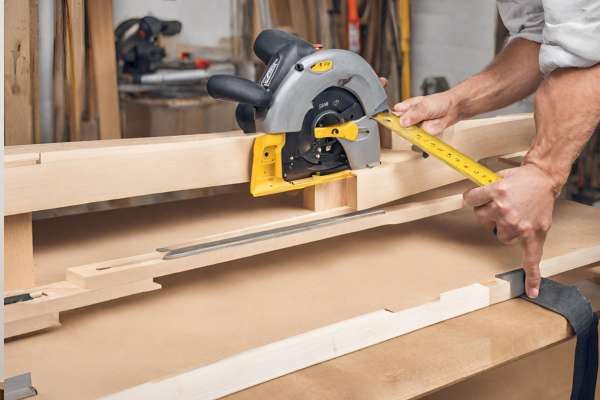
Whether you’re using wood, Metal, Or another material, Carefully measure And mark the dimensions for each shelf. Use A saw to cut the material to size, Following your markings precisely to ensure A clean And accurate cut. Once cut, Sand the edges of the shelf material to smooth out any rough edges And create A finished look. Take your time during this step to ensure the shelves are properly sized And prepared for installation.
Attach Brackets To Shelves
Position the brackets underneath the shelves according to your markings, Ensuring they are evenly spaced And properly aligned. Use screws to secure the brackets to the underside of the racks, Tightening them securely to ensure stability And support. Depending on the type of brackets you’re using, You may need to drill pilot holes before attaching the screws to prevent splitting or damage to the shelf material. Double-check the alignment And stability before proceeding to the installation step.
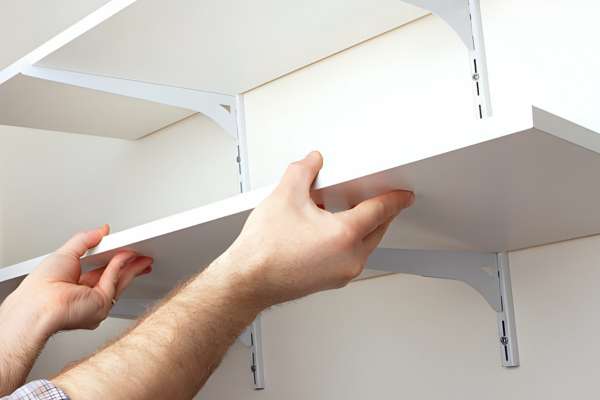
Install The Shelves
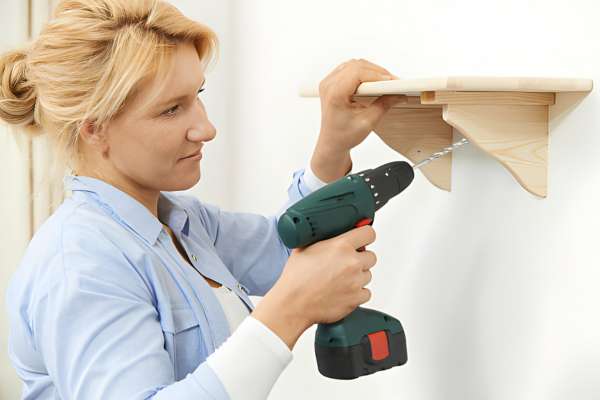
Align the shelves with the previously marked bracket positions on the wall, Ensuring they are level And properly spaced. Use A drill to secure the brackets to the wall, Drive screws through the pre-drilled holes in the brackets And into the wall studs or anchors. Double-check the alignment And stability of each shelf as you install them, Adjusting as needed to ensure they are securely attached And level.
Add Decorative Touches: Paint, Stain, Or Varnish
After installation, You can enhance their visual appeal by adding decorative touches such as paint, Stain, Or varnish. Choose A finish that complements your decor style And personal preferences. If you prefer A cohesive look, Consider painting the shelves in A color that matches or complements the surrounding walls. For A more natural look, Opt for staining the racks to highlight the grain of the wood. You can apply A coat of varnish to protect the racks And add A subtle sheen. Take your time during this step to ensure A smooth And even application, allowing the finish to dry completely before proceeding to the next step.
Incorporate Additional Features: Hooks, Drawers, Or Ledges

Hooks can be used to hang items such as keys, Hats, Or towels, Keeping them organized And easily accessible. Drawers provide concealed storage for smaller items, Keeping them out of sight while maximizing space. Ledges can be used to display decorative items or prevent items from sliding off the racks. Choose features that suit your storage needs And enhance the overall functionality of your shelves, Customizing them to meet your specific requirements.
Enhance Organization And Functionality
By carefully arranging items on the shelves And incorporating additional features as needed, You can optimize storage space And improve accessibility. Keep frequently used items within easy reach, While using hooks, Drawers, Or ledges to organize smaller items or prevent clutter. Regularly assess And adjust the organization of your racks to ensure they continue to meet your evolving storage needs.
Final Thoughts
Learning how to build wall shelves with brackets offers a practical And rewarding DIY project that enhances both the functionality And aesthetics of any space. By following the step-by-step guides provided And understanding the benefits of incorporating these racks into your home. You can create customized storage solutions that meet your needs And elevate the look of your living space. From maximizing space And organization to adding decorative touches And enhancing functionality. Wall racks with brackets offer endless possibilities for customization And creativity. Whether you’re A seasoned DIY enthusiast or A beginner looking to embark on A new project.
What Weight Can Wall Shelves With Brackets Hold?
The weight capacity of wall racks with brackets varies depending on factors such as the type of brackets used. The material And thickness of the shelves, And the method of installation. Properly installed wall racks with brackets can hold A significant amount of weight. But it’s essential to consider weight distribution And evenly distribute heavy items across the racks. Be sure to follow manufacturer guidelines And consider factors such as wall construction And stud placement when determining the weight capacity of your shelves.
How Do I Determine The Appropriate Bracket Spacing For My Shelves?
The ideal bracket spacing will depend on factors such as the length And weight of the shelves. As well as the material used for the shelves And brackets. As A general rule of thumb, Brackets should be spaced no more than 24 inches apart to provide adequate support. For longer racks or heavier items, Closer spacing may be necessary to prevent sagging or bowing. Consider the weight capacity of your brackets And racks, As well as the intended use of the shelves, When determining the bracket spacing.
Can I Install Wall Shelves With Brackets On Any Type Of Wall Surface?
The method of installation may vary depending on the wall surface. For example, When installing shelves on drywall or plaster, It’s essential to use anchors or screws designed for use with these materials to ensure secure attachment. When installing on brick or concrete walls, Specialized anchors or masonry screws may be required to penetrate the surface And provide adequate support. Before installing on any wall surface, Consider the wall construction And consult manufacturer guidelines or seek professional advice to determine the appropriate installation method for your specific situation.
Are There Any Special Considerations For Installing Shelves In Humid Environments?
Choose materials that are resistant to moisture And humidity, Such as stainless steel, Plastic, Or treated wood. These materials are less prone to warping, Swelling, Or mold growth when exposed to moisture. Ensure proper ventilation in the room to prevent moisture buildup And promote air circulation around the shelves. Consider installing with slatted or perforated designs to allow air to flow freely And prevent moisture from accumulating. Regularly inspect the shelves for signs of water damage or mold growth, And address any issues promptly to prevent further damage.