In today’s modern living spaces, Maximizing every inch of available space is essential. This is where corner wall shelves come into play, Offering A practical And stylish solution for storage And display needs. Learning how to build corner wall shelves not only adds functionality to your home or office but also allows you to unleash your creativity. By following A few simple steps, You can customize shelves to perfectly fit any corner, Regardless of its size or shape. The benefits of undertaking this DIY project are numerous, Including cost-effectiveness, Customization, And the satisfaction of creating something with your own hands. Whether you’re A seasoned DIY enthusiast or A novice looking to embark on your first project, Building corner wall racks is an achievable task that yields impressive results.
Why Corner Wall Shelves?
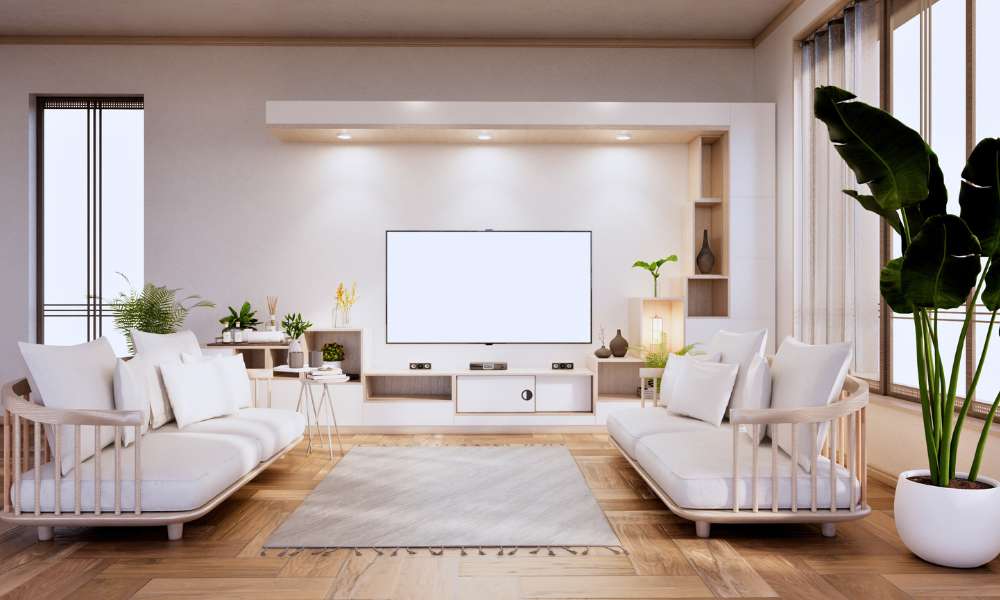
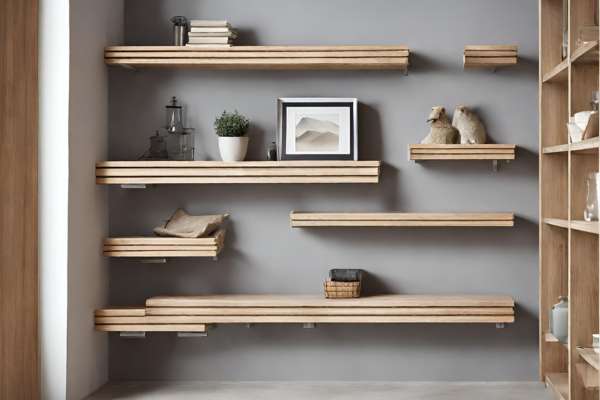
Corner wall shelves offer A unique solution to maximize space utilization in any room. By utilizing often overlooked corners, These racks provide valuable storage And display space without taking up valuable floor space. This is particularly beneficial in smaller rooms or areas where space is limited, Allowing you to make the most of every inch available. Corner wall racks add A touch of elegance And functionality to any space, Serving as both practical storage solutions And decorative elements.
Those offer versatility in design And placement, Allowing you to customize your space to meet your specific needs And style preferences. Whether you’re looking to showcase decorative items, Store books or accessories, Or simply add visual interest to A room, It offers endless possibilities for enhancing the aesthetic appeal And functionality of your living or work area.
Benefits Of DIY Corner Wall Shelves
Corner wall racks, When built through DIY methods, Offer A range of benefits that cater to both practical And aesthetic needs. Let’s delve into some of the advantages of undertaking this project yourself:
Cost-Effectiveness
It can be significantly more budget-friendly than purchasing pre-made ones. DIY projects allow you to source materials at lower costs And eliminate the markup associated with pre-assembled shelving units. By investing your time And effort, You can create custom shelves that suit your space And style preferences without breaking the bank.
Customization
One of the most significant benefits is the ability to customize them according to your specific requirements. Whether you have an unconventional corner space or unique design preferences, DIY projects empower you to create shelves that fit perfectly And complement your existing decor. From choosing the type of wood to selecting the dimensions And finishes. You have full control over the design process, resulting in racks that truly tailored to your needs.
Personal Satisfaction
Embarking on A DIY project can be immensely rewarding. Creating something with your own hands And seeing it come to life in your space gives you an unmatched sense of accomplishment. DIY enthusiasts often find joy And fulfillment in the creative process, From planning And designing to cutting, Assembling, And finishing. The satisfaction of completing A project And enhancing your living environment with A personalized touch adds an extra layer of value to the finished product.
Learning Experience
Engaging in DIY projects provides an opportunity for continuous learning And skill development. Whether you’re A seasoned DIYer or A novice, Building corner wall racks allows you to expand your knowledge of woodworking techniques, Tools, And materials. With each project, You can hone your skills, Gain confidence in your abilities, And acquire valuable experience that can be applied to future endeavors. DIY projects foster problem-solving skills as you navigate challenges And find creative solutions along the way.
Tailored Fit
Unlike pre-made shelves that come in standard dimensions, DIY projects enable you to measure your space accurately And create racks that maximize every inch of the available room. Whether you’re working with A small nook or A spacious corner, Custom-built shelves ensure A perfect fit And optimal space utilization.
Flexibility
Another advantage is the flexibility they offer in terms of design And functionality. You can customize the number of racks, Their dimensions, Spacing, And arrangement to suit your specific storage needs And aesthetic preferences. Whether you prefer minimalist floating shelves or multi-tiered units, DIY projects allow you to design racks that cater to your unique requirements And style sensibilities.
Endless Design Possibilities
The design possibilities are virtually endless. From simple And streamlined designs to intricate And ornate creations, DIY projects enable you to unleash your creativity And express your style. You can experiment with different wood species, Finishes, Hardware, And decorative elements to create shelves that reflect your personality And enhance the visual appeal of your space.
Essential Tools And Materials For This Work
Tools:
- Measuring Tape
- Saw
- Drill
- Screws
- Wood Glue
- Sandpaper
- Paintbrushes Or Rollers
- Level
- Stud Finder
- Shelf Brackets Or Hooks
Materials:
- Wood
- Paint Or Stain
- Wood Screws
- Wood Glue
- Sandpaper
- Primer (Optional)
- Protective Gear
Here Are Some Easy Guides To Build Corner Wall Shelves
Assess Space And Dimensions
Before diving into the construction of your corner wall shelves, It’s crucial to assess the space And dimensions of the corner where they will be installed. Measure the height, Width, And depth of the corner to ensure your racks will fit perfectly And maximize the available space. Consider any obstacles or obstructions that may affect the placement of the racks, Such as light switches or electrical outlets. By carefully evaluating the space And dimensions beforehand, You can avoid potential issues during the construction process And ensure that your shelves will be both functional And aesthetically pleasing.
Sketch Your Design
Once you have assessed the space And dimensions, It’s time to sketch your design. Take into account the measurements you’ve taken And visualize how you want the shelves to look in the corner. Consider the number of racks, Their placement, And any decorative elements you may want to incorporate. Sketching your design allows you to experiment with different layouts And configurations before committing to the final plan. It also serves as A helpful reference during the construction process, Guiding you as you bring your vision to life.
Measure And Cut Wood For The Frame
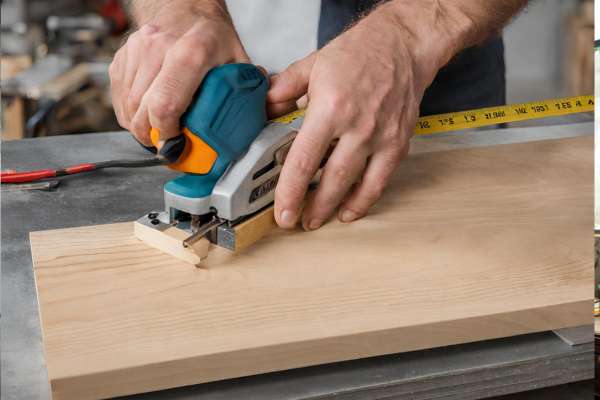
Use the dimensions from your assessment to determine the length of the wood pieces needed for the frame. Use A saw to cut the wood to the required lengths, Ensuring precision And accuracy. Double-check your measurements before cutting to avoid any mistakes that could affect the fit of the shelves. Once the wood is cut, Sand the edges to smooth out any rough spots And prepare them for assembly. Taking the time to measure And cut the wood accurately will ensure that your racks fit snugly into the corner And provide A sturdy foundation for your belongings.
Assemble The Frame
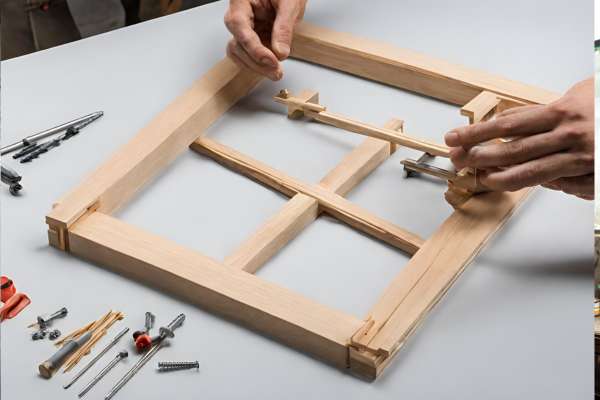
Lay out the pieces according to your design And use wood glue And screws to secure them together. Pay attention to the alignment of the pieces to ensure that the frame is square And stable. Use A level to check that the frame is straight And adjust as needed. Once the frame is assembled, Allow the wood glue to dry completely before moving on to the next step. Assembling the frame is A critical step in the construction process, As it forms the foundation for the rest of the shelves. Take your time And ensure that the frame is sturdy And well-constructed before proceeding to the next stage of building your corner wall shelves.
Determine Shelf Placement

Consider factors such as the height between shelves And the distance from the frame’s edges to ensure optimal functionality And aesthetic appeal. Use A measuring tape And level to accurately mark the positions for the racks, Ensuring they are evenly spaced And aligned. Take into account any items you plan to display or store on the racks to determine the appropriate spacing between them. By carefully determining shelf placement, You can maximize the storage capacity And visual impact of your corner wall racks.
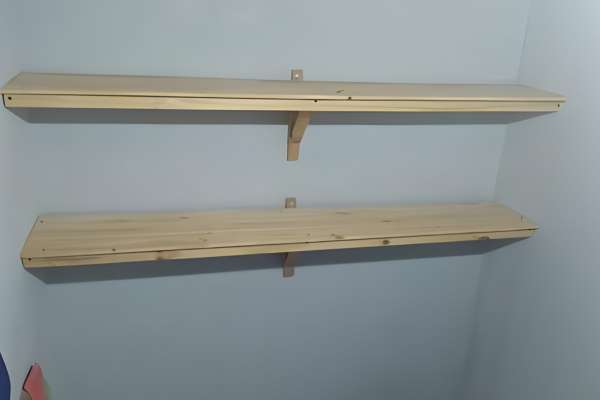
Install Shelves Securely
Depending on your design, You may use screws or shelf brackets to attach the shelves to the frame. Ensure that the shelves are level And securely anchored to the frame to prevent any accidents or damage. Use A level to ensure that each shelf is installed evenly And straight, Making any necessary adjustments as needed. During this step, Ensure that you securely attach And can safely support the weight of items placed on them.
Strengthen The Structure
Depending on the materials used And the weight of items to be stored on the shelves, Additional reinforcement may be necessary. Consider adding support brackets or braces underneath the racks to distribute weight more evenly And prevent sagging over time. Reinforcing the structure of your shelves ensures that they remain sturdy And secure, Even when supporting heavy items or experiencing daily wear And tear.
Ensure Stability For Heavy Items
Use appropriate hardware And installation methods to securely anchor the shelves to the wall, Preventing them from tipping or falling under the weight of heavy objects. Consider using wall anchors or securing the racks to wall studs for added stability. Avoid overloading the shelves with excessive weight beyond their capacity to prevent damage or accidents.
Sanding And Smoothing For Surfaces
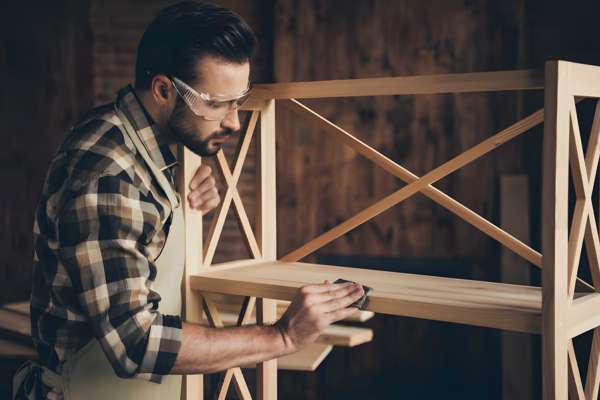
Use sandpaper of appropriate grit to smooth out any rough edges, Imperfections, Or uneven surfaces on the wood. Start with coarse grit sandpaper to remove any rough spots or splinters, Then gradually move to finer grit sandpaper for A smoother finish. Sanding not only improves the appearance of the shelves but also ensures A better finish when painting or staining. Take your time with this step to achieve A flawless surface that is ready for finishing.
Painting Or Staining Options
Once the surfaces are sanded And smoothed, You have the option to paint or stain them according to your preference. Consider the overall aesthetic of your space And choose A paint or stain color that complements your decor. Apply the paint or stain evenly using A paintbrush or roller, Following the manufacturer’s instructions for best results. Allow the paint or stain to dry completely between coats, And consider applying A clear sealant for added protection And durability.
Mounting Your Shelves
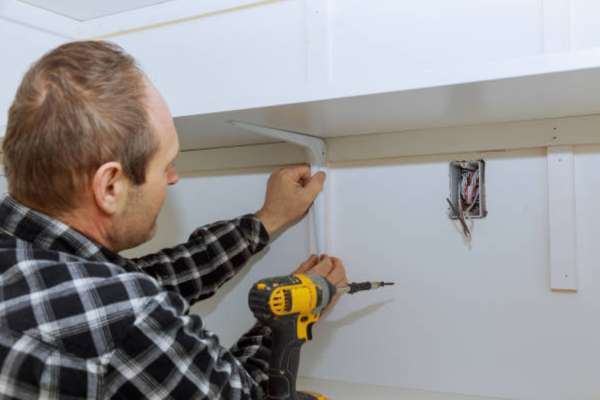
Use A level to ensure that the shelves are installed evenly And straight, And mark the positions for mounting hardware accordingly. Depending on your design And the weight of the racks, You may use screws, Wall anchors, Or shelf brackets to mount them to the wall. Follow the manufacturer’s instructions for the selected mounting hardware And ensure that the shelves are securely anchored to the wall to prevent any accidents or damage.
Select Proper Hardware
Consider factors such as the weight of the shelves And the type of wall material when selecting hardware. For lightweight racks, Simple screws or wall anchors may be sufficient, While heavier shelves may require more robust hardware such as heavy-duty screws or shelf brackets. Consider the aesthetic appeal of the hardware And choose options that complement the overall design of your racks And space.
Install Shelves Safely
Before mounting the shelves, Carefully follow the manufacturer’s instructions And guidelines for proper installation. Use A stud finder to locate And secure the shelves-to-wall studs for added stability, Especially if you plan to store heavy items on them. Double-check that the shelves are level And securely anchored to the wall, Using appropriate hardware such as screws, Wall anchors, Or shelf brackets. Avoid overloading the racks beyond their weight capacity And periodically check their stability to ensure safe usage over time.
Add Hooks Or Brackets
Consider adding hooks or brackets for additional storage options to enhance the functionality. Depending on your needs, You can install hooks or brackets underneath the shelves to hang items such as keys, Hats, Or small baskets. Ensure that the hooks or brackets are securely attached to the shelves And can safely support the weight of the items you intend to hang. By adding hooks or brackets, You can maximize the storage capacity And keep your space organized And clutter-free.
Final Thoughts
Building corner wall shelves through DIY methods offers A multitude of benefits, including cost-effectiveness, Customization, Personal satisfaction, And learning experience. By carefully assessing space And dimensions, Sketching designs, Measuring And cutting wood, And assembling frames, Individuals can create custom racks tailored to their specific needs And preferences. Installing racks securely, Reinforcing structures, And ensuring stability for heavy items are essential steps to maximize the functionality And longevity of corner wall racks. Whether installed in rental properties or permanent residences, These shelves provide practical storage solutions while adding aesthetic appeal to any space.
How Long Does It Take To Build Corner Wall Shelves?
The time required to build depends on various factors such as the complexity of the design, Your level of experience, And the availability of tools And materials. It can be completed within A day or two, Including planning, Measuring, Cutting, Assembly, Finishing, And installation. More intricate designs or larger projects may take longer to complete, especially if additional steps such as sanding, Painting, or staining are involved. It’s essential to allocate sufficient time And plan accordingly to ensure that the project is completed safely And successfully.
Can I Install Corner Wall Shelves In A Rental Property?
Yes, You can typically install in A rental property, But it’s essential to check with your landlord or property management company first. Some rental agreements may have restrictions or require permission to make modifications to the property, including installing shelves. If your landlord approves, Consider using removable adhesive hooks or brackets instead of drilling holes into the walls. These options allow you to install the shelves securely without causing damage to the walls, making them ideal for rental properties. Be sure to follow any guidelines provided by your landlord And remove the shelves properly before moving out to avoid any potential damage fees.
How Do I Prevent Shelves From Sagging Over Time?
Use sturdy materials for the shelves And consider adding support brackets or braces underneath for additional reinforcement, Especially for longer shelves or those intended to hold heavier items. Avoid overloading the racks beyond their weight capacity And distribute weight evenly across the entire surface. Regularly check the racks for signs of sagging And make any necessary adjustments or reinforcements. By taking these precautions, You can help prevent shelves from sagging And maintain their stability And durability over time.
Are Corner Wall Shelves Suitable For Holding Heavy Items?
Use sturdy materials such as solid wood or engineered wood for the shelves And ensure that they are properly supported And reinforced during installation. Consider adding support brackets or braces underneath the racks for additional stability, Especially if you plan to store heavy items. Distribute weight evenly across the entire surface of the racks And avoid overloading them beyond their weight capacity.