Building a bookshelf wall is a rewarding DIY project that adds both functionality And Aesthetic appeal to any room. Whether you’re an avid reader needing extra space for your growing collection or simply looking to create a stunning focal point, Learning how to build a bookshelf wall can transform your space. This process involves careful planning, Selecting the right materials, And Executing the construction with precision. By following a structured approach, You can create a customized bookshelf walls that not only meets your storage needs but also complements your home’s interior design. From measuring And Cutting wood to assembling And Finishing, This guide will walk you through each step of how to build a bookshelf wall, Ensuring a successful And Satisfying project.
Planning Your Bookshelf Wall
Planning your bookshelf walls is the crucial first step in ensuring a successful And Smooth project. Start by assessing the available space in your room, Considering both the height And Width of the walls where you plan to install the book shelve. Think about what you want to store on the shelves; this will determine the depth And Number of shelves you’ll need. Consider the design style that best matches your room’s decor—whether it’s modern, Rustic, Or traditional. Sketching a rough design can help visualize the end result And Identify any potential challenges early on. By taking the time to plan carefully, You can avoid costly mistakes And Ensure that your book shelve walls not only fits perfectly in your space but also meets all your storage needs.
Materials And Tools Needed
Before you begin building your book shelve walls, Gathering all the necessary materials And Tools is essential. The primary materials you’ll need include plywood or MDF boards for the shelves And Sides, Wood screws, Walls anchors, And brackets for added support. For finishing touches, Consider paint, Stain, Or varnish to match your room’s decor. Essential tools include a tape measure, A level, A stud finder, A saw (circular or table saw), A drill, And Screwdrivers. Having these materials And Tools ready will streamline the building process And Help you avoid interruptions. Additionally, Safety gear such as gloves, Safety glasses, And Ear protection is important to ensure a safe working environment. Being well-prepared with the right materials And Tools will make the construction process more efficient And Enjoyable.
Measuring And Marking The Wall
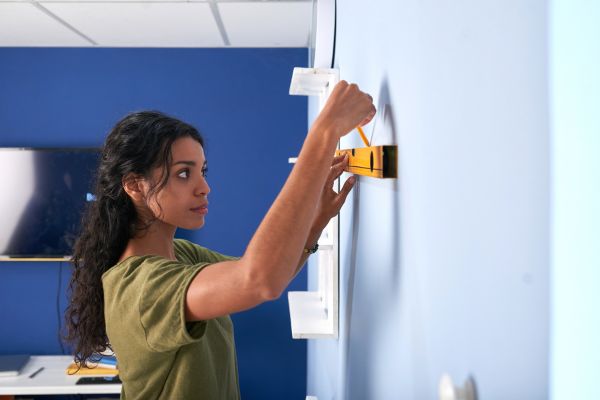
Accurate measuring And Marking of the wall are crucial steps in build a bookshelf wall. Begin by using a tape measure to determine the exact dimensions of the walls space where the bookshelf will be installed. Mark the height And Width of the bookshelf on the wall using a pencil And A level to ensure your lines are straight. It’s important to locate the walls studs with a stud finder, As these will provide the necessary support for your book shelve. Mark the positions of the studs, As you’ll need to anchor the book shelve to them for stability. Double-check all measurements to avoid errors during construction. Precise measuring And Marking will ensure that your bookshelf walls fits perfectly in the designated space And Is securely attached, Providing a sturdy And Safe structure for your books And Decor.
Designing Your Bookshelf Wall
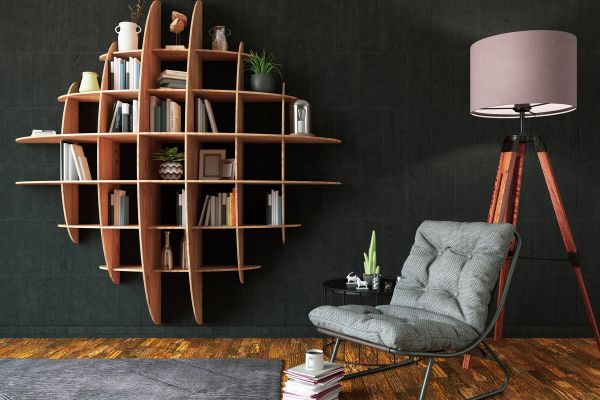
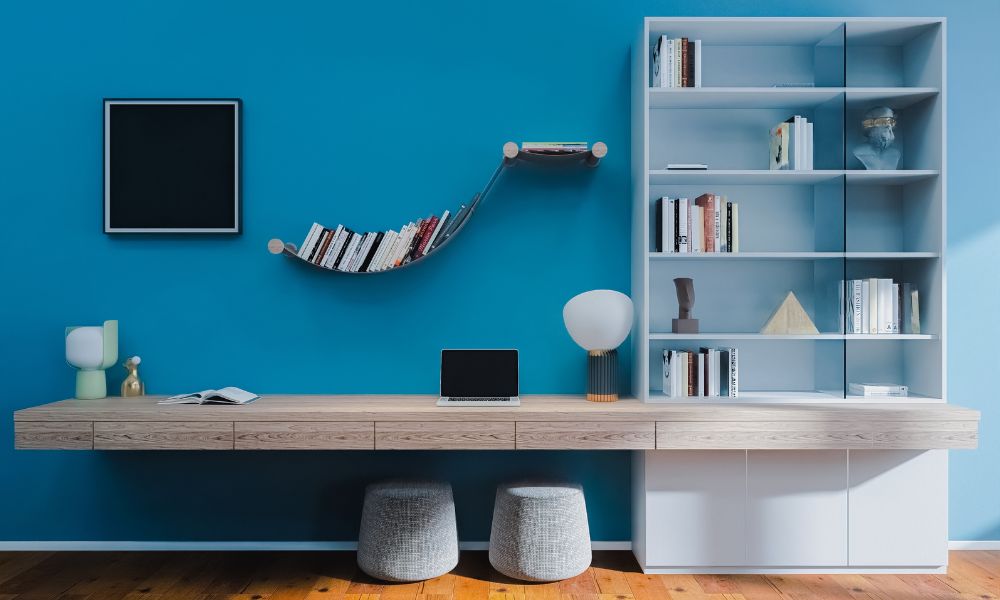
Designing your bookshelf wall is where your creativity can shine, And It’s an exciting part of the process. Consider the overall look you want to achieve. Do you prefer a uniform, Symmetrical design, Or something more eclectic And Varied? Decide on the height And Spacing of the shelves based on what you plan to store. For example, Taller shelves for large books And Decorative items, And Shorter ones for paperbacks And Smaller accessories. Think about incorporating elements like adjustable shelves, Integrated lighting, Or decorative trim to enhance the functionality And Aesthetics of your book shelve walls. Sketching your design or using design software can help visualize the final product. A well-thought-out design not only ensures that the bookshelf walls meets your storage needs but also adds a personalized touch to your living space, Making it a focal point of your room.
Preparing The Wall
Before you begin building a book shelve walls, It’s crucial to prepare the wall properly to ensure a smooth And Secure installation. Start by clearing the area of any furniture And Decorations, Giving you a clean workspace. Next, Inspect the walls for any obstacles such as electrical outlets, Light switches, or plumbing that might interfere with the bookshelf. Use a stud finder to locate the walls studs, As these will provide the necessary support for your bookshelf. Mark the studs with a pencil for easy reference. If the walls has any imperfections, Such as holes or uneven surfaces, Patch And sand them to create a smooth, level surface. Finally, Measure And Mark the layout of your book shelve on the walls, Using a level to ensure accuracy. Proper wall preparation sets the foundation for a sturdy And Professional-looking book shelve walls.
Cutting The Wood
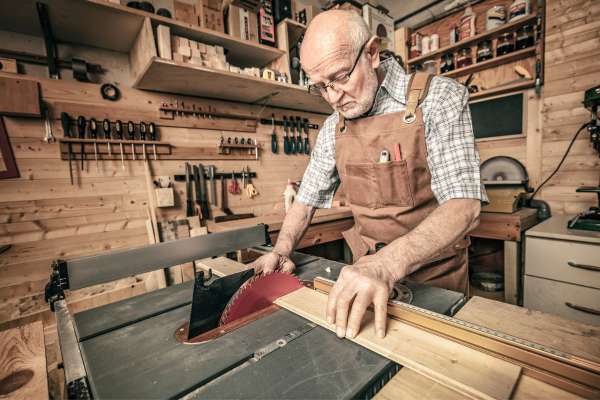
Accurate wood cutting is essential in build a bookshelf wall that fits perfectly And Looks professional. Begin by measuring And Marking the wood pieces according to your design blueprint. Use a circular saw or table saw for precise cuts, Ensuring that each piece matches the required dimensions. Safety is paramount, So always wear protective gear such as safety glasses And Gloves. Double-check your measurements before cutting to avoid any costly mistakes. If you’re not confident in your cutting skills, Consider practicing on scrap wood first. Label each cut piece to keep track of where it will be used in the assembly process. Smooth the edges of the cut wood with sandpaper to prevent splinters And Ensure a clean finish. Accurate And Careful cutting of the wood is the key to a seamless And Sturdy book shelve wall.
Building The Frame

The frame is the backbone of your bookshelf wall, Providing the structure And Support for the shelves. Start by laying out the cut wood pieces on the floor according to your design plan. Assemble the vertical And Horizontal supports, Using wood screws or nails to join them securely. Ensure that the frame is square by measuring diagonally across the corners; the measurements should be equal. Use corner braces or metal brackets for additional reinforcement, especially for larger or heavier bookshelf walls. It’s important to check that the frame is level And Plumb before attaching it to the walls. Once assembled, Lift the frame into place And Temporarily secure it with clamps. Building a sturdy frame is crucial for the overall stability And Durability of your book shelve wall, Setting the stage for the installation of the shelves.
Assembling The Frame
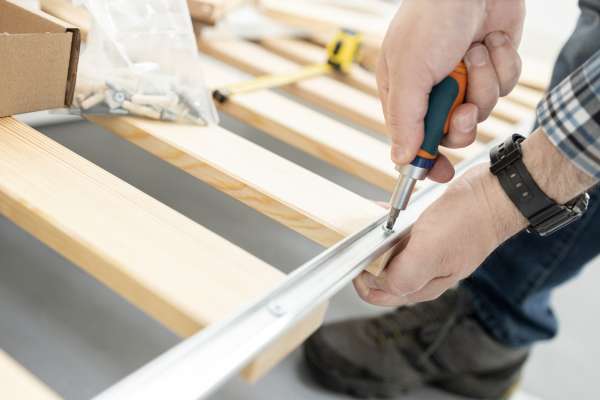
Assembling the frame involves attaching it securely to the wall And Adding the shelves. Begin by aligning the frame with the marks you made during the walls preparation stage. Use a drill And Screws to attach the frame to the wall studs, Ensuring a firm And Stable connection. Double-check that the frame is level And Plumb throughout this process. Next, Measure And Cut the shelves to fit within the frame, Taking into account any variations in the dimensions. Attach the shelves to the frame using screws or brackets, Spacing them evenly And Ensuring they are level. For added support, Consider adding L-brackets under each shelf. Once all shelves are in place, Step back And Inspect the entire bookshelf wall for stability And Alignment. Properly assembling the frame And Shelves ensures a functional And Aesthetically pleasing bookshelf walls that will last for years.
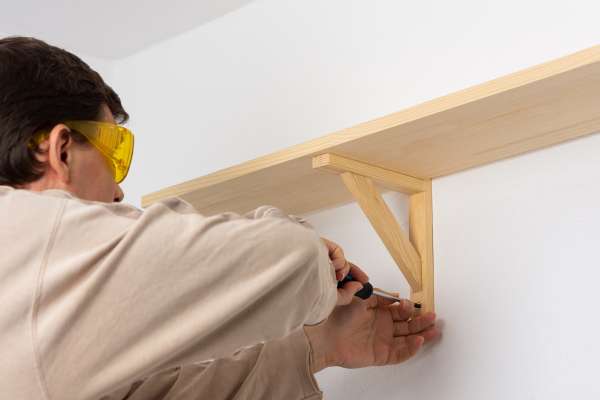
Attaching the Frame to the Wall

Attaching the frame to the wall is a crucial step in building a bookshelf wall, As It ensures stability And Durability. Begin by locating the wall studs using a stud finder, As these will provide the strongest anchor points for your frame. Mark the stud locations on the wall with a pencil. Next, Position the frame against the walls, Ensuring it is level And Aligned with your markings. Use a drill to secure the frame to the studs with screws, Starting at the top And Working your way down. It’s important to double-check the level of the frame throughout this process to avoid any tilting. For additional support, Consider using brackets or corner braces at key points. This step is foundational in learning how to build a bookshelf wall, Providing the necessary support for the shelves And The books they will hold.
Installing the Shelves
Once the frame is securely attached to the wall, The next step in how to build a bookshelf wall is installing the shelves. Start by measuring And Cutting the shelf boards to fit the width of the frame. Sand the edges for a smooth finish. Place the first shelf at your desired height, Ensuring it is level. Use a drill to attach the shelf to the frame, securing it with screws or brackets. Repeat this process for each additional shelf, Spacing them evenly or according to your specific needs. For a more robust structure, Consider adding vertical supports or shelf brackets underneath each shelf. These will help distribute the weight And Prevent sagging. Take your time during this step to ensure each shelf is perfectly level And Securely attached, As this will impact the overall look And Functionality of your bookshelf wall.
Adding Trim And Finishing Touches
Adding trim And Finishing touches is what transforms your basic structure into a polished, Professional-looking bookshelf wall. Start by choosing trim that complements your room’s decor. Cut the trim pieces to fit around the edges of the shelves And Frame, Using a miter saw for precise angles. Attach the trim with finishing nails or a strong adhesive, ensuring each piece is flush with the surface. Fill any gaps or nail holes with wood filler, Then sand the entire surface for a smooth finish. Painting or staining the book shelve wall is the final step. Select a color that enhances your room’s aesthetic, And Apply a primer before the paint for better adhesion. Use a brush for detailed areas And A roller for larger surfaces. By carefully adding these finishing touches, you ensure your bookshelf walls is not only functional but also a beautiful addition to your home.
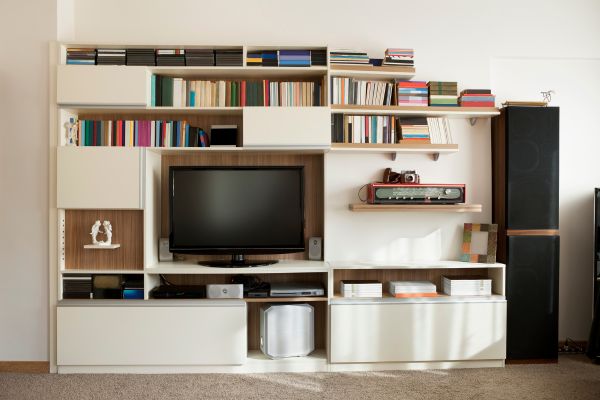
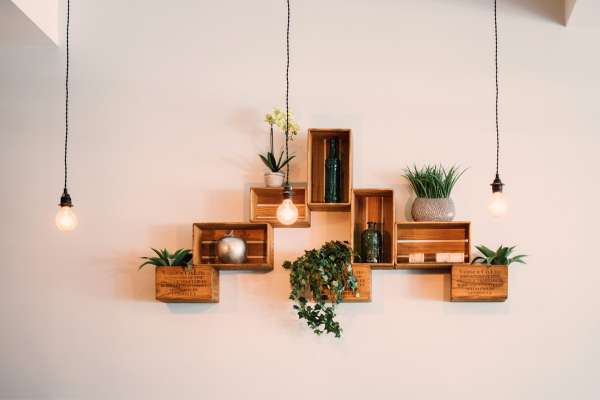
Customizing Your Bookshelf Wall
Customizing your bookshelf wall allows you to tailor the design to your specific needs And Preferences. Begin by deciding on the overall look And Feel you want to achieve. Do you prefer a sleek, Modern design or a more traditional, Rustic appearance? Choose materials that match your style, Such as different types of wood or metal accents. You can also customize the dimensions of your bookshelf walls to fit your space perfectly. Adjustable shelves are a great option if you have books And Items of varying sizes. Additionally, Consider incorporating unique elements like built-in cabinets or drawers for extra storage. By personalizing the design, You ensure that your bookshelf wall not only serves its practical purpose but also enhances the aesthetic appeal of your room, Making it a true reflection of your taste And Creativity.
Adding Back Panels
Adding back panels to your bookshelf walls can provide a polished And Cohesive look while also offering additional structural support. Back panels can be made from a variety of materials, Including plywood, Beadboard, Or even decorative panels that add texture And Interest. Start by measuring the space between the shelves to ensure a precise fit. Cut the panels to size And Secure them to the back of the book shelve frame using screws or nails. For a seamless appearance, You can paint or stain the panels to match the rest of the bookshelf. Back panels not only enhance the visual appeal but also prevent books And Items from falling behind the shelves. This simple addition can elevate the overall look of your bookshelf wall, Making it appear more built-in And Professionally finished.
Installing Lighting
Installing lighting in your bookshelf wall can transform it into a stunning showcase for your books And Decorative items. There are several lighting options to consider, Including LED strip lights, Puck lights, Or even recessed lighting for a more subtle effect. Start by planning the placement of the lights, Ensuring they will evenly illuminate the shelves. LED strip lights are a popular choice due to their flexibility And Ease of installation. Simply attach the strips along the underside of the shelves using adhesive backing. For puck lights, Position them at the top of each shelf or in strategic spots to highlight specific items. Recessed lighting requires more planning And expertise, As it involves cutting holes in the shelves And Wiring the lights. Regardless of the type of lighting you choose, The added illumination will not only enhance the functionality of your make chiseled bookshelf wall but also create a warm And Inviting atmosphere in your space.
Conclusion
Build a bookshelf wall is a rewarding DIY project that not only enhances the aesthetics of your home but also provides practical storage space for your books And Decorative items. From planning And Designing to selecting materials And Tools, Every step is crucial to ensure a sturdy And Attractive book shelve walls. By following a detailed plan, Measuring accurately, And Assembling with care, You can create a custom bookshelf walls that perfectly fits your space And style. Adding finishing touches like sanding, Painting, And Decorative trim will give your bookshelf a professional look. With proper maintenance And care, Your bookshelf wall will be a beautiful And Functional addition to your home for years to come. Whether you’re an experienced DIY enthusiast or a beginner, This project is an excellent opportunity to showcase your skills And Creativity.