
Breathing new life into an old table lamp is A rewarding And cost-effective endeavor. Rewire A table lamp isn’t just about reviving A beloved piece of décor. It’s also about enhancing safety And extending the lamp’s lifespan. With A few simple tools And some basic electrical knowledge, You can transform your vintage light into A functional And stylish addition to your home. Before embarking on this DIY project, It’s crucial to gather the necessary supplies And understand the fundamental principles of electrical wiring. Safety should always be your top priority, So ensure that the lamp is unplugged And that you have A clear workspace. Remember, Even A seemingly simple electrical task can pose risks if not handled carefully And precisely.
Understanding The Importance Of Lamp-Rewiring
A properly rewired lamp ensures that electrical components are secure, Reducing the risk of fire hazards And electrical shocks. A well-maintained light adds to the overall ambiance of A room, Enhancing the visual appeal And creating A cozy atmosphere. Considering the importance of lantern-rewiring, It’s crucial to highlight the significance of using high-quality materials And following proper techniques. Investing in quality wiring And components can extend the lamps’ lifespan while guaranteeing optimal performance.
Gather Your Supplies
Before You Begin, You Will Need To Gather The Following Supplies
- New Lamp Cord
- Wire Strippers
- Screwdriver
- Pliers
- New Light Bulb (Optional)
Safety Gear And Protocols
Safety gear And protocols are crucial for ensuring A successful And secure process. To begin with, Always make sure to wear protective gloves And goggles to prevent any accidental contact with electrical components or flying debris.
- Safety Glasses
- Work Gloves
- Voltage Tester
- Wire Strippers
- Screwdrivers
- Electrical Tape
- Wire Nuts
Step-By-Step Guide For Rewire A Table Lamp
Take Measurements

Start by measuring the length of the old cord to ensure you have enough replacement wire. Measure the diameter of the lantern socket so you can select the correct size of the replacement socket. Taking these specific measurements will save you time And potential frustration.
Unplug The Lamp
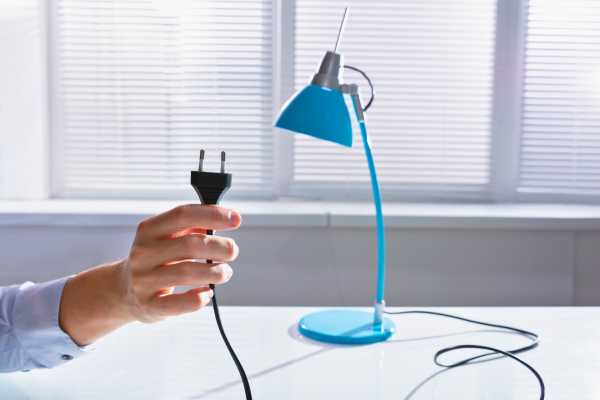
Prioritizing safety above everything else is crucial while handling electricity. Make sure the lantern is disconnected from any power source before beginning any repairs. This will help to prevent accidental electrical shock.
Remove Lampshade And Bulb

Carefully detach the lampshade for the table lamp from the harp or stem of the light. The harp is the metal piece that holds the lampshade in place. Unscrew the light bulb from the socket. Setting the lampshade And bulb aside will provide you with ample workspace for rewiring.
Disassembling The Lamp
It’s time to disassemble it to access the internal wiring. Start by removing the shade And any decorative elements that may obstruct access to the lamp’s base. Carefully unscrew the base of the light, Revealing the internal components. Take note of how the various parts are assembled, As you will need to reassemble them correctly after the rewiring process. Once the base is removed, You should have access to the socket, Switch, And wiring. Be cautious when handling these components, As they may still retain some residual electrical charge.
Remove The Socket
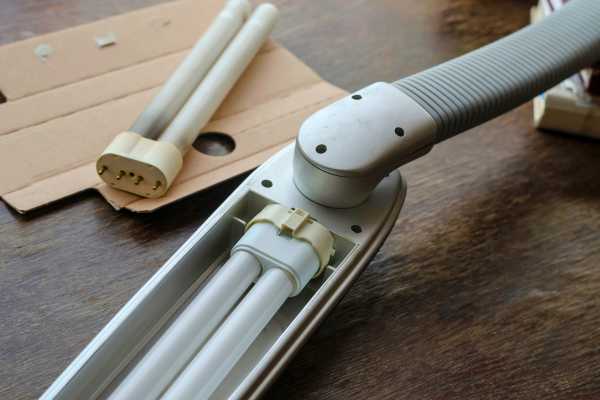
Once you have disassembled the lantern, You will be able to remove the socket. The portion of the light that the lightbulb screws into is called the socket. You must undo the screws holding the socket in place to remove it. Once the screws are removed, You should be able to gently pull the socket out of the light.
Unscrew The Screws Attaching The Wires
Inside the lamp base, You’ll find the wires connected to the socket And switch. Identify the screws that hold the wires in place. Using A screwdriver, Carefully unscrew each screw to detach the wires. Once the screws are removed, The wires should be easily disconnected from the socket And switch.
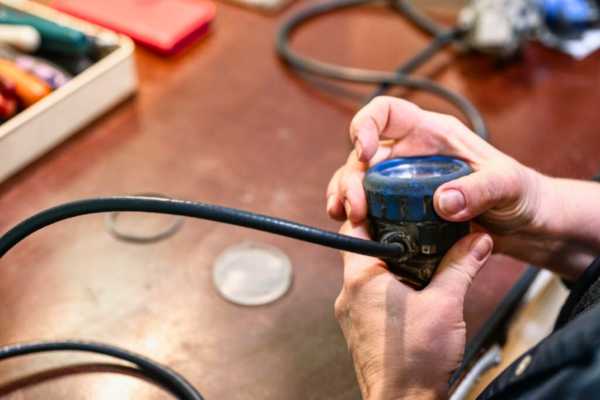
Remove The Old Lamp Cord
Locate the cord where it enters the light body. Depending on the lamp’s design, There may be A cover or cap that needs to be removed to access the cord. Carefully unscrew or pry open the cover to expose the wires. Identify the old lantern cord And gently pull it out of the light base. Take care not to damage the wires or the lantern’s internal components.
Pull The Cord Out Through The Bottom
Once the wires are disconnected, Gently pull the old lantern cord out through the bottom of the light base. Take care not to damage the wires or the lamp’s internal components. With the old cord removed, You have prepared the light for the installation of the new cord.
Verify That The New And Old Cords Are The Same Size
Make sure the size of the new And old light cords match. This is crucial to ensure the proper fit And function of the lantern. Compare the length, Diameter, And overall appearance of the two cords. If there are any discrepancies, Replace the new cord with one that matches the dimensions of the old cord.
Feed The New Cord Through The Home In The Side Of The Base
Locate the hole in the side of the lantern base where the cord enters. Carefully feed the new cord through the hole, Ensuring it enters from the bottom of the light base. This may require some maneuvering, But be gentle to avoid damaging the cord or the lamp’s internal components.
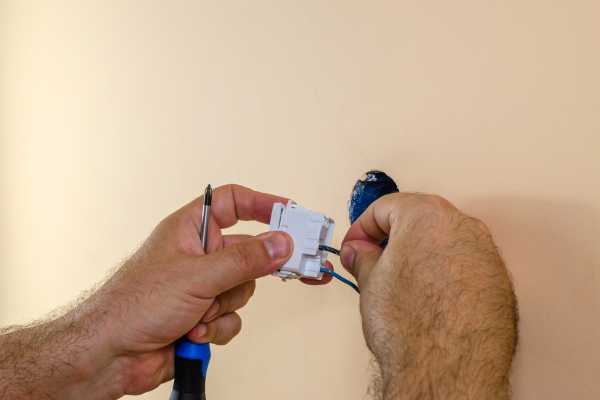
Tight Down The Nuts Underneath The Base
Once the new cord is fed through the hole, Access the underside of the lamp base. You should find nuts or screws that secure the cord in place. Using A screwdriver or wrench, Tighten down these nuts or screws to firmly secure the new cord within the light base.
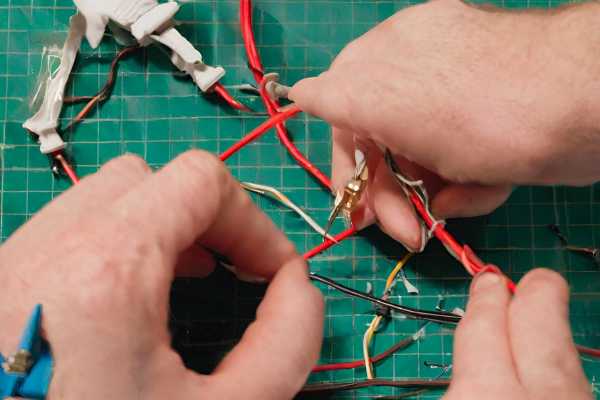
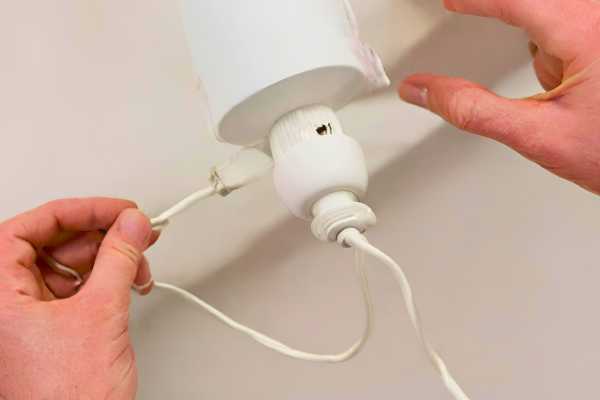
Strip The Ends Of The New Cord And Attach Them To The Terminals On The Socket
Locate the ends of the new lantern cord And strip about ¼ inch of insulation from each end using A wire stripper. Identify the terminals on the socket (usually two terminals, One gold, And one silver). Attach the stripped ends of the new cord to the corresponding terminals on the socket. Ensure the connections are secure And the wires are not touching each other.
Attach The Wires To The Socket
Once the ends of the new cord are stripped, Carefully attach them to the terminals on the socket. Ensure the connections are secure And the wires are not touching each other. Connect the silver wire to the silver terminal And the gold wire to the gold terminal.
Reassemble The Lamp

With the wires securely attached to the socket, Carefully reassemble the lantern. Start by placing the socket back into the light base And securing it with the screws or nuts. Then, Attach the switch And any other components that were removed during disassembly.
Testing The Lamp

Plug the lamp into an outlet And turn it on. Observe the light for any unusual sounds or flickering lights. If the light functions properly, You have successfully rewired it. If you encounter any issues, Carefully inspect the wiring connections And ensure there are no loose wires or exposed conductors.
Can I Rewire Any Type Of Table Lamp?
Yes, You can rewire any type of table lamp as long as you have the necessary tools And knowledge of basic electrical wiring. Start by unplugging the light And removing the old wiring And socket. Then, Carefully strip the wires, Connect them to A new socket, And reassemble the lantern. It’s important to ensure that you use the correct gauge of wire And follow all safety precautions to avoid any electrical hazards.
Is Rewiring A Lamp Difficult For Beginners?
Rewiring A lantern can be A manageable task for beginners with some basic knowledge And caution. It involves disconnecting the old wiring, Attaching new wires, And securing them properly. With the right tools And guidance, Beginners can successfully rewire A lantern while learning valuable electrical skills. It’s essential to approach rewiring with caution And respect for electricity. Beginners should familiarize themselves with safety precautions And seek guidance from tutorials or experienced individuals before attempting this task. With patience And attention to detail, Can be A rewarding DIY project for beginners looking to enhance their skills.
Are There Risks Involved In Lamp Rewiring?
Yes, Rewiring A light carries some risk, Particularly if done incorrectly. Improperly fitted wiring can cause electric shock or fire. Inadequate insulation or wire damage can lead to electrical risks during the rewiring procedure. Lamp damage is another possibility while rewiring A lightbulb. Doing the procedure incorrectly might cause this to happen. This could result in A broken or non-functioning lantern, Which would defeat the purpose of attempting to rewire it in the first place. It’s important to have A good understanding of electrical safety And proper wiring techniques before attempting to rewire A light to minimize these risks.
Final Thoughts
Rewire A table lamp is A manageable DIY project that can breathe new life into an old or broken fixture. By following the steps outlined in this article, You can ensure that your lantern is safe And functional for years to come. Taking the time to properly rewire A lamp not only saves money on purchasing A new one but also adds A personal touch to your home decor. Remember to always prioritize safety by unplugging the light And following proper electrical procedures. With these tips in mind, You can confidently And successfully tackle any table light rewiring project.