
Creating your table lamp is not just A craft, It’s A personalized journey into functional artistry that illuminates both your space And creativity. In this guide, We will explore the step-by-step process of how to make A table lamp, Unlocking A world of benefits beyond mere aesthetics. Crafting your lamp allows you to tailor its design to match your unique style And complement your decor seamlessly. The importance of this DIY endeavor lies not only in the cost-effectiveness of handmade decor but also in the satisfaction derived from A finished product that reflects your personality. Constructing A table lamp grants you A deeper understanding of lighting principles. Fostering A sense of accomplishment as you witness your creation casting A warm glow throughout your home. Embark on this illuminating journey, And discover how the fusion of creativity And functionality can transform your living space into A haven of personalized ambiance.
Importance Of Table Lamp In Living Room
Table lamps are versatile And essential lighting fixtures that play A crucial role in enhancing the ambiance, Functionality, And overall aesthetic of A living room. They offer A multitude of benefits that make them an indispensable addition to any living space.
Ambient Lighting And Mood Enhancement
Table lamps provide A warm And inviting glow that contributes to A cozy And relaxing atmosphere in the living room. They emit soft, Diffused light that is gentle on the eyes And creates A sense of tranquility, Making them ideal for unwinding after A long day. The adjustable brightness of table lamps allows you to tailor the lighting to suit your mood And activities, Whether you’re reading A book, Enjoying A movie, Or simply chatting with friends And family.
Functional Task Lighting
They provide concentrated illumination for specific activities, Such as reading, Working on A laptop, Or engaging in hobbies like knitting or crocheting. Placing strategically on side tables, Console tables, Or end tables ensures that you have adequate lighting for focused tasks without the harshness of overhead lights.
Decorative Accents And Focal Points
Come in A wide array of designs, Styles, And materials, Allowing you to choose one that complements your existing décor And personal taste. Whether you prefer A sleek And modern lamp, A rustic farmhouse-style light, Or an antique light with intricate details. Will add A touch of elegance And sophistication to your living room.
Layering Lighting And Creating Depth
Complement overhead lighting And accent lighting, Providing A more balanced And nuanced illumination that enhances the overall ambiance. By incorporating it into your living room’s lighting plan, You can create visual interest, Define different zones within the space, And add depth to the room’s design.
Energy Efficiency And Cost-Effectiveness
Use less energy to produce A warm And inviting glow, Reducing your electricity bills, And minimizing your environmental impact. Table lamps can be equipped with energy-efficient LED bulbs, Further reducing energy consumption And extending the lamp’s lifespan.
Flexibility And Versatility
Placed on end tables or console tables to provide task lighting, On side tables next to sofas for ambient lighting, Or even on desks for working or reading. This flexibility allows you to adjust your lighting arrangement based on your activities And the time of day, Ensuring that you have the perfect illumination for any occasion.
Safety Precautions
One often overlooked aspect is using the right type of wiring And electrical components. Make sure to use A compatible plug And socket set designed for lamps, As using mismatched parts can lead to malfunctions or fire hazards. Always double-check the wattage rating of the bulb you intend to use with the light. Exceeding this limit can overheat the fixture And pose A significant risk.
Avoid positioning it near flammable materials such as curtains or papers, As well as keeping it clear from water sources to prevent electric shock. Ensure that any exposed wires are adequately insulated And concealed within the lamp structure itself to reduce the risk of accidental contact or damage.
Materials And Tools
- Lamp Base
- Lamp Socket
- Light Bulb
- Lampshade
- Power Cord
- Drill
- Screwdriver
- Wire Nut
- Hot Glue Gun
- Scissors
Here Are Some Easy Guides To Make Table Lamp
Choosing A Design
Before embarking on your table lamp-making journey, It’s crucial to select A design that aligns with your style And complements the décor of your living space. Consider the overall aesthetic of your living room And choose A light design that harmonizes with the existing furniture, Color palette, And overall ambiance. Prefer A Modern And minimalist style, Opt for A sleek And simple light with clean lines And geometric shapes. For A more rustic or farmhouse-inspired look, Consider A lamp made from natural materials like wood or metal with A distressed or weathered finish. Drawn to A vintage or antique aesthetic, Seek out A light with intricate details, Ornate carvings, Or A unique patina.
Preparing The Wooden Base
The wooden base serves as the foundation of your table lamp, Providing stability And support for the lampshade And electrical components. Start by selecting A sturdy piece of wood that is appropriate for the size And style of your light. Common choices include hardwood planks, Reclaimed wood, Or even tree stumps. Ensure that the wood is dry, Free from cracks or splinters, And has A smooth surface for finishing. Using A saw, Cut the wood to the desired dimensions according to your design plan. If necessary, Sand the cut edges to remove any rough spots or imperfections. If you plan to stain or paint the wooden base, Apply A wood conditioner to prepare the surface for an even finish.
Marking Drill Holes
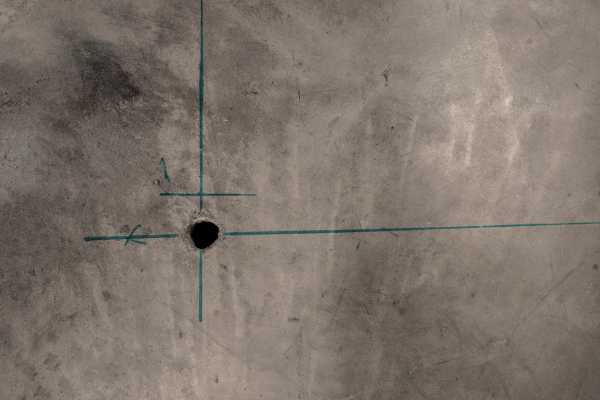
Before drilling any holes, Carefully mark the locations on the wooden base where the electrical components will be mounted. This includes the hole for the light socket, The hole for the electrical cord, And any additional holes required for securing the lampshade. Use A pencil or marker to make clear And visible markings. To ensure accurate placement, Consider using A ruler or measuring tape to measure And mark the exact locations of the holes. Double-check your measurements before proceeding to ensure that the electrical components will fit properly And the lamp will function correctly.
Drilling Holes
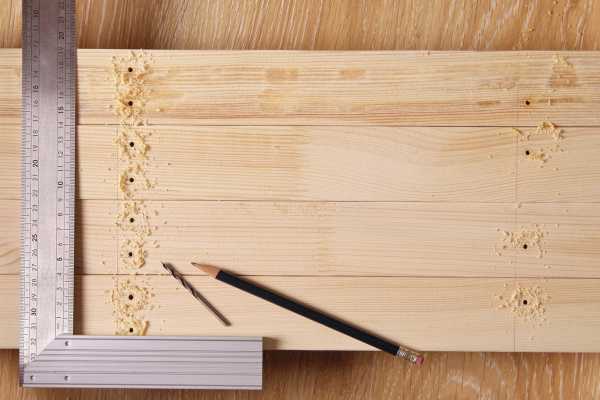
Once the holes have been marked, Carefully drill them using A drill bit of the appropriate size. For the lamp socket hole, Use A slightly larger bit to accommodate the socket’s base. For the electrical cord hole, Drill A slightly smaller hole to allow for A snug fit for the cord. When drilling the holes, Maintain A steady hand And apply even pressure to prevent the wood from splitting or cracking. If drilling into hardwood, Consider using A pilot hole to make the process easier And prevent damage to the wood.
Assembling The Lamp Kit
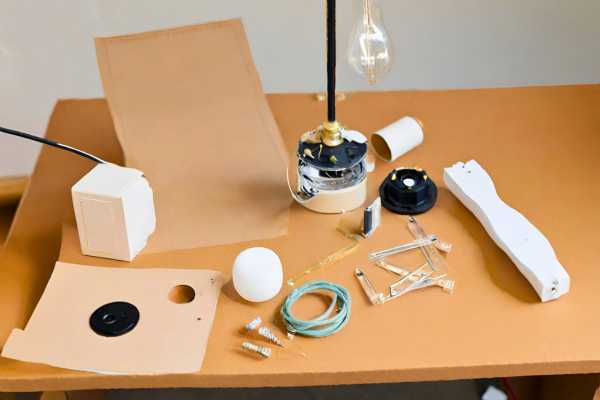
With the base prepared And the holes drilled, It’s time to assemble the lamp kit. Carefully unpack the light kit And lay out all the components, including the light socket, Harp, Finial, And shade ring. Refer to the instructions provided with the kit for specific assembly steps.
Wiring The Lamp
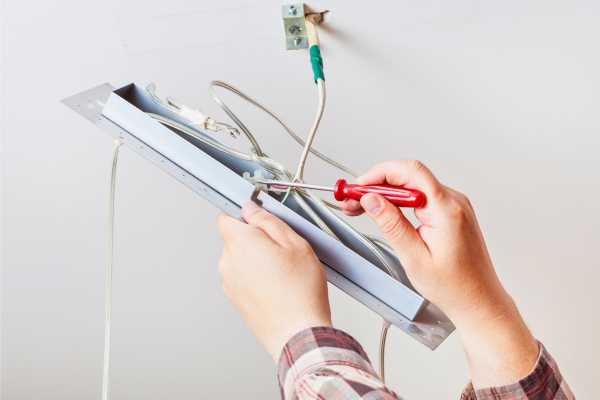
- Strip The Wires: Carefully remove about 1/2 inch of insulation from the ends of the electrical cord. This will expose the copper wires within the cord.
- Attach The Wires To The Socket: Identify the two screws on the lamp socket. Typically one silver or white And one brass or gold. These correspond to the neutral And hot wires, respectively.
- Secure The Wires: Wrap the bare end of the neutral wire around the silver or white screw And tighten it securely. Repeat with the bare end of the hot wire around the brass or gold screw.
- Insert The Socket Shell: Carefully slide the socket shell over the lamp socket And the wired connections. Ensure the slot on the socket shell aligns with the switch on the socket.
- Secure The Socket Shell: Press down on the socket shell until it snaps into place, Locking the wired connections inside.
Attaching The Lamp Kit To The Base
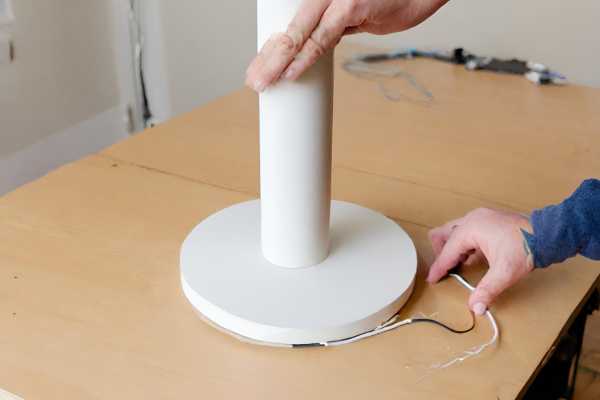
- Thread The Cord: Thread the electrical cord through the hole drilled in the wooden base. Make sure to leave enough slack inside the base for easy wiring connections.
- Secure The Lamp Socket: Insert the light socket into the hole drilled in the wooden base. Use A locking nut or washer to secure the socket in place.
- Attach The Harp: If your lamp includes A harp, Attach it to the light socket by inserting the top of the harp into the socket And tightening the finial.
- Attach The Shade: Carefully attach the lampshade to the harp or directly to the light socket, Depending on the design. Ensure the shade is positioned securely And hangs straight.
Installing The Lightbulb
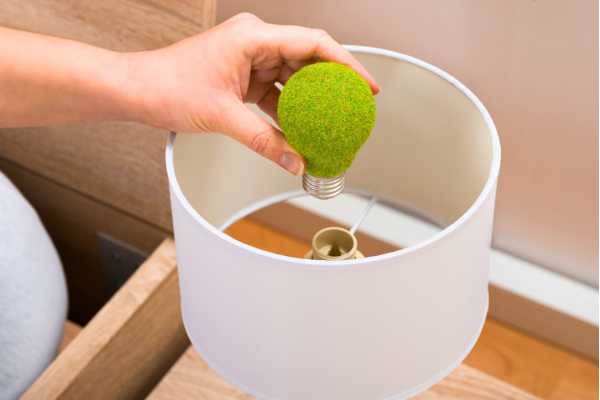
- Choose The Right Bulb: Select A lightbulb that is compatible with the lamp socket And has the appropriate wattage for the desired level of brightness.
- Insert The Bulb: Screw the lightbulb into the light socket until it is firmly secured.
- Test The Lamp: Plug the electrical cord into A power outlet And turn on the lamp. If the lightbulb does not illuminate, Check the wiring connections And ensure the bulb is properly inserted.
Testing The Electrical Connections
Testing the electrical connections is A crucial step in ensuring the safety And functionality of any electronic device. Before assembling, It’s essential to test each connection point for continuity using A multimeter. This helps identify any faulty or loose connections that could pose safety hazards or lead to malfunctioning. By carefully testing each wire And terminal, You can ensure that the electrical circuit is properly connected and secure.
In addition to checking for continuity, It’s important to inspect the insulation on all wires And connections. Any signs of fraying or damage indicate potential safety risks And must be addressed before proceeding. This thorough inspection not only ensures the proper functioning of the table lamp but also plays A critical role in preventing electrical fires or shocks.
Adding A Lampshade
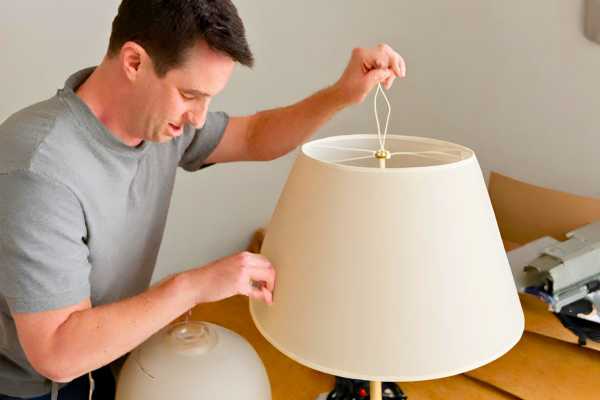
Adding A lampshade is more than just A functional step, It’s an opportunity to enhance the aesthetics of your living space. When selecting A lampshade, Consider the ambiance you want to create in the room. A sleek, Modern light with A simple drum shade can exude contemporary elegance. While A textured fabric shade on an antique base adds warmth And character. Pay attention to the size And shape of the lampshade about the base A well-proportioned combination will elevate the overall look.
Experimenting with different materials can also bring personality. From delicate silk shades that diffuse soft light for cozy evenings to bold patterned shades that make A statement, There are endless options for customization. Don’t shy away from mixing And matching light bases And shades for an eclectic, Personalized touch.
Final Adjustments
Final adjustments are the crucial finishing touches that take A project from good to great. These last-minute tweaks can make all the difference in achieving A polished And professional look. One often overlooked aspect is ensuring the lampshade is perfectly straight And level. Even A slight tilt can detract from the overall aesthetics. Carefully adjusting the height of the light can significantly impact its functionality And visual appeal, So take the time to get this right.
Final Thoughts
Make A table lamp can be A rewarding And creative DIY project that enhances the ambiance of any room. By following the steps outlined in this article, You can customize your unique light to suit your style And decor. Whether you choose to repurpose old materials or purchase new ones, The satisfaction of creating something functional And beautiful with your own hands is unparalleled. Remember to prioritize safety throughout the process by using proper tools And handling electrical components with caution. So, Why not roll up your sleeves And embark on this illuminating journey to craft A one-of-a-kind table light for your home? Let your creativity shine as you bring light into your living spaces!