Looking to enhance your home’s comfort and privacy? Learn how to hang blackout curtains over blinds for an elegant and functional window treatment. Combining blackout curtains with blinds helps block unwanted light, improve insulation, and create a stylish look. Whether you’re dealing with roller blinds, vertical blinds, or mini blinds, the process is simple and adaptable. Choose quality curtain rods, measure accurately, and secure your hardware for a seamless fit. This approach ensures easy installation without doing away with current blinds. Perfect for bedrooms, nurseries, or media rooms, blackout curtains over blinds offer a layered answer for a restful and strength-green area. Transform your windows effortlessly with this practical guide.
Understanding Blackout Curtains And Blinds

To truly appreciate the beauty of combining blackout curtains with blinds, it’s important to understand the role of each. Blackout curtains, as the name suggests, are designed to block out light entirely. These curtain are often made from thick, dense fabrics, sometimes with a specialized lining to ensure they offer maximum light blockage. They create an impenetrable barrier against external light, allowing you to craft a space that’s perfectly dark – even in broad daylight.
Blinds, on the other hand, offer a more adjustable way of controlling the light coming into a room. They can be tilted to your desired angle, allowing you to regulate the brightness while maintaining privacy. However, blind alone may not block enough light if you’re sensitive to brightness, or if you’re creating a media room or a nursery where total darkness is desired. That’s where the magic of layering comes in. By placing blackout curtain over blinds, you achieve the best of both worlds: the flexibility of blind and the total darkness of blackout curtains.
Tools And Materials You’ll Need

Before diving into the installation, you’ll need to assemble a few essential tools and materials. Having everything ready will ensure a smooth, hassle-free process.
- Blackout Curtains (with or without a lining, based on your preference)
- Curtain Rod (make sure it’s long enough to cover your window completely)
- Blinds (already installed, of course!)
- Tape Measure (for accuracy)
- Level (to ensure everything is aligned properly)
- Screwdriver (for mounting, if necessary)
- Drill (for creating wall holes, if applicable)
- Curtain Hooks or Rings (if your curtain rod requires them)
- Pencil (for marking positions)
Having these tools in hand will save you time and ensure that you don’t encounter any surprises mid-project.
Choosing The Right Blackout Curtains

Selecting the right blackout curtain is pivotal. It’s not just about blocking light; it’s about finding a solution that complements your home’s decor and meets your practical needs. Think about the fabric first. Velvet or polyester are common choices for blackout curtains because of their density, but the fabric’s texture can also play a significant role in your room’s overall aesthetic.
Next, consider the color. Dark colors like charcoal gray or navy blue offer a modern, sophisticated vibe, while lighter shades can soften the room’s atmosphere. Be mindful of the size too—your curtain need to fully cover the blinds, so choose a width that allows for ample coverage and a length that extends down to your desired height (either the floor or slightly above).
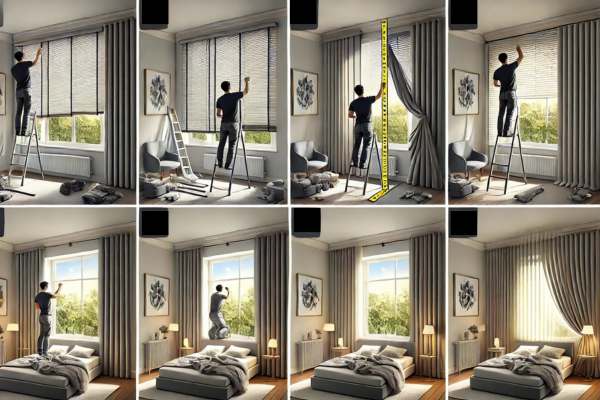
Step-By-Step Guide To Hanging Blackout Curtains Over Blinds

1: Choose the Right Curtain Rod
Select a sturdy curtain rod that extends far enough to clear the blinds when the curtain are drawn.
2: Measure Your Window
Measure the width and height of your window frame to determine the proper curtain size and rod placement.
3: Install the Brackets
Secure the brackets above the window frame, at least 4-6 inches above the blind for full coverage and a layered effect.
4: Hang the Curtains
Thread the blackout curtains onto the rod and place the rod into the brackets. Adjust the curtain for a seamless appearance.
5: Test for Functionality
Ensure the blinds and curtains operate smoothly, providing both light control and privacy.
Why Hang Blackout Curtains Over Blinds?

Why bother with the extra step of layering blackout curtains over your existing blinds? Simple—because it’s the best way to maximize both functionality and style. The blind allow you to regulate light throughout the day, adjusting them based on the sun’s position. But when you need total darkness, the blackout curtain provide that extra layer of protection. The combination also serves as an effective sound barrier and thermal insulator, reducing heat loss during winter and keeping your room cooler during the warmer months.
Preparing Your Blinds And Window Area

Take a moment to inspect your blinds before proceeding. Are they clean? In good condition? You don’t want to put extra strain on them with the additional weight of hang blackout curtains over blinds. Give them a quick dusting, and ensure they’re functioning properly. Also, prepare your window area: remove any obstacles, wipe the surface clean, and ensure the wall space is ready for the curtain rod installation.
Choosing The Best Hanging Method

When hanging blackout curtains over blinds, there are several approaches to consider. Each method offers a unique set of benefits:
- Curtain Rod Above Blinds: This is the most common and widely recommended method. Simply install the curtain rod above your blind, allowing each window treatment to function independently. This creates a balanced look and offers flexibility.
- Ceiling Mount: For a more seamless, ultra-modern appearance, a ceiling-mounted rod might be a better choice. It provides an unobstructed view and allows the curtain to hang straight down, creating a minimalist, clean aesthetic.
Which method you choose largely depends on your style preferences and available space, but both offer the ability to effectively layer your window treatments.
Installing A Curtain Rod Above Blinds
- Measure the Window: Accuracy is key. Measure both the height and width of your window. Add a few extra inches to the width to ensure the curtains will fully cover the blinds when closed. Also, consider how high you’d like your curtain to hang.
- Mark the Mounting Points: With a level and pencil, mark the positions for your brackets. These should be a few inches above your blind, allowing enough clearance for the blinds to function freely.
- Install the Brackets: Depending on the material of your wall, you’ll need to select the right screws or anchors to secure the brackets in place. Ensure they’re level before drilling.
- Attach the Curtain Rod: Once the brackets are installed, place the curtain rod onto them and adjust it to ensure it’s hanging evenly.
Hanging Your Blackout Curtains

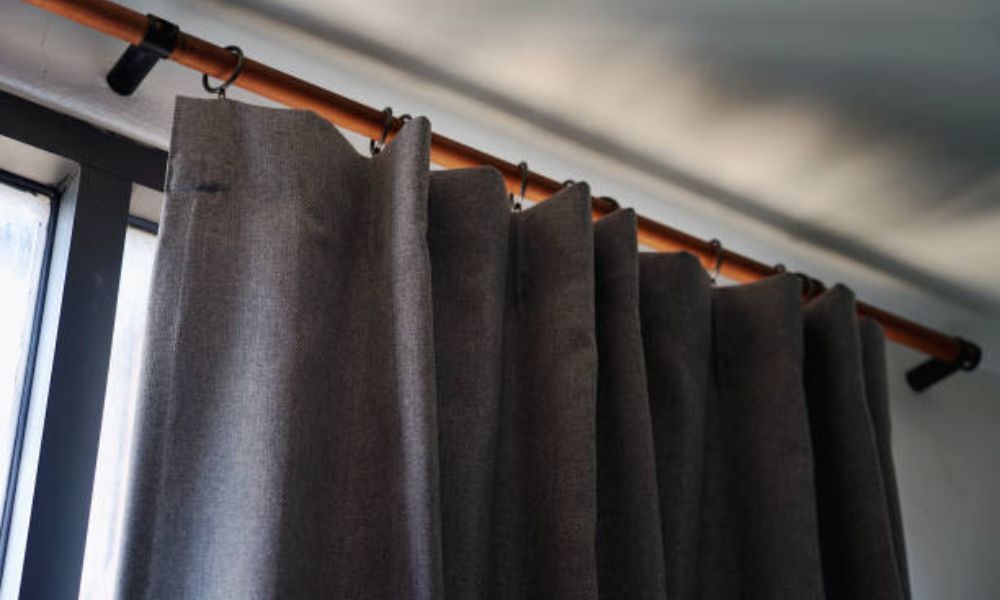
With the curtain rod securely in place, it’s time to hang the clean blackout curtains. If you opted for a rod with curtain rings, simply attach your curtains to the rings before draping them over the rod. Alternatively, if your curtain have grommets, slide them directly onto the rod. Ensure the curtains hang evenly, adjusting the pleats or folds to give them a polished look.
Combining Curtains With Blinds For Maximum Effect
By combining both window treatments, you’re enhancing the functionality of each. The blinds give you the flexibility to adjust light levels during the day, while the blackout curtain ensure total darkness when necessary. Additionally, this layering creates a swish, elegant appearance that can increase the classy of any room. The delivered insulation additionally facilitates maintaining a comfortable temperature, slicing down your power expenses.
Tips For Adjusting Light And Privacy Levels
Once your blackout curtains are up, experiment with different configurations. Open the blinds to let natural light in, or adjust them for optimal privacy. You can also slightly open the curtains to filter in a little light without compromising privacy. When total darkness is essential, make sure both the blind and curtain are fully closed.
Maintaining Your Blackout Curtains
Maintaining your blackout curtains will ensure they continue to perform effectively. Dust them regularly, especially if you live in a dusty area. If the curtain are machine washable, follow the care instructions to keep them looking fresh. Check for any signs of wear, particularly in the lining, and repair any damage promptly to preserve their light-blocking capabilities.
Frequently Asked Questions
1. Can I Hang Blackout Curtains Over Blinds Without Drilling?
Absolutely. If you pick a no-drill solution, you can use tension rods or adhesive hooks. These options are best for renters or anyone who desires to avoid making holes within the wall. While they’ll no longer be as strong as conventional mounting strategies, they can nevertheless keep your curtain securely.
2. Best Way to Layer Blackout Curtains with Blinds?
The best way to layer blackout curtain with blinds is to install the curtain rod above the blind, giving both treatments their own space to function. This allows for complete light control and maximum privacy while keeping the look of your window clean and organized.
Final Thoughts
Hanging blackout curtains over blinds is an effective way to enhance light control and privacy in your home. To achieve this, measure your window accurately, choose the right curtain rod, and opt for blackout curtains that complement your existing blinds. Install the rod above the blinds to maximize light-blocking efficiency and create a polished look. This setup no longer simplest improves the room environment but additionally allows for insulation and power financial savings. By following those steps, you could seamlessly set up blackout curtain over blind and enjoy a more cushty living area.
