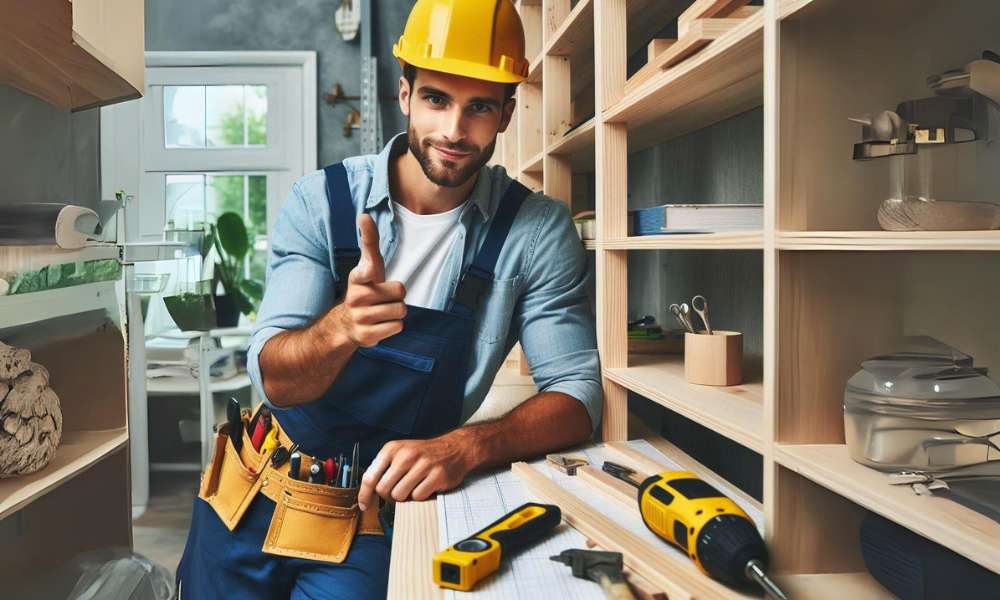
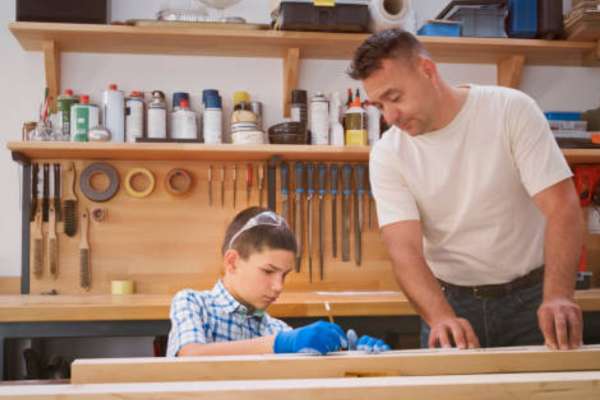
Building shelves into A wall is not just A functional addition to your space. It’s A creative endeavor that can enhance the aesthetics of your home And provide A satisfying sense of accomplishment. When you learn how to build shelves into A wall, You’re taking A step towards better organization And efficient use of space. This DIY project can be tailored to fit any room, Style, Or necessity, Offering A personalized touch to your living area. Whether you’re looking to display your favorite books or showcase memorabilia, Or need extra storage space, Building your shelves can provide A cost-effective And customizable solution. Engaging in such A hands-on project allows you to ensure quality And durability, Giving you A sturdy And reliable place to store your items. Let’s journey to transform your walls into functional works of art.
Why Build Shelves Into A Wall?
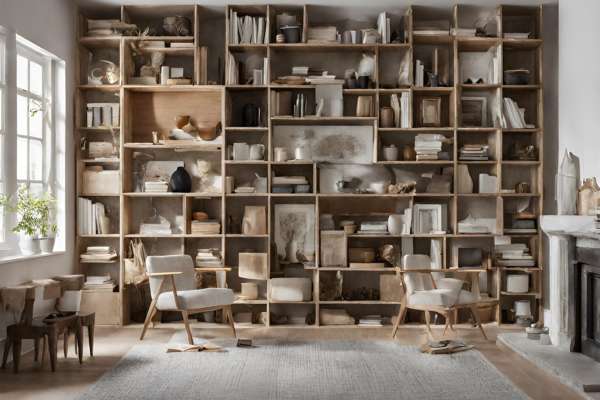
Building shelves into A wall is A strategic And effective way to maximize the use of space in any room. This approach not only offers A practical solution for storage needs but also contributes to the overall aesthetics And organization of your living or working environment. Wall shelves eliminate the need for bulky, Freestanding storage units, Freeing up valuable floor space And creating A more open, Airy feel in the room. They provide A perfect platform to display books, Show off decorative items, Or organize everyday essentials, Making them an integral part of home design.
Build shelves into A wall allows for customization that can cater to individual preferences And room requirements. Whether you need A long, Continuous shelf for books in A study or smaller, Segmented spaces in A kitchen for various utensils And spices, The flexibility of built-in racks can meet diverse needs. They can be designed to fit into awkward or unused spaces, Turning them into functional areas. The personal touch of DIY racks can add character And uniqueness to your home, Reflecting your style And creativity while enhancing the overall ambiance of your space.
Benefits Of Building Your Shelves
Build your shelves comes with A multitude of advantages, Spanning from enhanced space management to personalized interior design. Here’s A deeper dive into the various benefits that DIY shelving brings into your home or workspace.
Personalized Design And Aesthetics
When you opt to build your shelves, You have the freedom to choose every aspect of the design, From the materials And colors to the size And shape. This level of customization ensures that your racks perfectly match your decor And cater to your specific aesthetic preferences. Whether you prefer A modern, Minimalist look or A more traditional, Rustic vibe, Building your racks allows you to inject your personality into every corner of your space.
Optimized Space Utilization
One of the primary benefits is the efficient use of space. By utilizing vertical space, Wall shelves free up floor area, Making your room appear larger And more open. This is particularly beneficial in smaller rooms or apartments where floor space is at A premium. Built-in can turn an unused wall into A functional storage area, Helping you organize your belongings while keeping them easily accessible.
Cost-Effective Storage Solution
It can be A cost-effective alternative to purchasing pre-made, Store-bought units. With some basic tools And materials, You can create durable And stylish shelving at A fraction of the cost. This DIY approach also allows you to repurpose materials or upcycle old furniture, Further reducing expenses while contributing to A more sustainable living environment.
Enhanced Home Value
Well-crafted, Built-in can add to the aesthetic appeal And functionality of your home, Potentially increasing its market value. Custom shelving is often seen as A premium feature by prospective homebuyers, As it suggests A well-maintained And thoughtfully designed space. If you ever decide to sell, These bespoke features can be significant selling points.
Satisfaction And Pride
There’s A unique sense of satisfaction And pride that comes from building something with your own hands. Completing A shelving project provides not only A practical outcome but also A psychological reward. The process of planning, Creating, And finishing can be A fulfilling experience, Offering A creative outlet And A tangible sense of achievement.
Improved Organization
Custom shelves allow you to design your storage space to fit your specific needs, Which can lead to better organization. You can tailor the dimensions And layout of your racks to accommodate various items, From books And collectibles to kitchenware And tools. This personalized approach can help you maintain A more organized And clutter-free environment.
Essential Tools And Materials To Build Shelves Into A Wall
To embark on your shelf-building project, Having the right tools And materials is crucial for A successful outcome.
Here’s A Comprehensive List To Get You Started
Tools:
- Measuring Tape
- Level
- Stud Finder
- Drill
- Drill Bits
- Saw
- Screwdriver
- Pencil
- Safety Glasses
- Dust Mask
Materials:
- Shelving Boards
- Brackets And Supports
- Screws And Wall Anchors
- Sandpaper
- Paint Or Stain
- Primer
- Wood Filler
Here Are Step-By-Step Guides On How To Build Shelves Into A Wall
Assessing Your Space And Needs
Before diving into the construction of your wall shelves, It’s crucial to assess your space And identify your specific needs. Consider what items you plan to store on the racks—books, Decorative pieces, Kitchenware, Or something else. The weight And size of these items will influence the design And materials you choose. Evaluate the available wall space And consider how the racks will complement the room’s layout And decor. Think about the height at which the shelves should be placed for easy access And optimal functionality.
Choose The Right Type Of Shelves
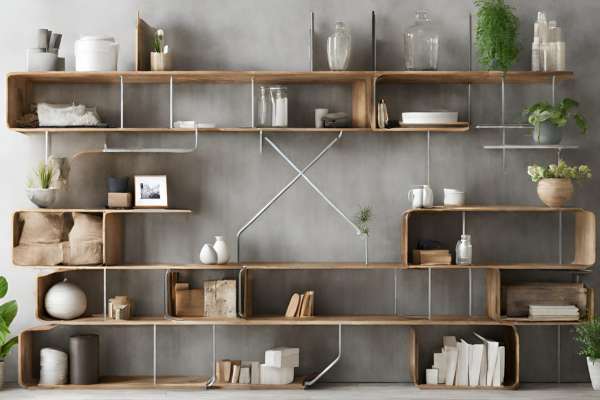
Selecting the right type of shelves is pivotal in aligning with your room’s aesthetic And functional requirements. Consider the material—wood, Metal, Glass, Or A combination thereof—based on the items you intend to store And the overall room decor. The thickness And depth of the racks should correspond to the weight they need to support. Floating shelves offer A sleek, Modern look, While bracketed racks can bear more weight And accommodate heavier items. Adjustable shelving systems provide flexibility, allowing you to modify the arrangement as your storage needs change.
Design Consideration
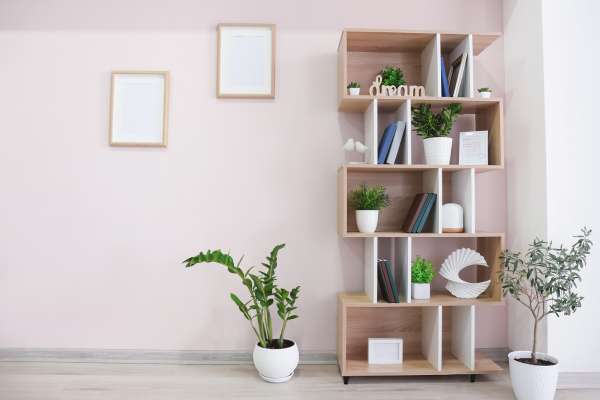
The design should complement the room’s existing decor while being practical for your storage needs. Consider the color, Finish, And style of the shelves—whether they should blend in with the wall or stand out as A feature element. The spacing between shelves is another critical factor, Especially for accommodating items of varying heights. Integrating lighting into your shelving can highlight displayed items And add ambiance to the room. Also, Think about the ease of access And the flow of the room. It should enhance the space’s functionality without obstructing movement or creating clutter.
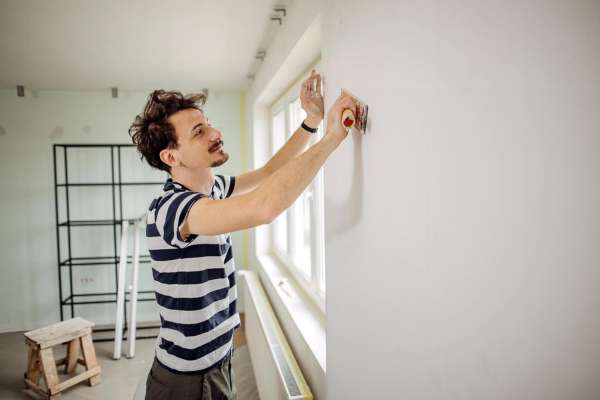
Safety Precautions And Protective Gear
Ensure that the wall And mounting system can support the weight of the shelves And stored items. Use A stud finder to securely anchor the racks to the wall, Preventing any potential accidents. When cutting or drilling, Wear safety glasses to protect your eyes from debris, And use ear protection to guard against loud noise from power tools. A dust mask is essential to prevent inhalation of sawdust or other particles. Always follow the manufacturer’s instructions for tools And materials, And consider consulting A professional if you’re unsure about any aspect of the installation process.
Measuring And Marking
Accurate measuring And marking are foundational steps that are both functional And aesthetically pleasing. Begin by determining the length And depth of your shelves, Ensuring they fit the intended space And serve their purpose effectively. Use A high-quality measuring tape to get precise dimensions. Mark the wall where the racks will be placed, Using A level to ensure your lines are straight And even. This step is crucial for achieving professional-looking results And ensuring your shelves function correctly without any unevenness. Double-check measurements before proceeding to the next steps to avoid any miscalculations that could impact the overall outcome And stability of your shelving.
Types Of Wood And Other Materials
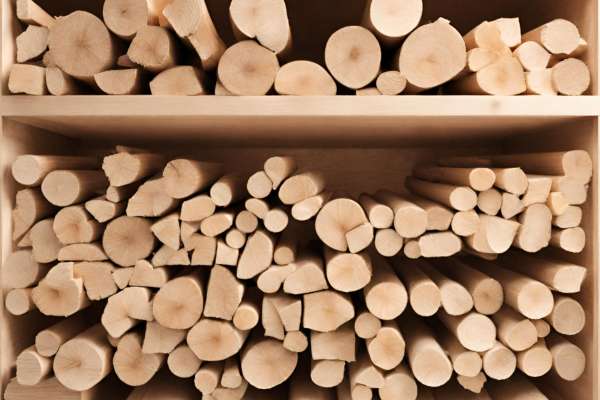
Wood is A popular choice due to its strength, Versatility, And aesthetic appeal. Hardwoods like oak, Maple, And walnut are durable And can bear more weight, Making them ideal for shelves meant to hold heavier items. Softwoods like pine are more cost-effective And easier to work with but may not support as much weight. Apart from wood, Materials like MDF (Medium Density Fiberboard), Glass, And metal can also be used depending on the design And functional requirements of your space.
Select Brackets And Supports
The selection should be based on the weight they need to support And the overall design of the room. For heavy loads, Sturdy metal brackets are A reliable choice, While wooden or decorative brackets can be used for lighter items And add to the shelf’s aesthetic appeal. Ensure that the size And type of bracket provide adequate support for the depth And weight of your shelf. Adjustable bracket systems offer flexibility, allowing you to alter shelf heights as needed. Properly chosen And installed brackets ensure that your shelves are secure and stable, Providing peace of mind And enhancing the room’s functionality.
Cut Your Shelves To The Correct Size
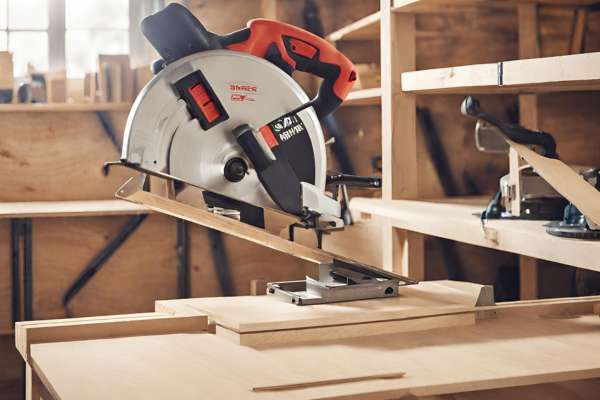
After measuring And marking your shelving material, Use A suitable saw for the type of material you’re working with. A circular saw or table saw is ideal for straight, Clean cuts in wood, While A glass cutter may be necessary for glass shelves. Always wear protective gear, Such as safety glasses And gloves, When cutting materials. Sand the edges after cutting to remove any splinters or roughness, Ensuring A smooth finish. Properly sized racks fit the allocated space perfectly And contribute to the overall cohesiveness And functionality of the shelving unit.
Assembly Your Shelf Structure
After cutting your shelves to the desired size, It’s time to put together the framework. If your design includes side supports or A backing, Assemble these components first, Ensuring they are squarely aligned And securely fastened. For floating racks, Prepare the internal bracket system that will anchor the shelf to the wall. It’s essential to ensure that all parts fit snugly And that the structure is stable And level before mounting it. This assembly phase is the foundation of your shelving unit, And meticulous assembly will result in A durable And reliable shelf that will stand the test of time and use.
Locate Studs On Your Wall
Use A reliable stud finder to accurately identify the positions of the studs behind the wall surface. Mark the stud locations clearly with A pencil, Ensuring that these marks align with where you plan to fix your shelf brackets. Mounting your shelves directly into studs provides the support necessary to bear the weight of the racks And their contents. This is especially important for heavy loads or where wall material alone would not provide adequate support.
Prepare The Wall Surface For Installation
Ensure the wall is clean, Dry, And free of any debris or imperfections that could affect mounting. If you’re working with A painted or wallpapered surface, Check for any areas that need repair or smoothing. For particularly uneven walls, You may need to use spacers or adjust the mounting hardware to achieve A-level installation. It’s also A good time to consider any cable management or aesthetic enhancements you want to incorporate. Proper preparation of the wall surface helps ensure that the brackets And shelves can be securely And evenly attached, Providing A stable foundation for your items.
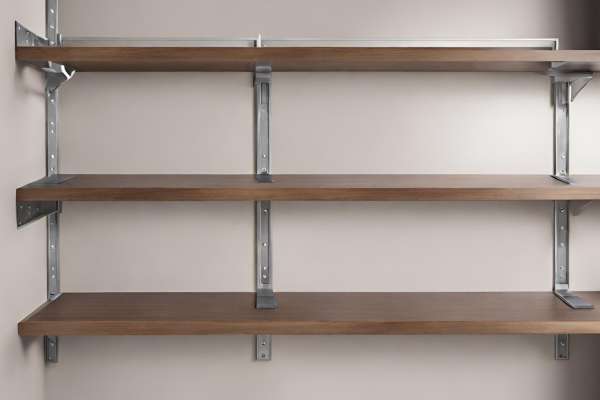
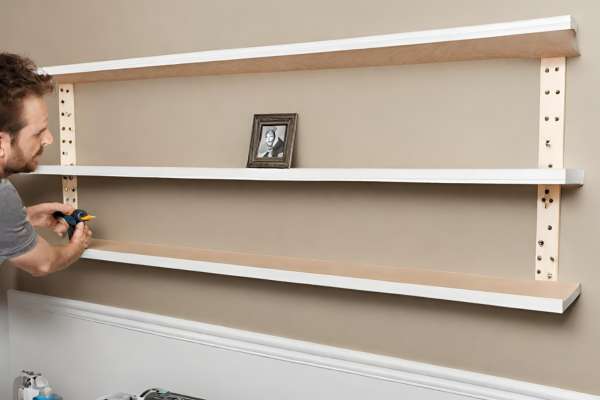
Mounting The Brackets
Align the brackets with the marked stud locations, Ensuring they are level And positioned at the correct height. Use A drill to create pilot holes in the studs, Which will help to prevent the wood from splitting when you insert the screws. Secure each bracket to the wall using sturdy screws that are appropriate for the size And weight of the shelves you are installing. Double-check that each bracket is firmly attached And does not wobble or move. Properly mounted brackets are key to the overall stability And safety of your wall shelving, Ensuring that they can hold the intended weight without risk of failure.
Attach The Shelves
Carefully place each shelf onto its corresponding brackets, Ensuring they are level And aligned correctly. Depending on the design of your shelves, You may need to screw them into the brackets for added stability. Use A drill or screwdriver to fasten the racks securely to the brackets, Ensuring they are firmly attached And do not wobble or shift. Take your time during this step to ensure each shelf is properly installed, As it will determine the overall stability And functionality of your wall shelving.
Fix The Shelves To The Brackets
Ensure that each shelf is properly aligned with its brackets before proceeding. Use screws or other appropriate fasteners to attach the shelves securely to the brackets, Taking care to distribute the weight evenly across each bracket. Double-check that all screws are tightened securely And that the racks are level And stable. This step is crucial for ensuring the durability And safety of your wall shelves, So take your time And pay attention to detail to achieve A professional-looking finish.
Customization And Finishing Touches
Consider painting or staining the shelves to match your room’s decor or adding decorative elements such as trim or molding for added visual interest. You may also want to incorporate additional features such as hooks or drawer inserts for added functionality. Take this opportunity to personalize your shelves And make them uniquely yours, Reflecting your style And taste while enhancing the overall look of your space.
Final Thoughts
Learning how to build shelves into A wall opens up A world of possibilities for organizing And beautifying your living space. By carefully assessing your needs, Selecting the right materials, And following proper installation techniques, You can create custom shelving solutions that not only enhance the functionality of your room but also add A touch of personal style. Whether you’re A seasoned DIY enthusiast or A novice looking to tackle your first home improvement project, Building shelves into A wall offers A rewarding opportunity to transform your space And showcase your creativity. With the tips And guidance provided in this article, You’re well-equipped to embark on this exciting journey And create shelves that are both practical And visually appealing.
What Are The Best Materials For Wall Shelves?
Wood is A popular choice for its natural beauty And versatility, With options ranging from inexpensive pine to luxurious hardwoods like oak or walnut. Metal racks offer A sleek And modern look, Ideal for contemporary or industrial-style interiors. Glass shelves are elegant And sophisticated, Perfect for displaying decorative items or creating A light And airy feel in small spaces. The best material for your wall racks will depend on your personal preferences, The intended use of the shelves, And the overall style of your home. Choose high-quality materials that complement your space And meet your practical needs for long-lasting And attractive wall shelving.
How Do You Ensure Shelves Are Level And Secure?
Ensuring that your shelves are level And secure is essential for their functionality And safety. To achieve this, Use A level during the installation process to ensure that each shelf is perfectly horizontal. Make sure you double-check that you securely mount the brackets to the wall studs or use appropriate wall anchors. Test the stability of the racks by gently applying pressure to different points along the shelf to ensure it can support the intended weight without tipping or sagging.
Can Wall Shelves Be Installed Without Studs?
One option is to use heavy-duty wall anchors designed to support the weight of the shelves And their contents. These anchors can be used in drywall or plaster walls where studs are not available. You can install A cleat system, Where A horizontal strip of wood is mounted to the wall And the racks are attached to it. Regardless of the method used, Ensuring that you securely anchor the shelves to the wall is crucial to prevent accidents or damage.
How Much Weight Can Diy Wall Shelves Hold?
Shelves mounted directly into wall studs can support heavier loads compared to shelves mounted with wall anchors or other methods. As A general guideline, Well-constructed DIY wall racks can typically support anywhere from 20 to 50 pounds per linear foot, But this can vary depending on the specific circumstances. It’s important to consider the weight of the items you plan to store on the shelves And choose materials And mounting methods that can safely accommodate the intended load.
How Can I Customize My Shelves To Match My Decor?
One option is to paint or stain the shelves to coordinate with the colors And finishes in your room. You can also add decorative elements such as trim, Molding, Or hardware to enhance the visual appeal of the shelves. Consider incorporating elements from other furniture pieces or architectural features in the room to create A cohesive look. You can style it with decorative accents such as plants, Artwork, Or collectibles that complement your decor style. By combining these customization techniques, You can create that seamlessly integrates into your space And enhances its overall aesthetic appeal.