
Anchoring a bookshelf to the wall is an essential step to ensure the safety and stability of your furniture, especially in homes with children or areas prone to earthquakes. Bookshelves, when loaded with heavy books and decorations, can become top-heavy and risk tipping over, posing a significant hazard. By securely anchor your bookshelf to the wall, you can prevent accidents and protect your loved ones and belongings. This process involves selecting the appropriate hardware, locating wall studs, and properly installing brackets or straps to keep the bookshelf firmly in place. Follow these steps to learn how to anchor a bookshelf to the wall and create a safe and secure living environment.
Choosing The Right Bookshelf

Selecting the right bookshelf is the first crucial step in ensuring your furniture is secure and stable. When choosing a bookshelve, consider the size, weight, and material. A sturdy bookshelves made of solid wood or metal is often more stable than one made of particleboard or plastic. Additionally, the height and depth of the bookshelves should be appropriate for the space and the items you plan to store. Bookshelves with a wider base tend to be more stable and less prone to tipping. Adjustable shelves can also be beneficial, allowing you to distribute weight evenly. Opt for a bookshelve with a back panel, as it provides additional structural integrity and can be more easily anchored to the walls. By carefully selecting a sturdy and well-designed bookshelves, you set the foundation for a secure anchoring process.
Gathering Necessary Tools And Materials
Before you begin the process of anchor a bookshelf to the wall, gather all the necessary tools and materials to ensure a smooth and efficient installation. Essential tools include a drill, a stud finder, a level, a measuring tape, and a screwdriver. Depending on your wall type and the bookshelf, you might also need wall anchors, screws, brackets, or anti-tip straps. It’s important to choose high-quality hardware that can support the weight of your fully-loaded bookshelf. Wall anchors are particularly useful for wallsinstallations, as they provide extra support. Make sure you have all these items on hand before starting the project to avoid interruptions and ensure the safety and stability of the bookshelves. Proper preparation with the right tools and materials is key to successfully anchoring your bookshelves to the walls.
Identifying The Wall Type
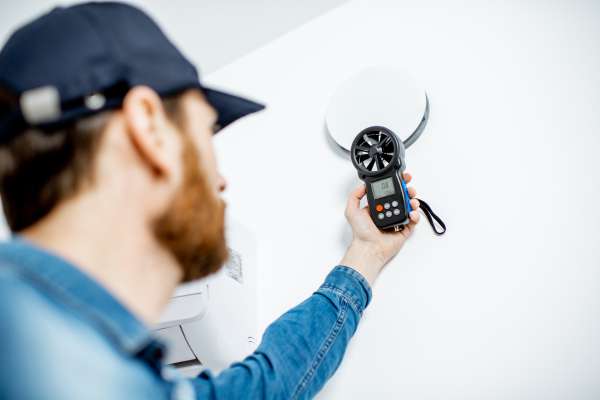
Identifying the type of wall you will be anchoring the bookshelves to is a crucial step in the process. Different wall types, such as drywall, plaster, concrete, or brick, require specific anchoring techniques and hardware. For drywall, you will typically need walls anchors or toggle bolts to ensure a secure hold. Plaster walls might require a slightly different approach, often needing specialized anchors to prevent cracking. Concrete or brick walls demand heavy-duty masonry anchors and a powerful drill to penetrate the hard surface. Understanding your wall type helps you select the appropriate hardware and tools, ensuring a stable and secure installation. This step is essential for the safety and effectiveness of anchor your bookshelf wall, as using the wrong type of anchor can lead to a failure in securing the bookshelves, posing a risk of tipping.
Locating Studs In The Wall
Locating the studs in your wall is a fundamental step in securely anchor a bookshelf. Studs are vertical wooden or metal beams behind the wall surface that provide strong support for heavy loads. To find studs, use a stud finder, an electronic device that detects the edges of these beams. Move the stud finder horizontally along the walls until it indicates a stud’s presence, usually with a light or beep. Mark the stud’s location with a pencil. Typically, studs are spaced 16 to 24 inches apart, so once you find one, locating others becomes easier. If a stud finder is unavailable, knocking on the walls and listening for a solid sound can also help identify stud locations. Anchoring your bookshelf directly into studs ensures maximum stability, preventing the bookshelf from tipping or falling, especially when loaded with heavy items.
Measuring And Marking Anchor Points
Before you start anchoring your bookshelves to the wall, precise measurements are crucial. Begin by deciding where you want the bookshelves to be positioned. Use a tape measure to find the exact height and width of the bookshelves, noting down these dimensions. Next, hold the bookshelf up to the walls and mark the top edge using a pencil. This will help you identify the highest point where the bookshelves will rest.
Measure and mark where the brackets will be placed on the bookshelf; typically, brackets are positioned about a third of the way down from the top and a third of the way up from the bottom. Ensure these marks align with the studs in the walls for maximum stability. Use a stud finder to locate the wall studs, marking their positions clearly. If studs are not available in the desired location, consider using wall anchors that can handle the weight of the filled bookshelf.
Preparing The Bookshelf
Once the anchor points are marked it’s time to prepare your bookshelf wall for the installation. Clear out all the contents to make the unit lighter and easier to handle. If the bookshelf is disassembled, put it together according to the manufacturer’s instructions, making sure all screws and joints are secure. Check the back panel to ensure it is sturdy; a flimsy back panel might need reinforcement. If the bookshelves have adjustable shelves, remove them temporarily to give you better access for attaching the brackets. Lay the bookshelf face down on a flat, clean surface. If there are any existing holes for walls brackets, check if they align with your marks and adjust as necessary. If there are no pre-drilled holes, you’ll need to drill pilot holes at the marked points for the brackets. Make sure the drill bit matches the size of the screws you will use.
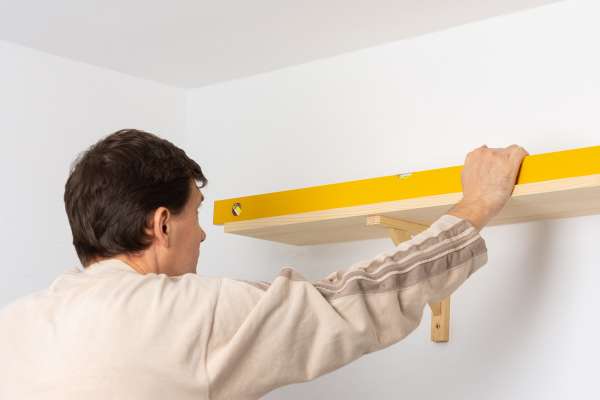
Preparing The Wall
With the bookshelf ready, shift your focus to preparing the wall. Ensure the area where the bookshelves will be anchored is free of any obstructions. If you have marked the stud locations, use a level to draw vertical lines from floor to ceiling, ensuring your brackets will align perfectly with the studs. If you’re using wall anchors instead, mark their positions accurately. Clean the wall surface to remove any dust or debris which might affect the adhesion of the brackets. If the walls has a plaster or drywall finish, use the appropriate drill bit to create holes for the wall anchors. Insert the anchors into the holes and tap them lightly with a hammer until they sit flush with the walls’ surface. Double-check all your measurements and marks to ensure everything is aligned and level before proceeding to attach the brackets.
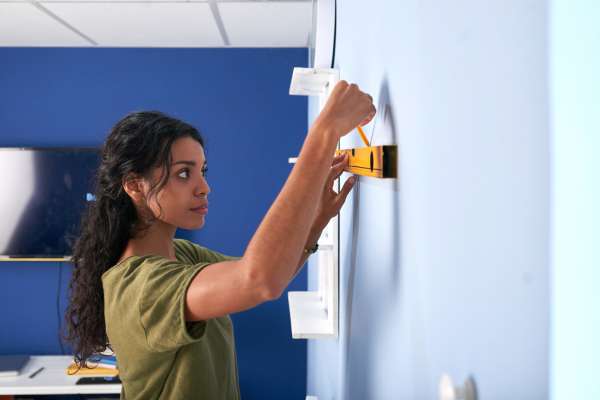
Attaching Brackets To The Bookshelf
The final step involves attaching the brackets to the bookshelves and walls. Begin by securing the brackets to the bookshelf at the pre-drilled holes. Use screws that are long enough to penetrate the bookshelf material but not so long that they protrude through the other side. Tighten the screws with a screwdriver or drill, ensuring the brackets are firmly attached and do not wobble. Once the brackets are in place on the bookshelves, lift the unit and position it against the wall, aligning the brackets with the wall marks or wall anchors. With the bookshelf held steady, secure the brackets to the wall studs or anchors using the appropriate screws. Double-check that all screws are tight and that the bookshelves are level. After securing the bookshelf, replace the shelves and restock your books. Finally, give the bookshelf a gentle shake to ensure it is firmly anchored and stable.
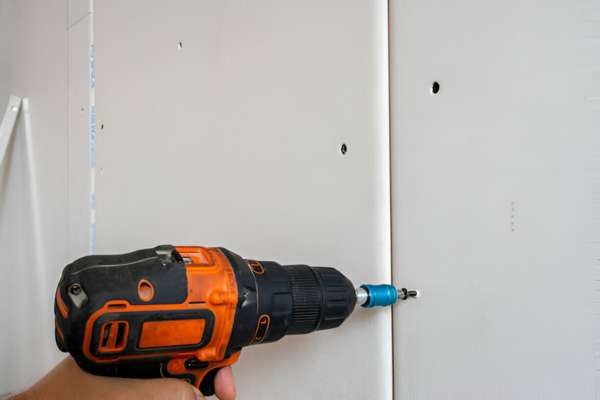
Drilling Pilot Holes

Drilling pilot holes is a critical step in securely anchoring a bookshelf to a wall. First, locate the studs in your wall using a stud finder. Studs are essential for providing the necessary support to hold the weight of the bookshelf and its contents. Once you’ve identified the studs, mark their locations on the walls with a pencil. Align the bookshelves with these marks, ensuring it’s level. Use a pencil to mark where the screws will go through the bookshelves into the wall studs.
Take a drill bit that’s slightly smaller than the screws you’re using and drill pilot holes at these marks. Pilot holes prevent the wood from splitting and make it easier to drive the screws in. This step ensures a more secure and professional installation, preventing the bookshelf from wobbling or falling over time. With the pilot holes drilled, you’re ready to attach the brackets and secure your bookshelf in place.
Reassembling The Bookshelf
After drilling the pilot holes, it’s time to reassemble the bookshelves. Start by placing the bookshelf back against the walls, and aligning it with the pilot holes you’ve drilled. Have someone assist you in holding the bookshelves steady while you work. Insert the screws through the brackets or the back of the bookshelves into the pilot holes. Use a screwdriver or a power drill to drive the screws into the wall studs. Ensure the screws are tightly secured, but be cautious not to overtighten them, which could strip the screws or damage the wall. Once the bookshelves are firmly attached to the walls, check for stability. If it wobbles, you might need to adjust the screws or add more brackets for additional support. Reassembling the bookshelf properly ensures that it is safely anchored and ready to hold your books and decor without any risk of tipping over.
Finishing Touches
With the bookshelf securely anchored to the wall, it’s time to add the finishing touches. Begin by checking the alignment and making sure the bookshelves are level. If needed, adjust the screws slightly to achieve perfect balance. Once everything looks good, cover the screw heads with decorative caps or wood fillers that match the color of your bookshelves. This not only enhances the aesthetic appeal but also prevents any sharp edges from being exposed.
Arrange your books and decorative items on the shelves. Distribute the weight evenly to maintain balance and prevent any strain on the anchors. You can also add felt pads to the bottom of the style and a bookshelf to protect your floor from scratches. Finally, step back and admire your work. A well-anchored bookshelf not only adds functionality to your space but also enhances the overall decor. Enjoy the peace of mind of knowing your bookshelves are safely secured.
Conclusion
Anchoring a bookshelf to the wall is a straightforward yet crucial task to ensure safety and stability in your home. By drilling pilot holes, reassembling the bookshelves properly, and adding finishing touches, you can prevent accidents and keep your belongings secure. Taking the time to find wall studs and use the right tools makes a significant difference in the outcome. Whether you have children, or pets, or simply want to safeguard your possessions, a securely anchored bookshelves is essential. Remember, each step, from drilling pilot holes to the final adjustments, plays a vital role in achieving a stable and aesthetically pleasing result. So, gather your tools, follow the steps carefully, and enjoy a clutter-free and safe living space with your well-anchored bookshelves.